DIY Mickey Halloween Wreath Copy Cat
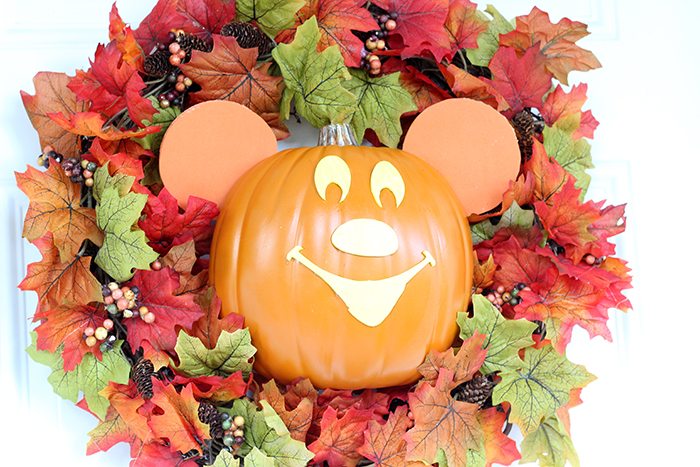
Ever since we moved to Florida, I've had the Disney itch. Last October, I went to Mickey's Not So Scary Halloween Party at Magic Kingdom at Disney World for the first time and feel in love. If you've never been, let me tell you, it's simply amazing. Halloween is absolutely one of my favorite holidays and a visit will put you in the spirit in minutes. The decorations are absolutely adorable and my favorite is absolutely the Mickey Halloween Wreath. So, let's make a copy cat.
I have to give a huge thanks to my mom, she's helping bring a lot of my creative Halloween ideas to life this season. Thanks Mom! I couldn't be more happy with how this came out, I hope you like too!
DIY Mickey Mouse Halloween Wreath
Making the wreath isn't as complicated as it seems and there are many ways you could do it. If you want the ultimate shortcut, you can buy a fall leave wreath already made. We spotted some at Hobby Lobby, but they were pretty pricey. Instead, we opted to make one. The wreath base came to only $3 after coupon. Then to save more, we went to Family Dollar to pick up fall garland at only $3 a string. Not too shabby!
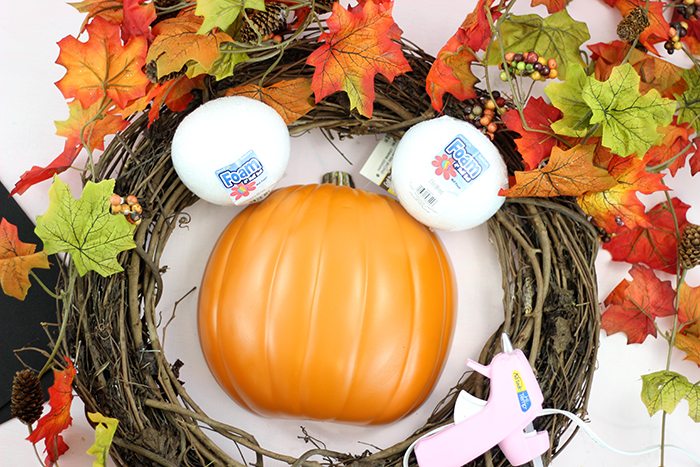
Here's what was used to make this Mickey Mouse Halloween Wreath:
*Floral Wreath (Purchased at Hobby Lobby)
*(2) Foam 4" Half Balls (3.9") (Purchased at Walmart)
*Craft Pumpkin - ½ (Purchased at Michaels)
*Faux Fall Garland (Purchased at Family Dollar) I used (3) 72" Garland for this wreath
*Yellow Foam Sheet (Like these)
*Orange Foam Sheet (Like these)
*Glue Gun
*Super Glue
*Crafting Wire (I used steel)
*Optional: Orange Paint for behind the ears.
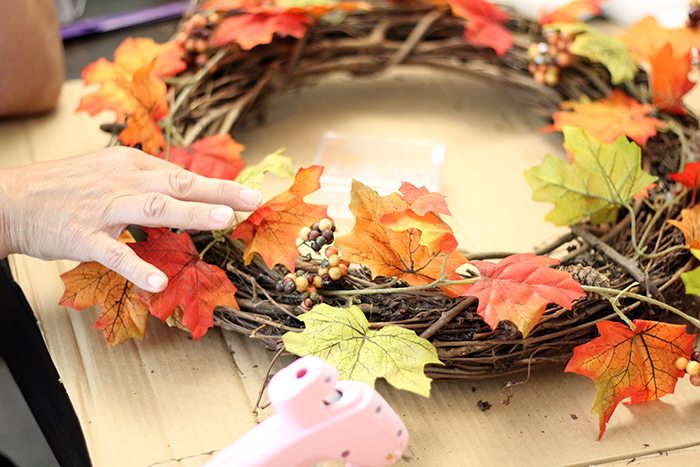
Step One: Make the wreath. Use a hot glue gun to strategically place the garland until the wreath is full. Reserve a few pieces to fill it in later after securing the pumpkin in place.
Step Two: Prepare Mickey's ears. If you are going to paint the back of the foam balls, do it now so they can dry and then move on to the following step. If you are skipping this step, trace the flat circular side onto orange foam and trim. Use super glue or school glue to secure the orange foam circles onto the foam. Put them aside to dry. Note: Don't use hot glue on the foam, it will melt them.
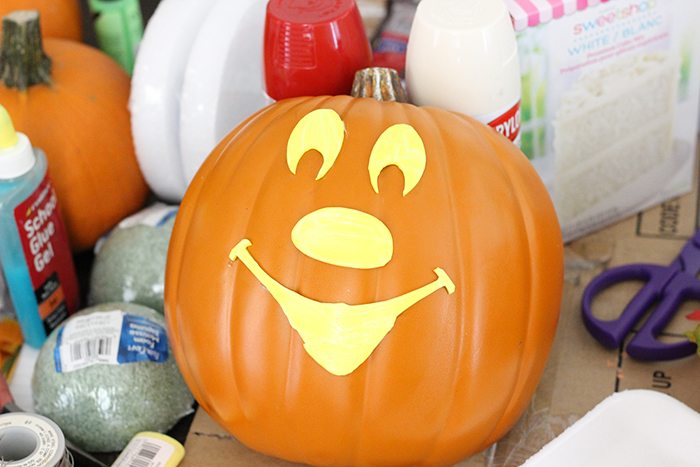
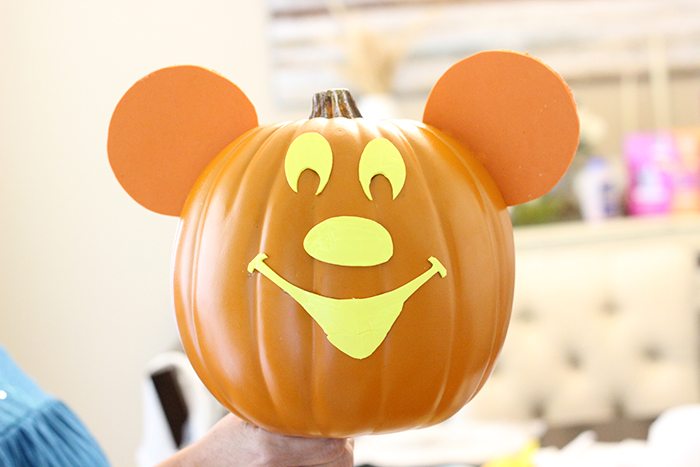
Step Three: Cut Yellow Foam into Mickey's face. You can print a picture to use as a template or just look online as you create the shape. It's actually fairly easy. I recommend sketching on paper first and then using that to help cut the foam into shapes. Use super glue to set the pieces into place on the pumpkin. Let it dry. Note: Don't use hot glue on the craft pumpkin, it could disfigure/melt it.
Step Four: Glue the ears on using super glue or another fast drying glue. Position the ears and glue directly onto the flat portion of the back of the pumpkin and let dry completely. Again, don't use hot glue for this step because it will melt the foam and possibly the pumpkin too.
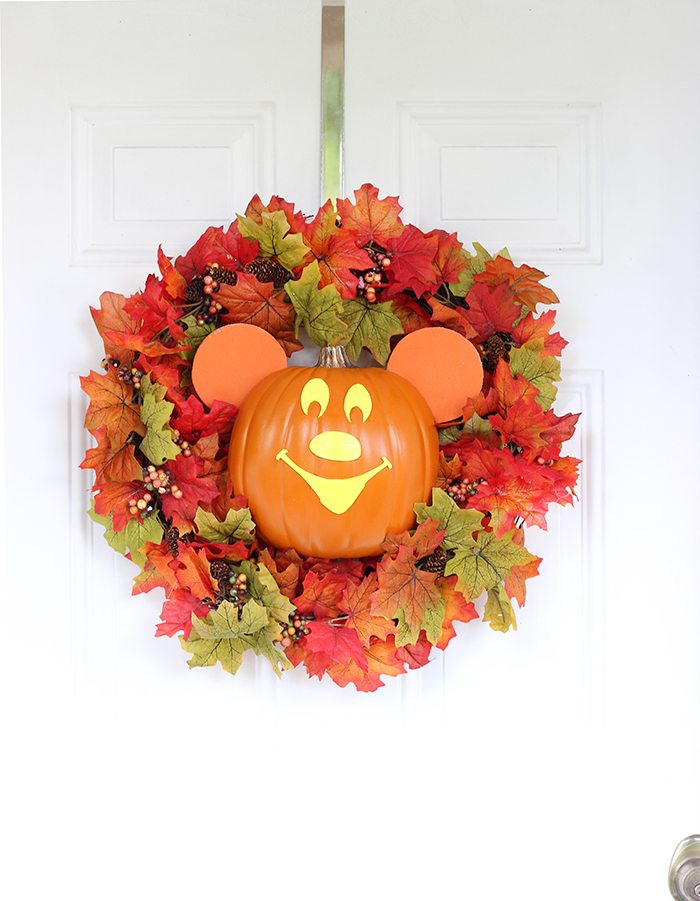
Step Five: Secure the pumpkin to the wreath. We did this by using wire. Since the crafting pumpkin is somewhat soft, we were able to press it right through the stem and then use it to wrap and secure it to the wreath base. You can adjust it to make sure your pumpkin is centered and that the ears are able to sit flat.
And that's it! Hang err up! I am absolutely thrilled with the way this came out!
Mickey's Not So Scary Party Info
We just went to Mickey's Not So Scary Party for the season last Sunday. I am totally going to go again! Here are some quick tidbits about the party that I learned last year.
-The party ticket is completely seperate from regular admission.
-If you purchase a regular admission ticket on select party days, you will not be able to stay for the party.
-It's worth going to these special party events because you can go on all the rides and do everything you can do with regular admission with all the perks.
-It costs a good deal less than regular admission.
-The party starts at 7 pm (on select nights) this year, but you can go to the park as early as 4pm. Score.
-If you go mid week, there will be less people. We went on Tuesday last year and it was awesome. This year we went on a Sunday is was more crowded.
-Buy tickets ASAP because it WILL sell out!
Have fun!
Have you been to Mickey's Not So Scary Party yet?



This is so cute! What was the sizes of the wreath and the faux pumpkin? Thanks!
Thanks for the mention! ❤️