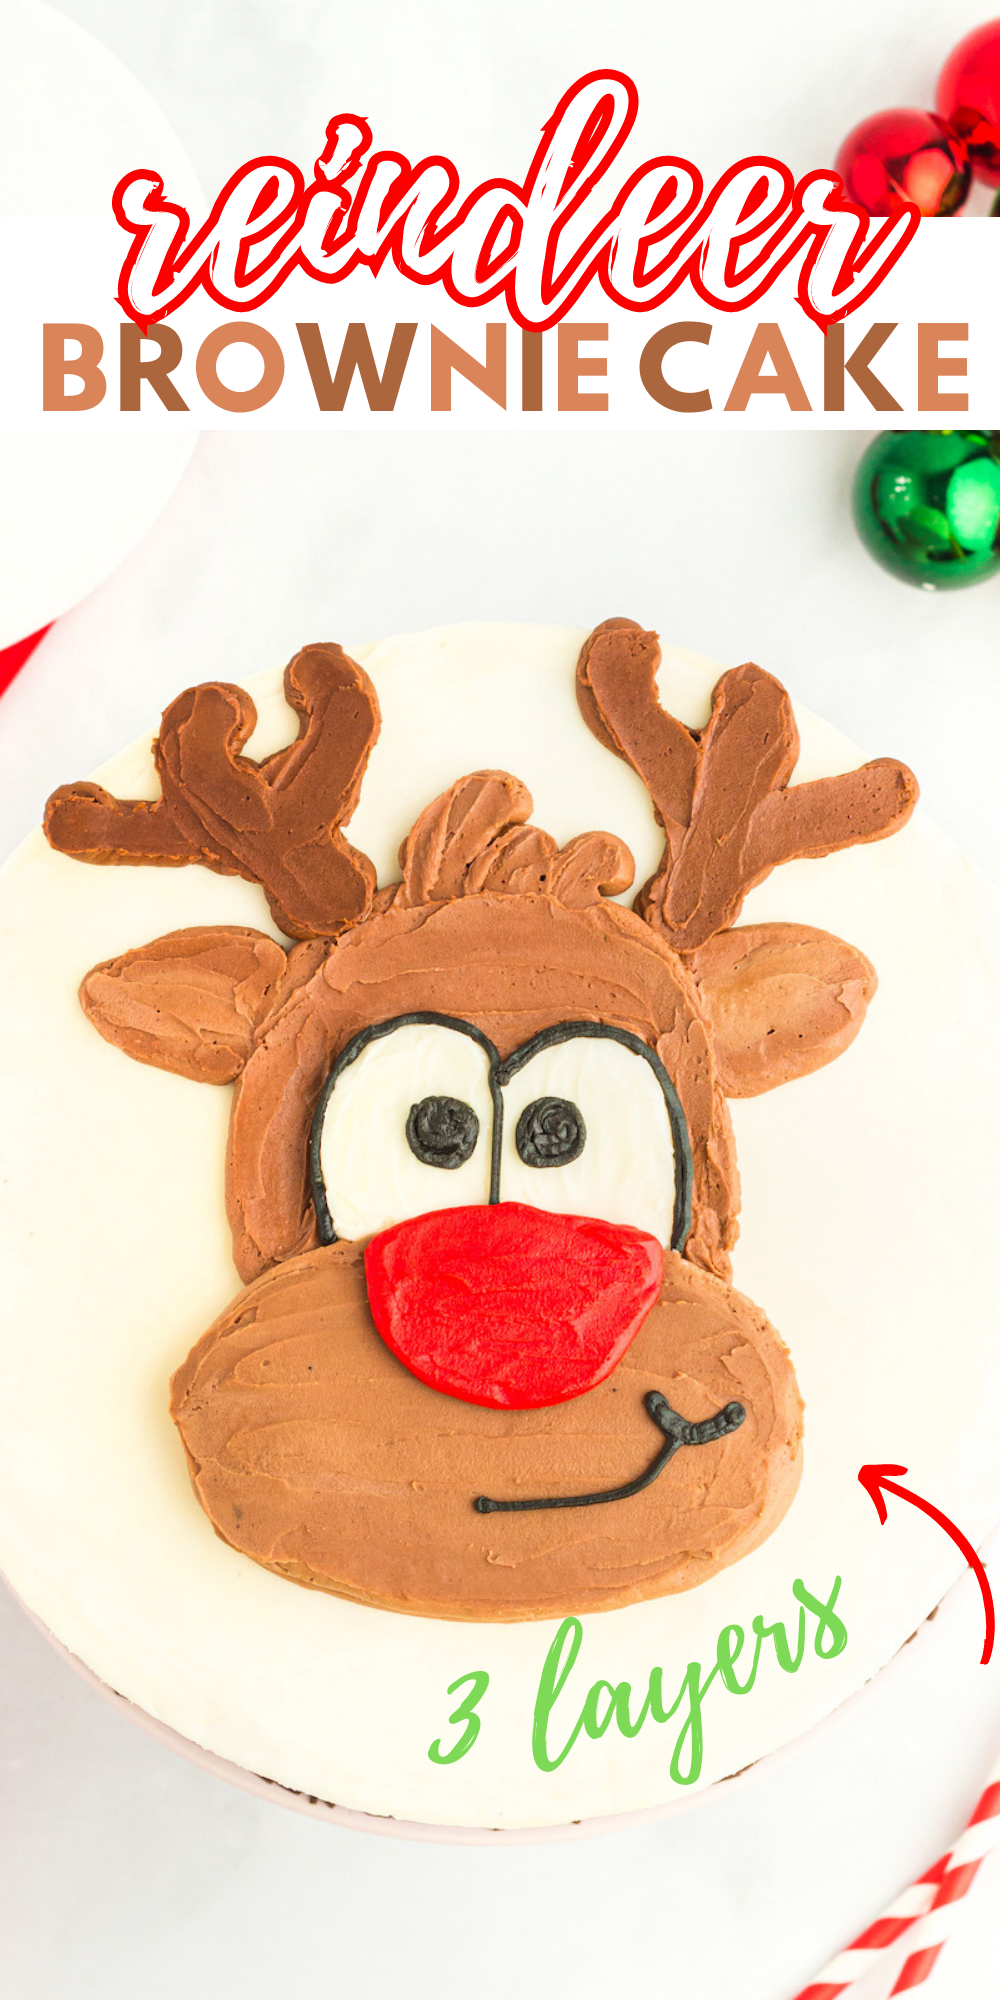
The Brownie Reindeer Cake Recipe You Need
Christmas is coming, and that means it's time for baking! This year, try something a little different and make a reindeer cake. It's sure to impress your friends and family. The best part is that it's easy to make - even the most inexperienced baker can create this festive masterpiece. So get started and have some fun in the kitchen this holiday season!
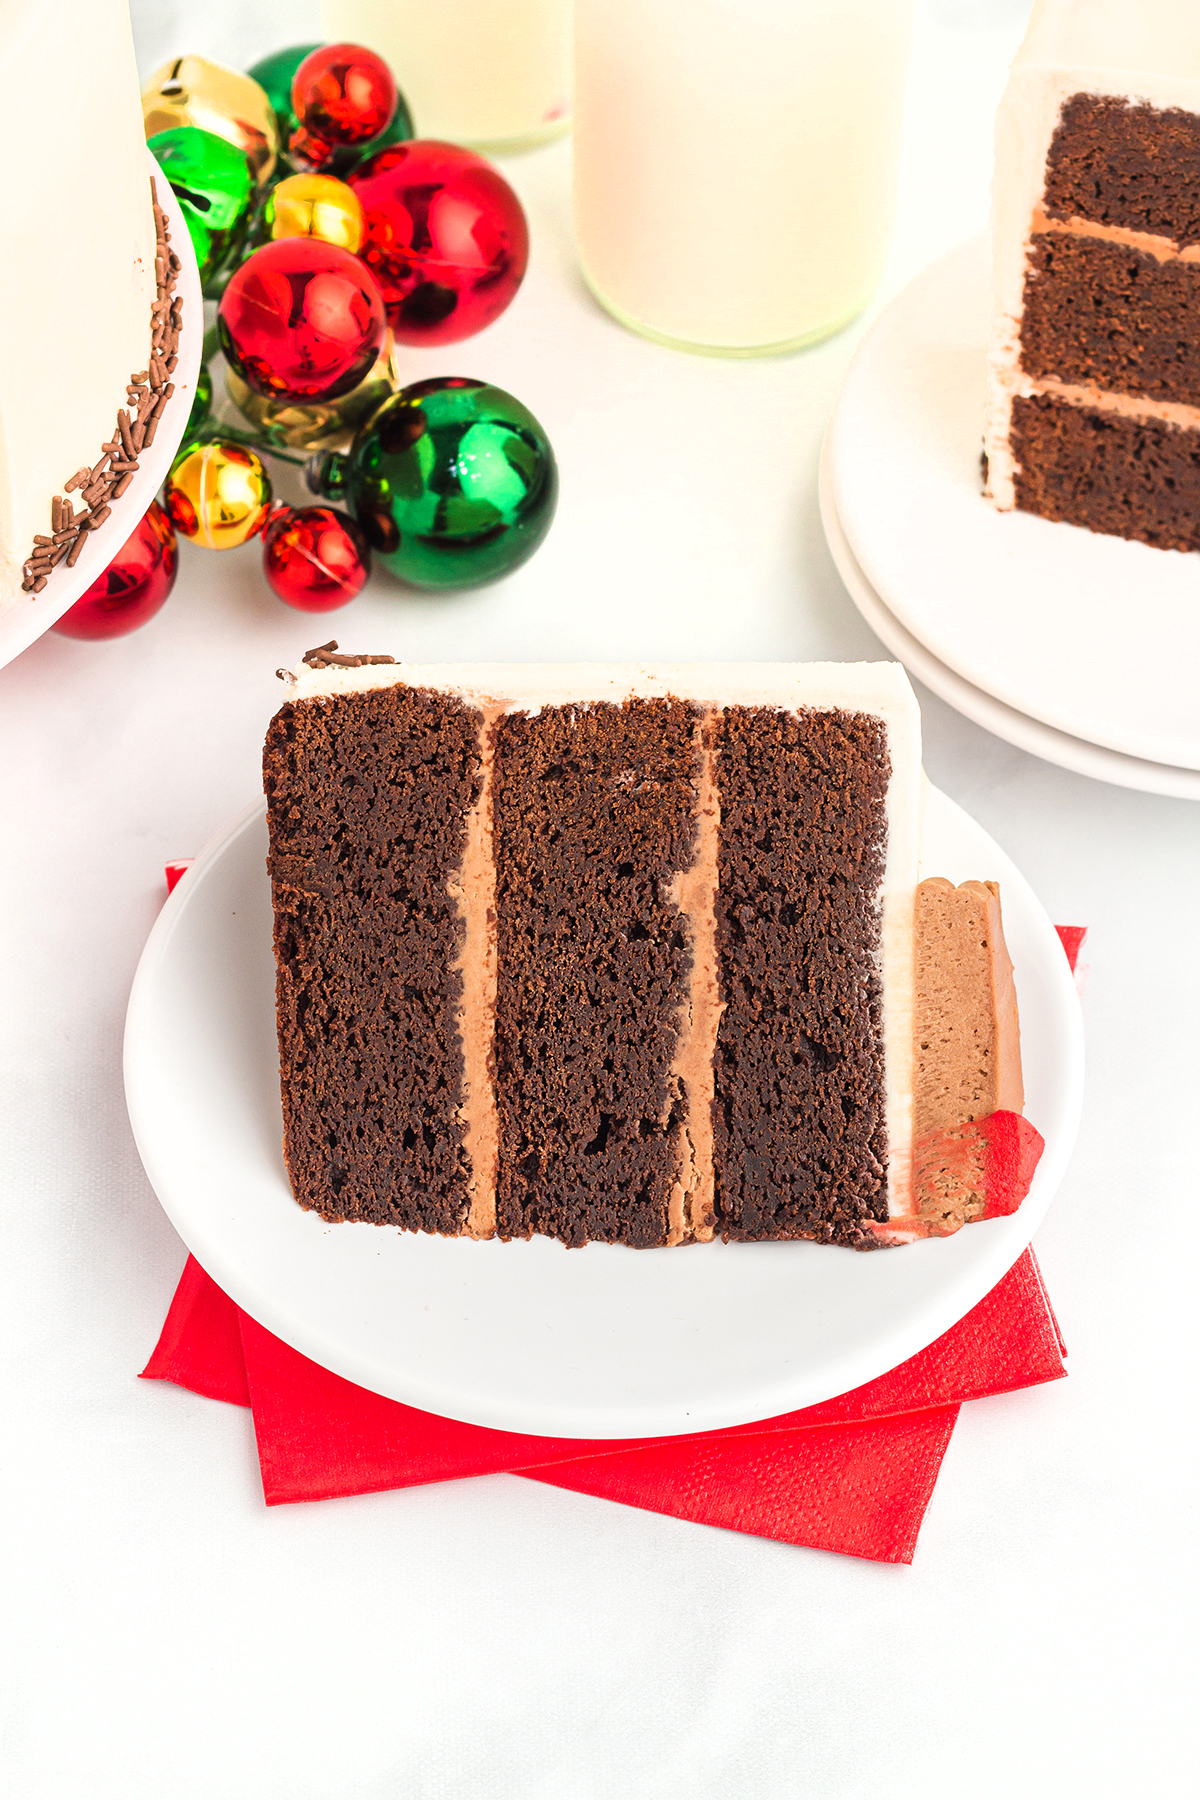
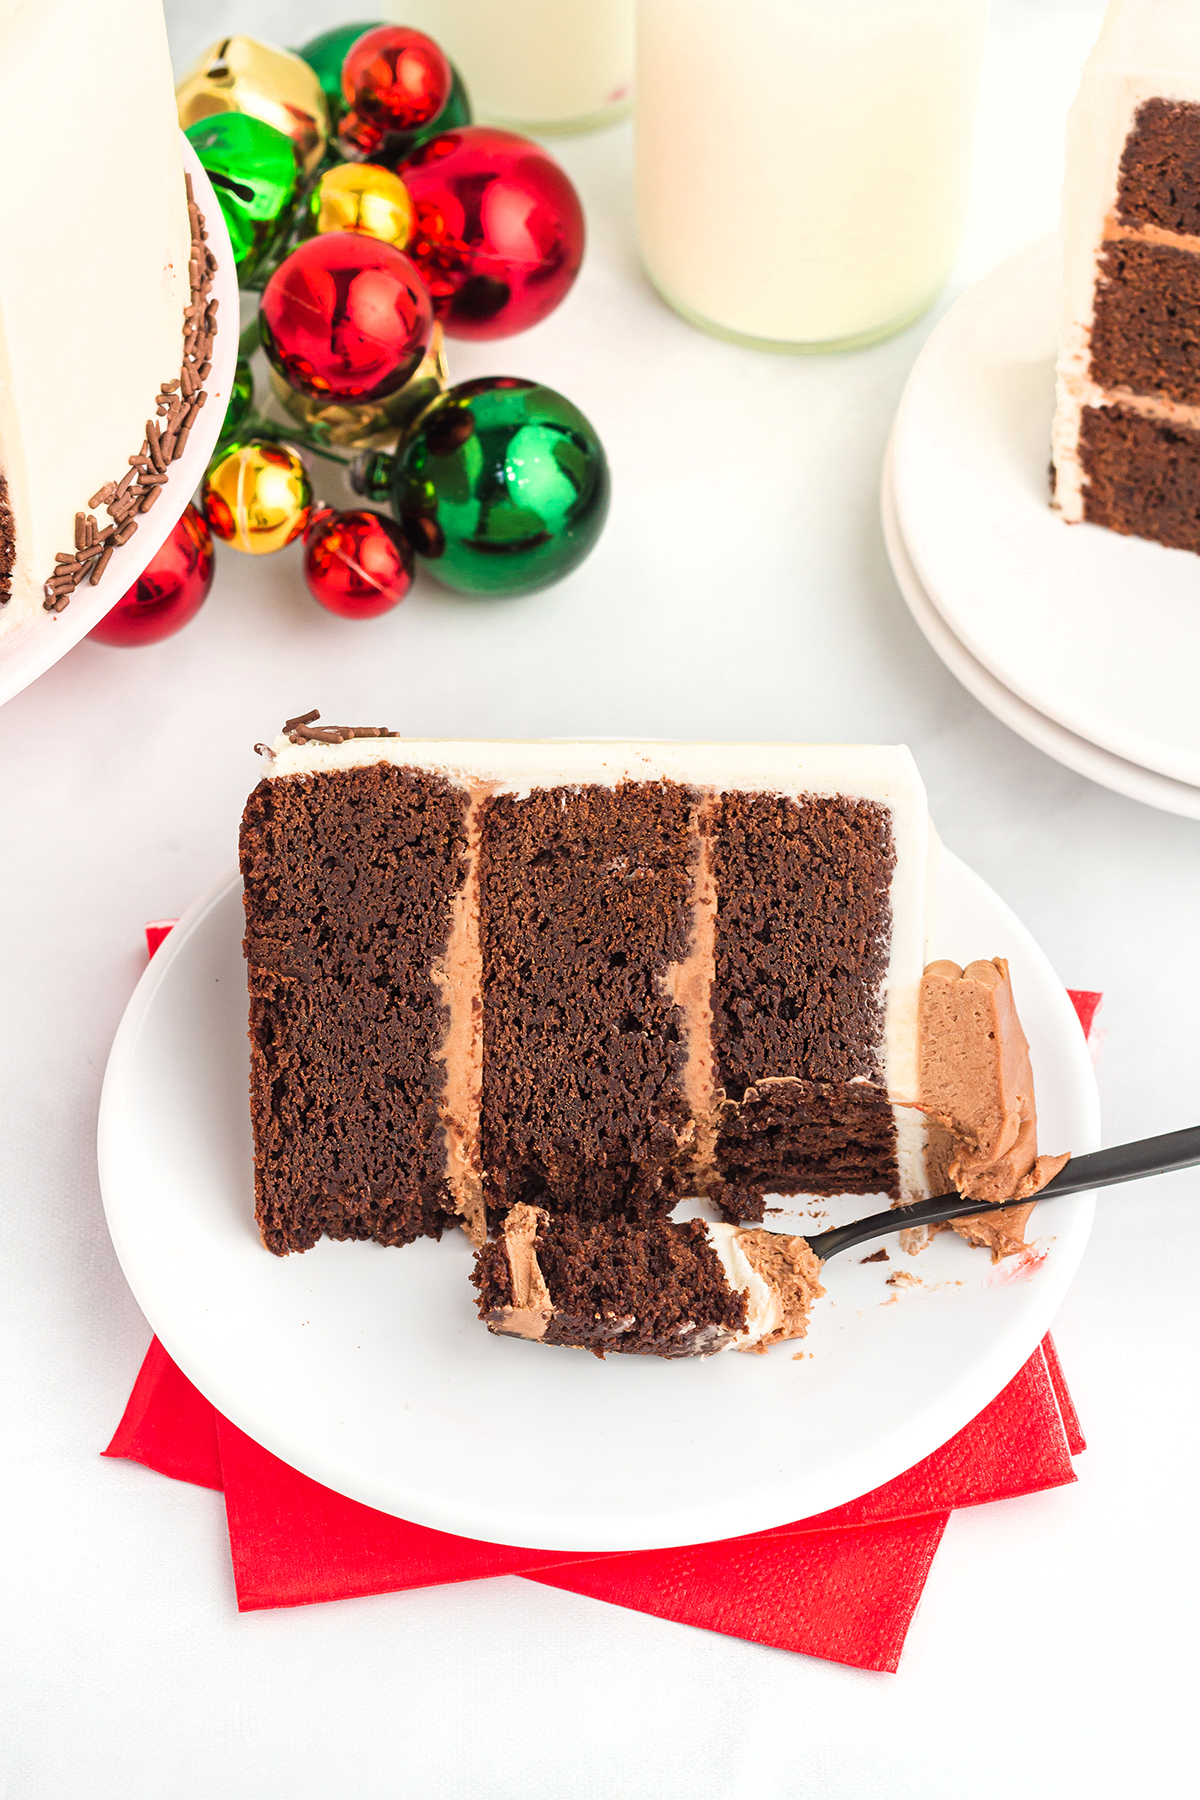
This Reindeer Cake is an easy dessert that’s full of festive cheer. It’s a simple brownie cake that is rich, chocolatey, and oh-so-fun! This Christmas Cake would look amazing on your holiday dessert table. If you are looking for a dessert to wow your guests, then this is the recipe for you!
BROWNIE REINDEER CAKE
Reindeers are a beloved part of Christmas. So, why not make a cake that looks like one? Don't be intimated this recipe is actually very easy to make. It does take a little bit of time, but you don't need any special skills to make this cake and the kids can get into the kitchen to help you!
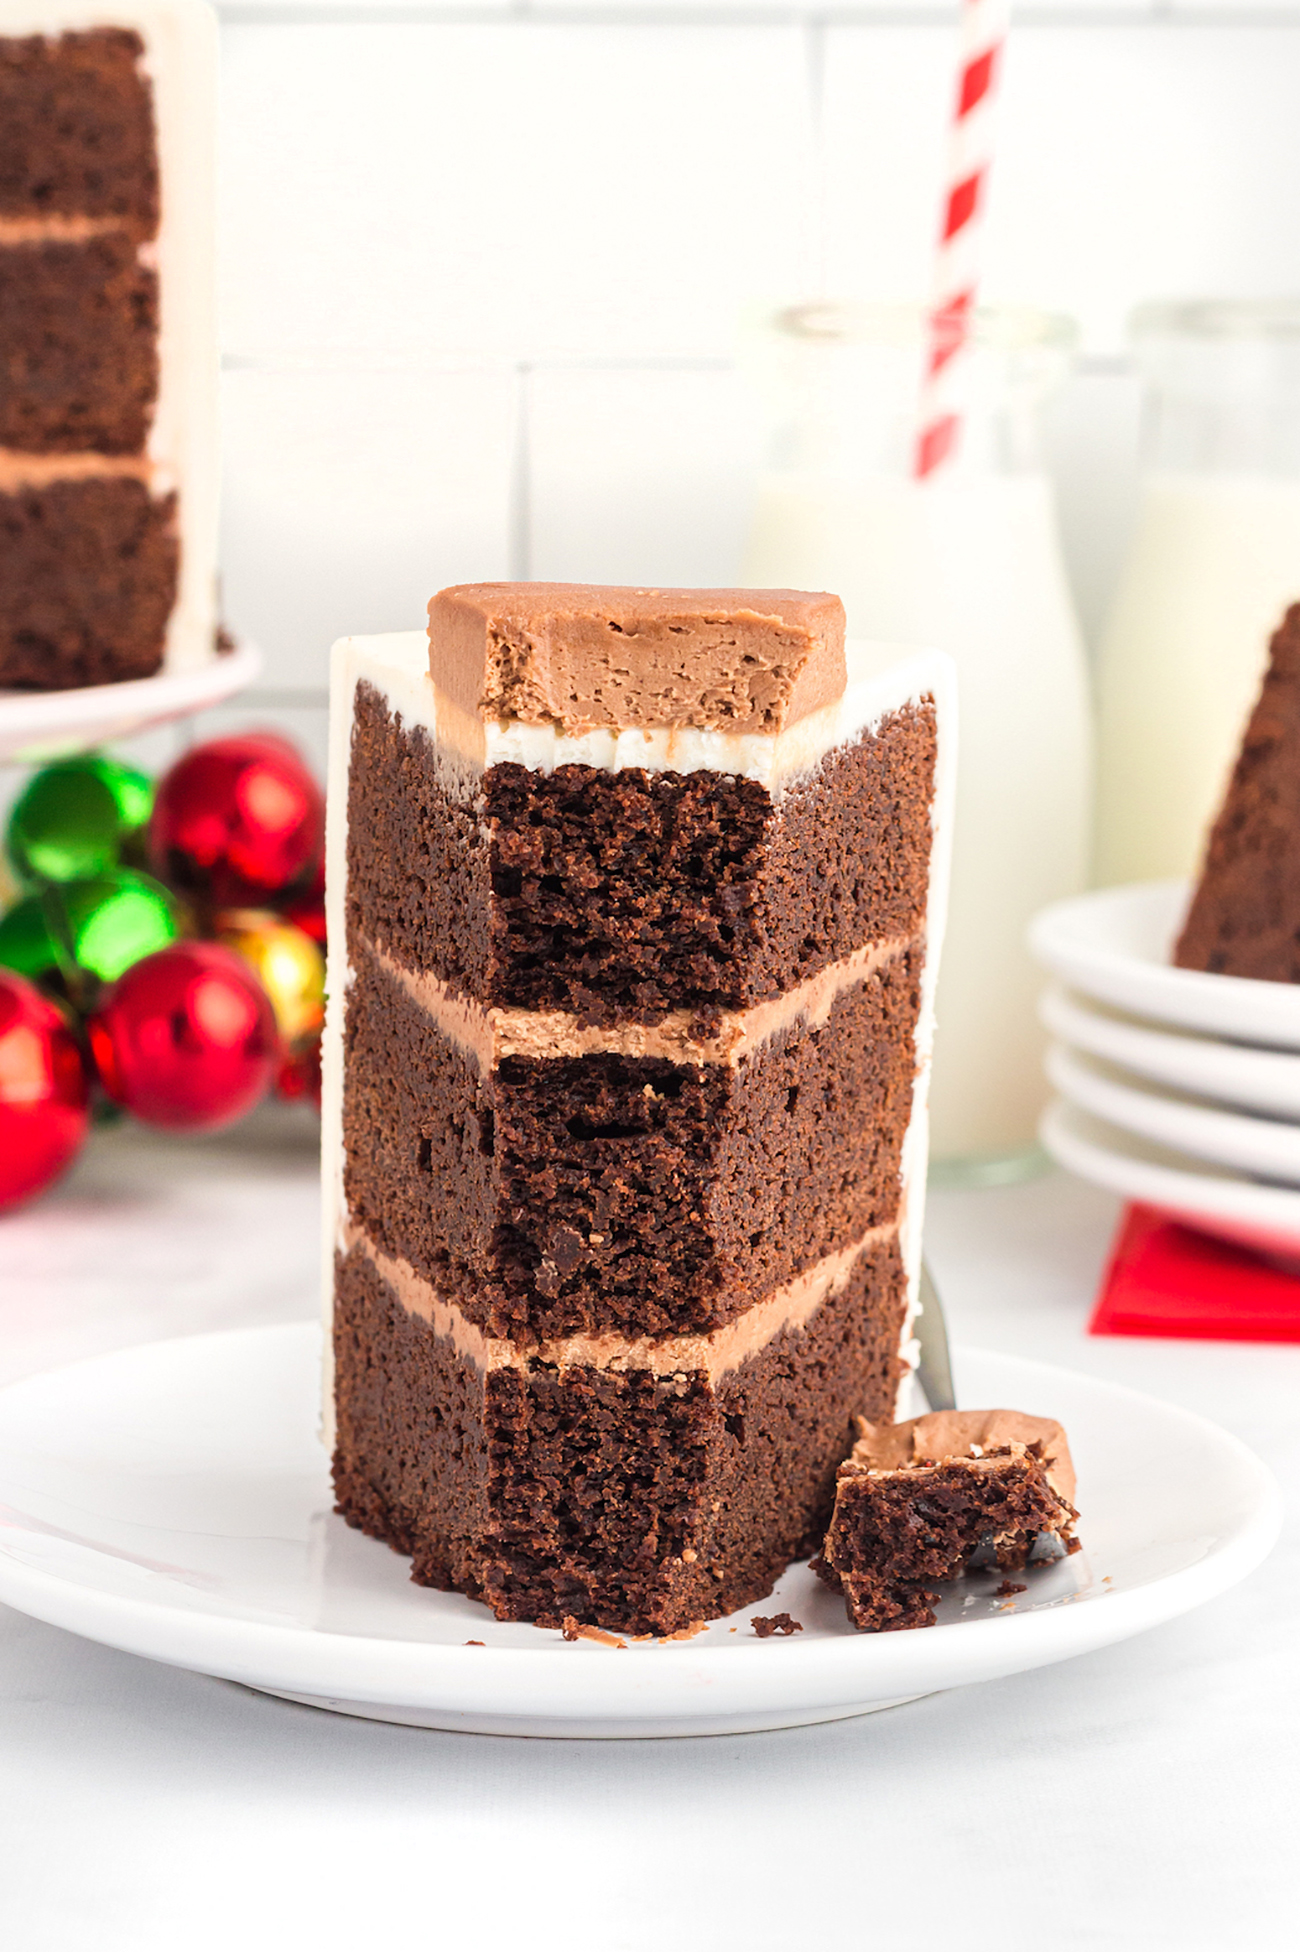
Buying a cake from a local bakery is always an option, but this homemade version is much more special and tastes even better. Plus, it's cheaper! This reindeer cake is made from a rich chocolate fudge brownie cake, topped with a creamy chocolate homemade frosting that is downright crave-worthy!
REINDEER CAKE RECIPE INGREDIENT LIST
While this list of ingredients may seem a little long, all of these ingredients are common in your regular pantries, but if you happen to need to make a quick trip to the store, all of them can also be easily found at your local grocery store.
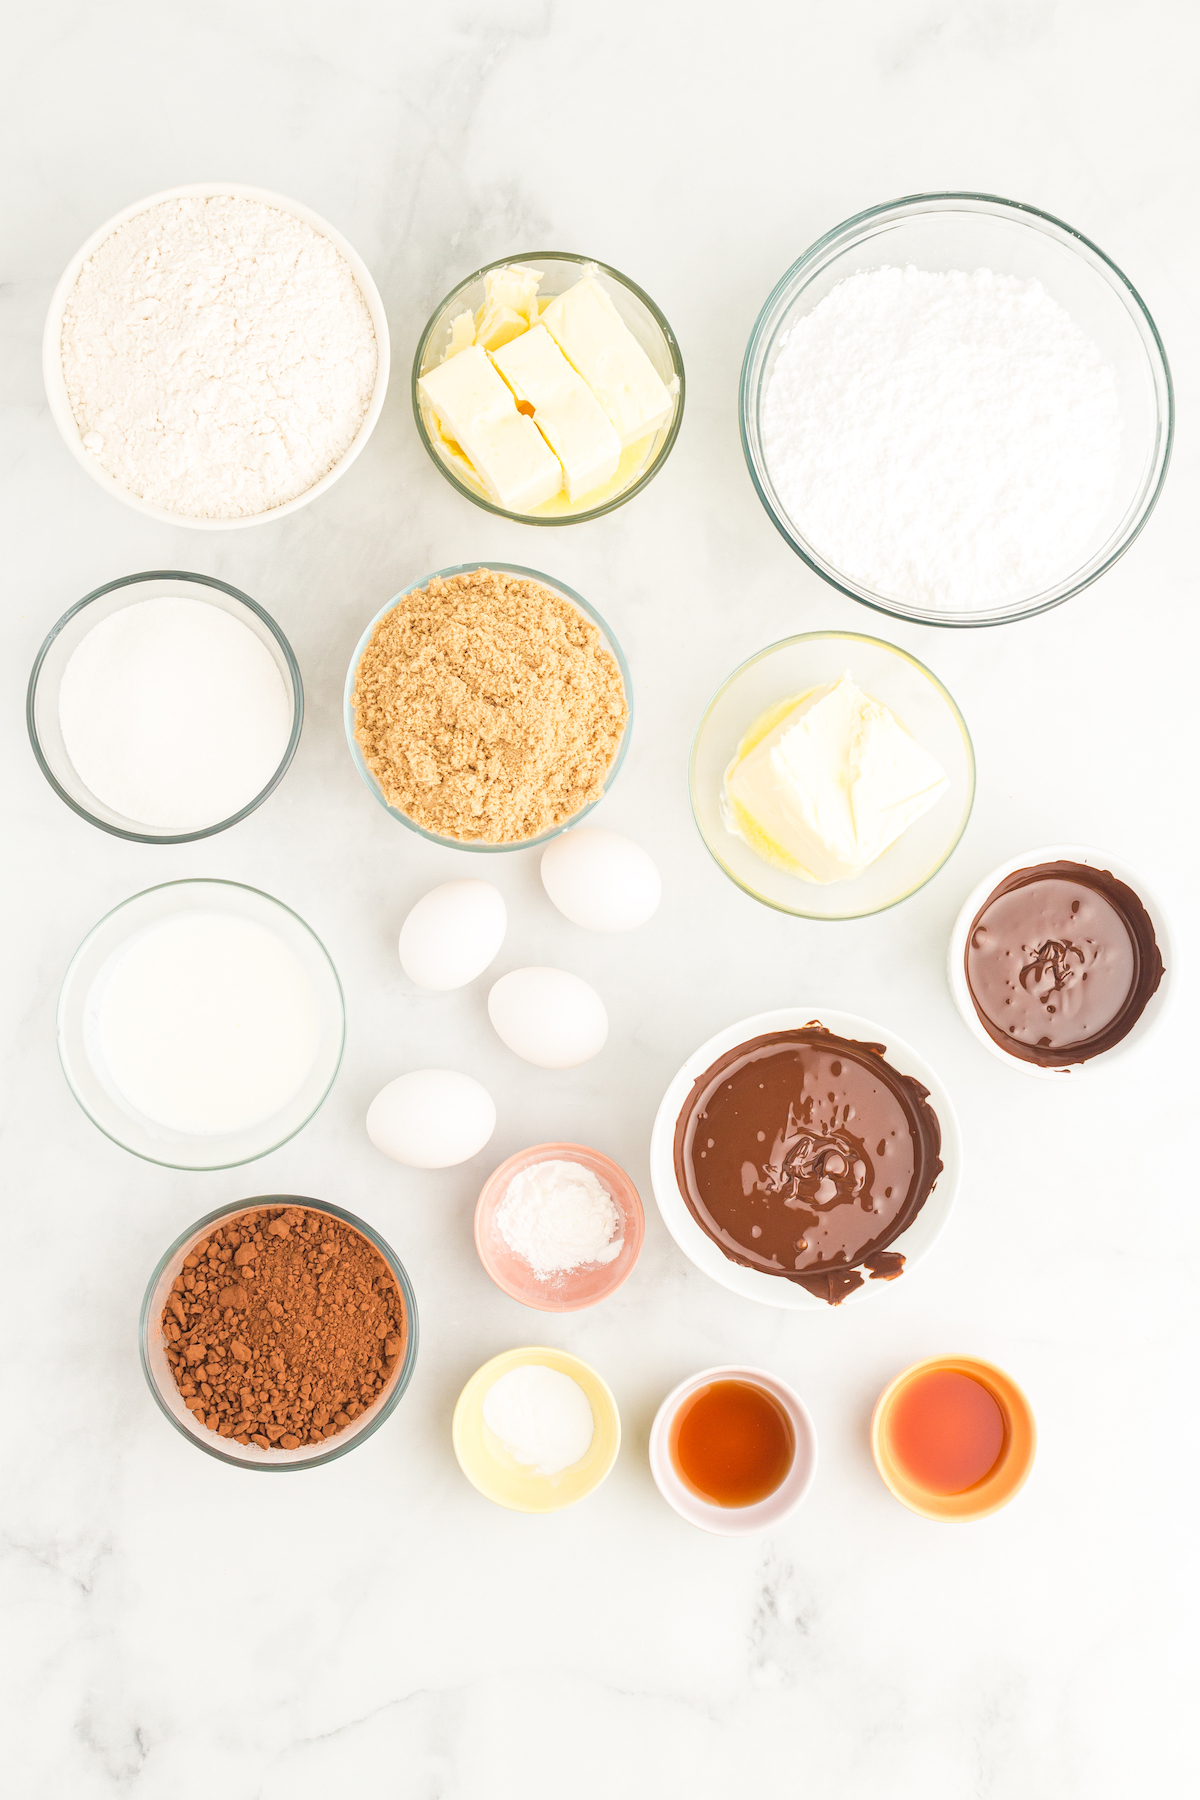
Here are the ingredients needed to make this recipe. Scroll down to the recipe card to see the exact measurements. You can also print them there.
CHOCOLATE CAKE:
- all-purpose flour
- unsweetened cocoa powder
- baking powder
- baking soda
- unsalted butter
- light brown sugar, packed
- granulated sugar
- large eggs, room temperature
- vanilla extract
- buttermilk, room temperature
- semi-sweet Baker’s chocolate
CHOCOLATE FROSTING:
- confectioners’ sugar
- unsalted butter
- semi sweet Baker’s chocolate
- vanilla extract
VANILLA FROSTING:
- confectioners’ sugar
- unsalted butter
- vanilla extract
HOW TO MAKE REINDEER CAKE
Making this brownie cake is so simple. Just follow the instructions below and you will have a rich, festive, and fudgy, cake that will be the star of the show in just a little bit of time!
Preheat oven to 350 degrees F. Then, spray three 8” round cake pans with non-stick cooking spray and line the inside bottom of each pan with parchment paper. The parchment paper will help the cakes slide easily out of the pan once baked and cooled. Set pans aside for now.
Now, in a medium bowl, stir together flour, cocoa powder, baking powder, and baking soda. Set aside.
Then, in a separate large bowl, beat butter, brown sugar, and granulated sugar on high until mixed well (about two minutes). Then beat the eggs and vanilla extract into the butter mixture until well combined.
Next, beat half of the flour mixture into the wet ingredients. Beat this on low speed just until combined. Don't over mix. And, beat in all of the buttermilk just until it's combined. Again, be sure not to over mix.
And, then on low speed, beat in the remaining flour mixture just until combined. Stir in the melted chocolate until well-mixed. Do not use the electric beaters for this step.
BAKE THE CAKE
Pour the cake batter evenly between the three prepared cake pans. Try to get the same amount in each pan so that they bake at the same speed.
Bake in the oven for 30 minutes or until a toothpick inserted in the middle of each comes out clean.
Remove cakes from oven and let cakes cool in pans for 15 minutes. After 15 minutes, remove cakes from pans and let cool completely on a wire rack.
Now, once the cakes have completely cooled to room temperature, wrap each cake individually in food-safe plastic wrap and place the cakes in the fridge for at least 1 hour. Chilling the cakes in the fridge before frosting will help them hold their shape and not crumble during decorating.
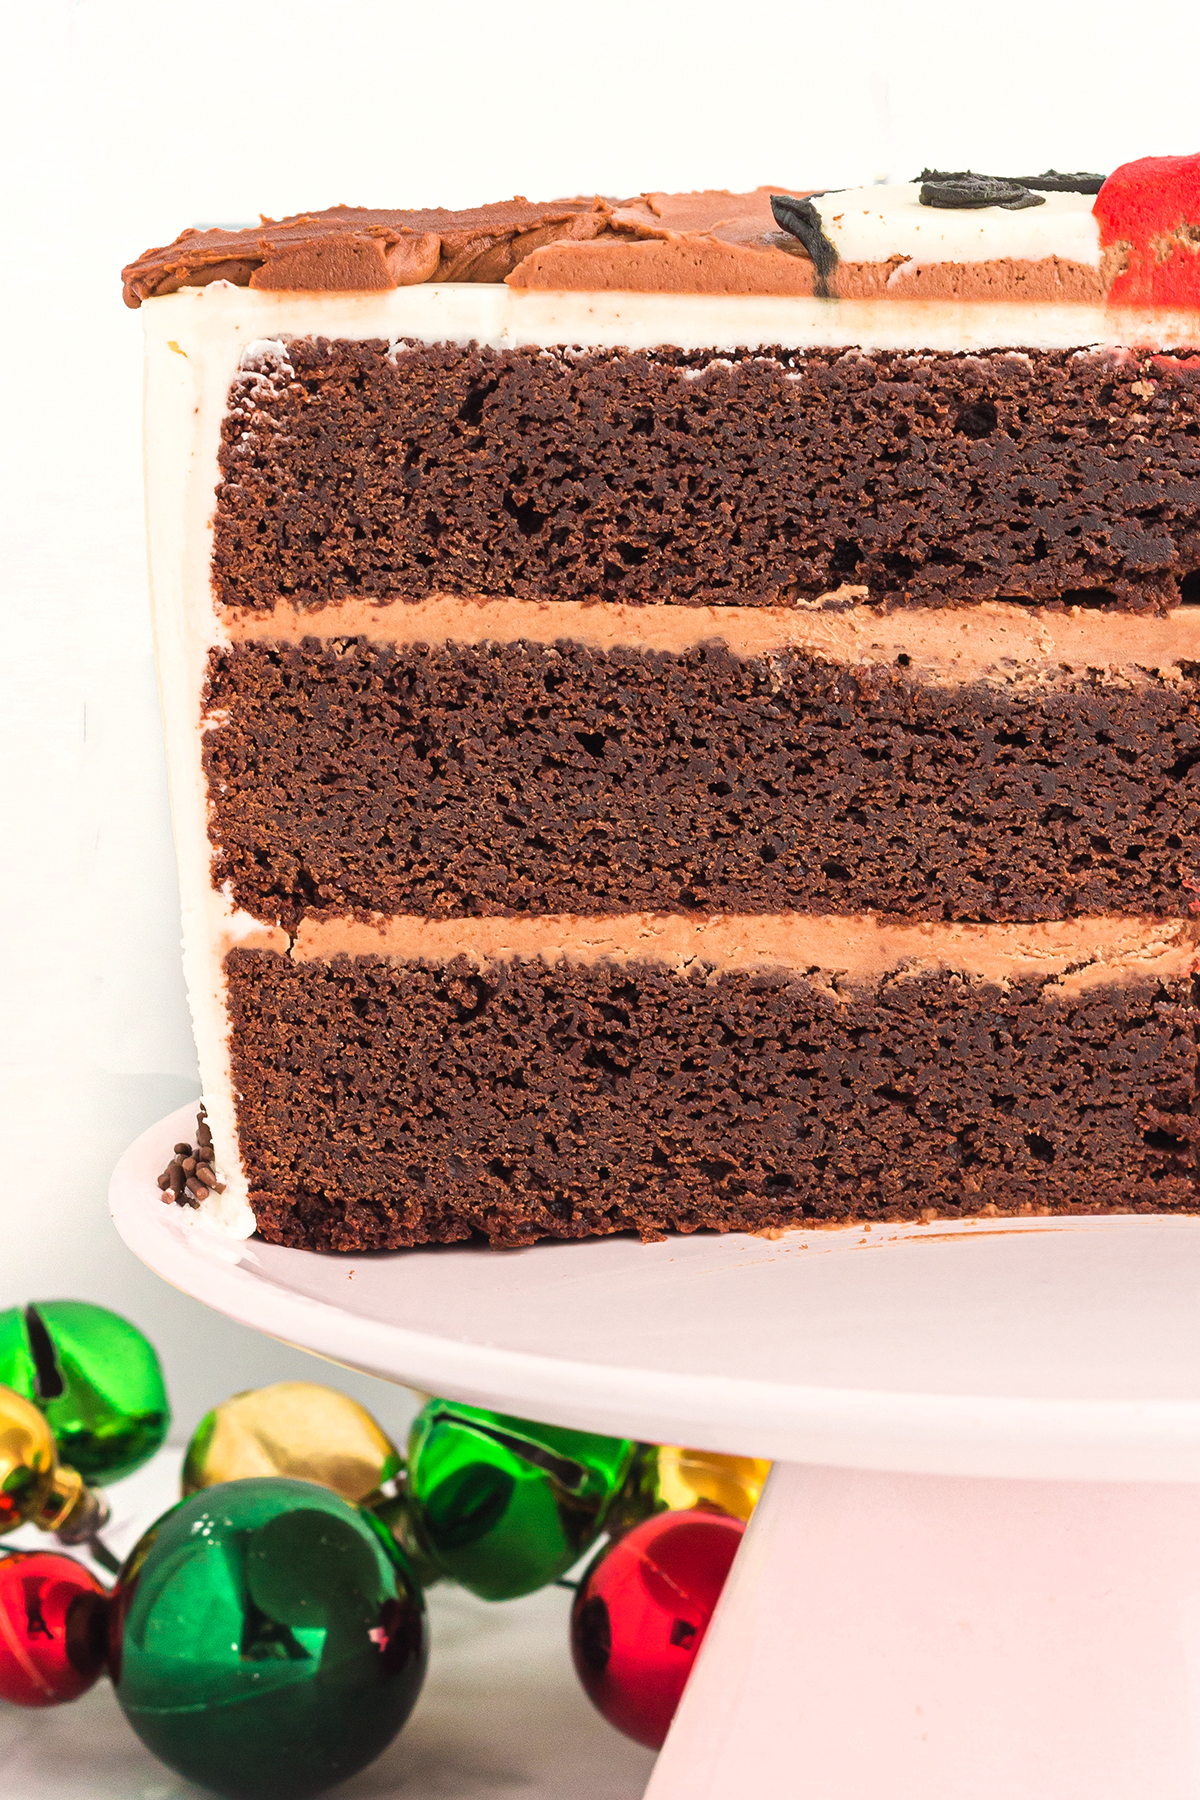
Then, Removed chilled cakes from the fridge and use a large serrated knife to cut any dome tops off cakes so they have flat tops. These cakes bake up pretty flat (like brownies) so there won’t be a lot to cut off the tops.
Now, it's time to make the chocolate frosting! In a large bowl, beat the confectioners’ sugar, butter, melted chocolate, and vanilla extract on high speed until light and fluffy (about 5 minutes).
FROST THE CAKE
Next, we whip up a batch of vanilla frosting. In a large bowl, beat the confectioners’ sugar, butter, and vanilla extract on high speed until light and fluffy (about 5 minutes).
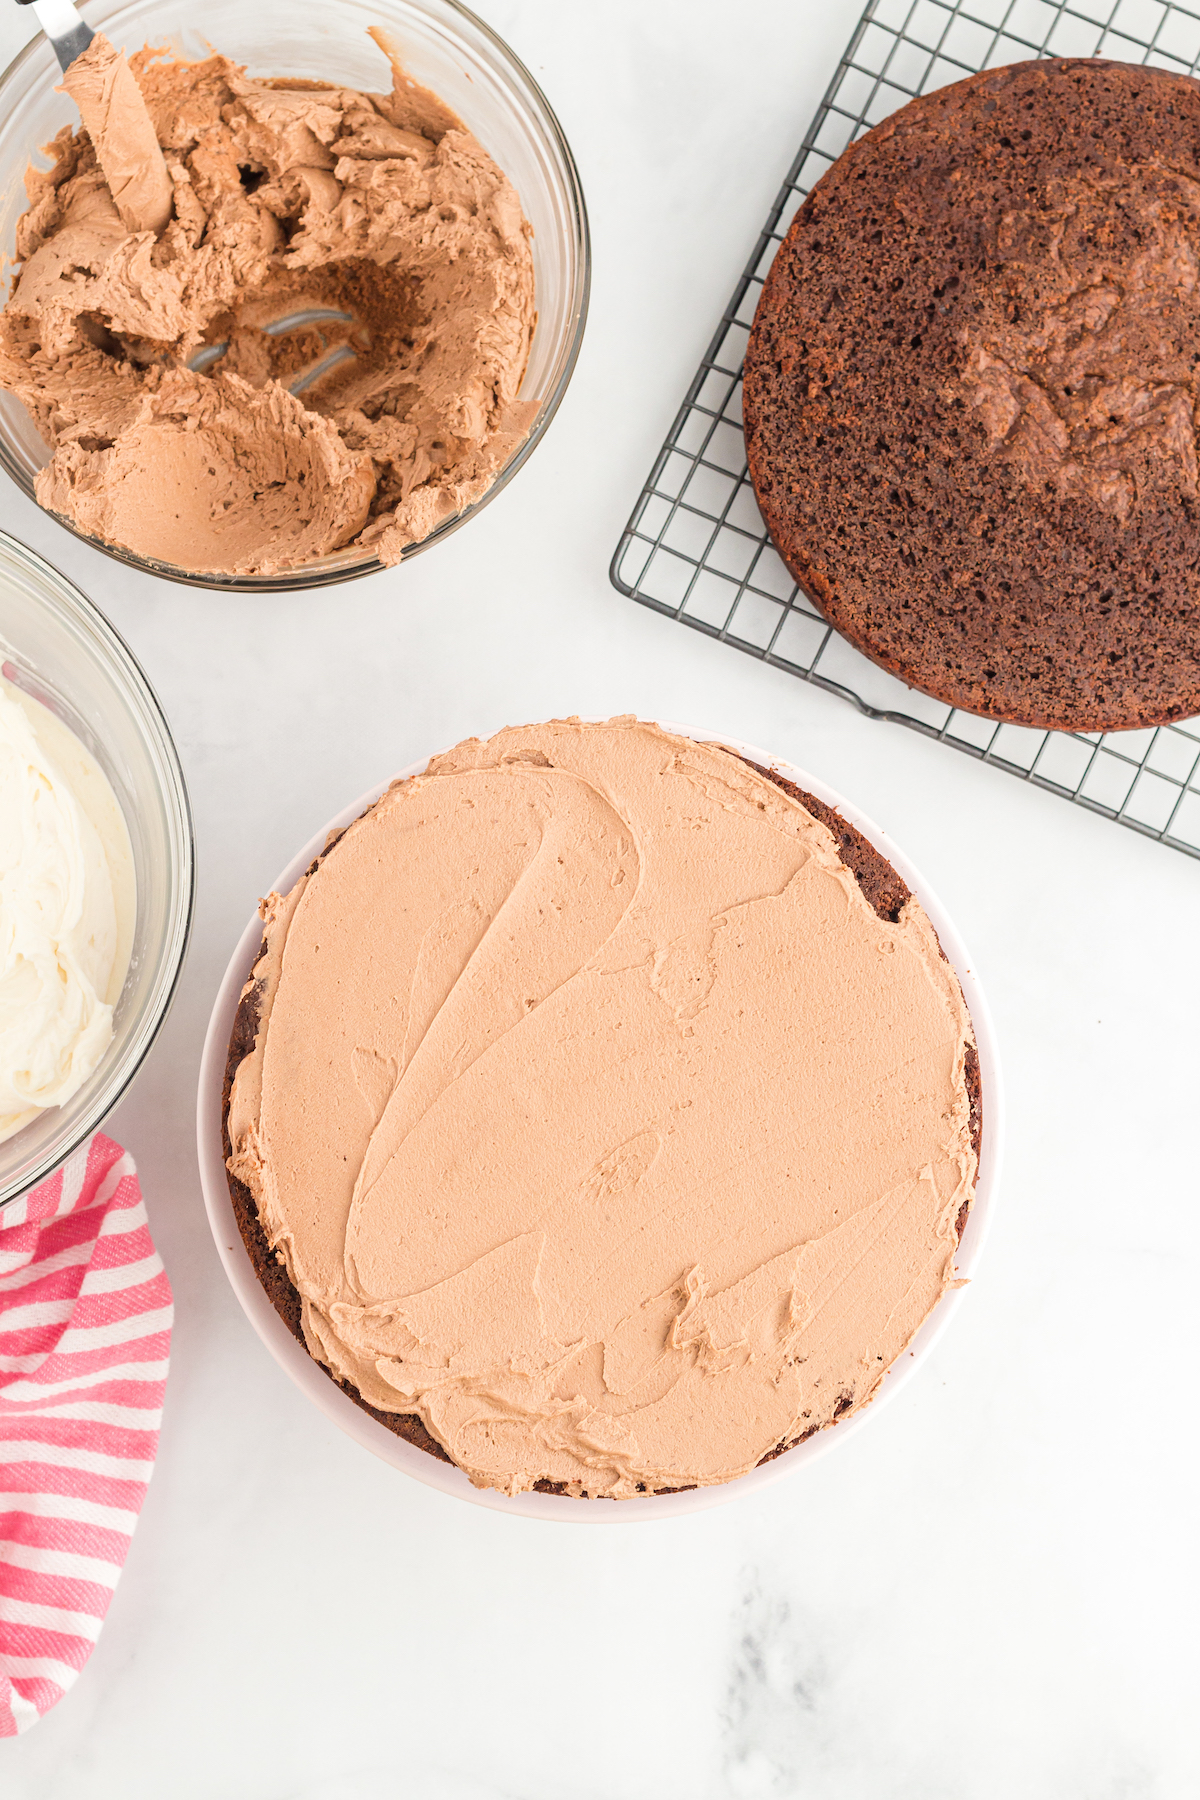
It's time for the fun part! Place a thin layer of chocolate frosting (about 2 tablespoons) in the middle of a cake board or cake plate then place one cake (cut side facing up) on top of that frosting. This helps secure the cake to the cake board or plate so it doesn’t slide off during decorating.
Then, add a generous layer of chocolate frosting on top of that first layer of cake and use an angled cake spatula to smooth that frosting into an even layer.
Add the second layer of cake (cut side up) over that frosting then add another generous layer of chocolate frosting on top and smooth it out using the angled cake spatula.
And, add the third and final layer of cake with the bottom side facing up. You’ll now have a 3-layer cake.
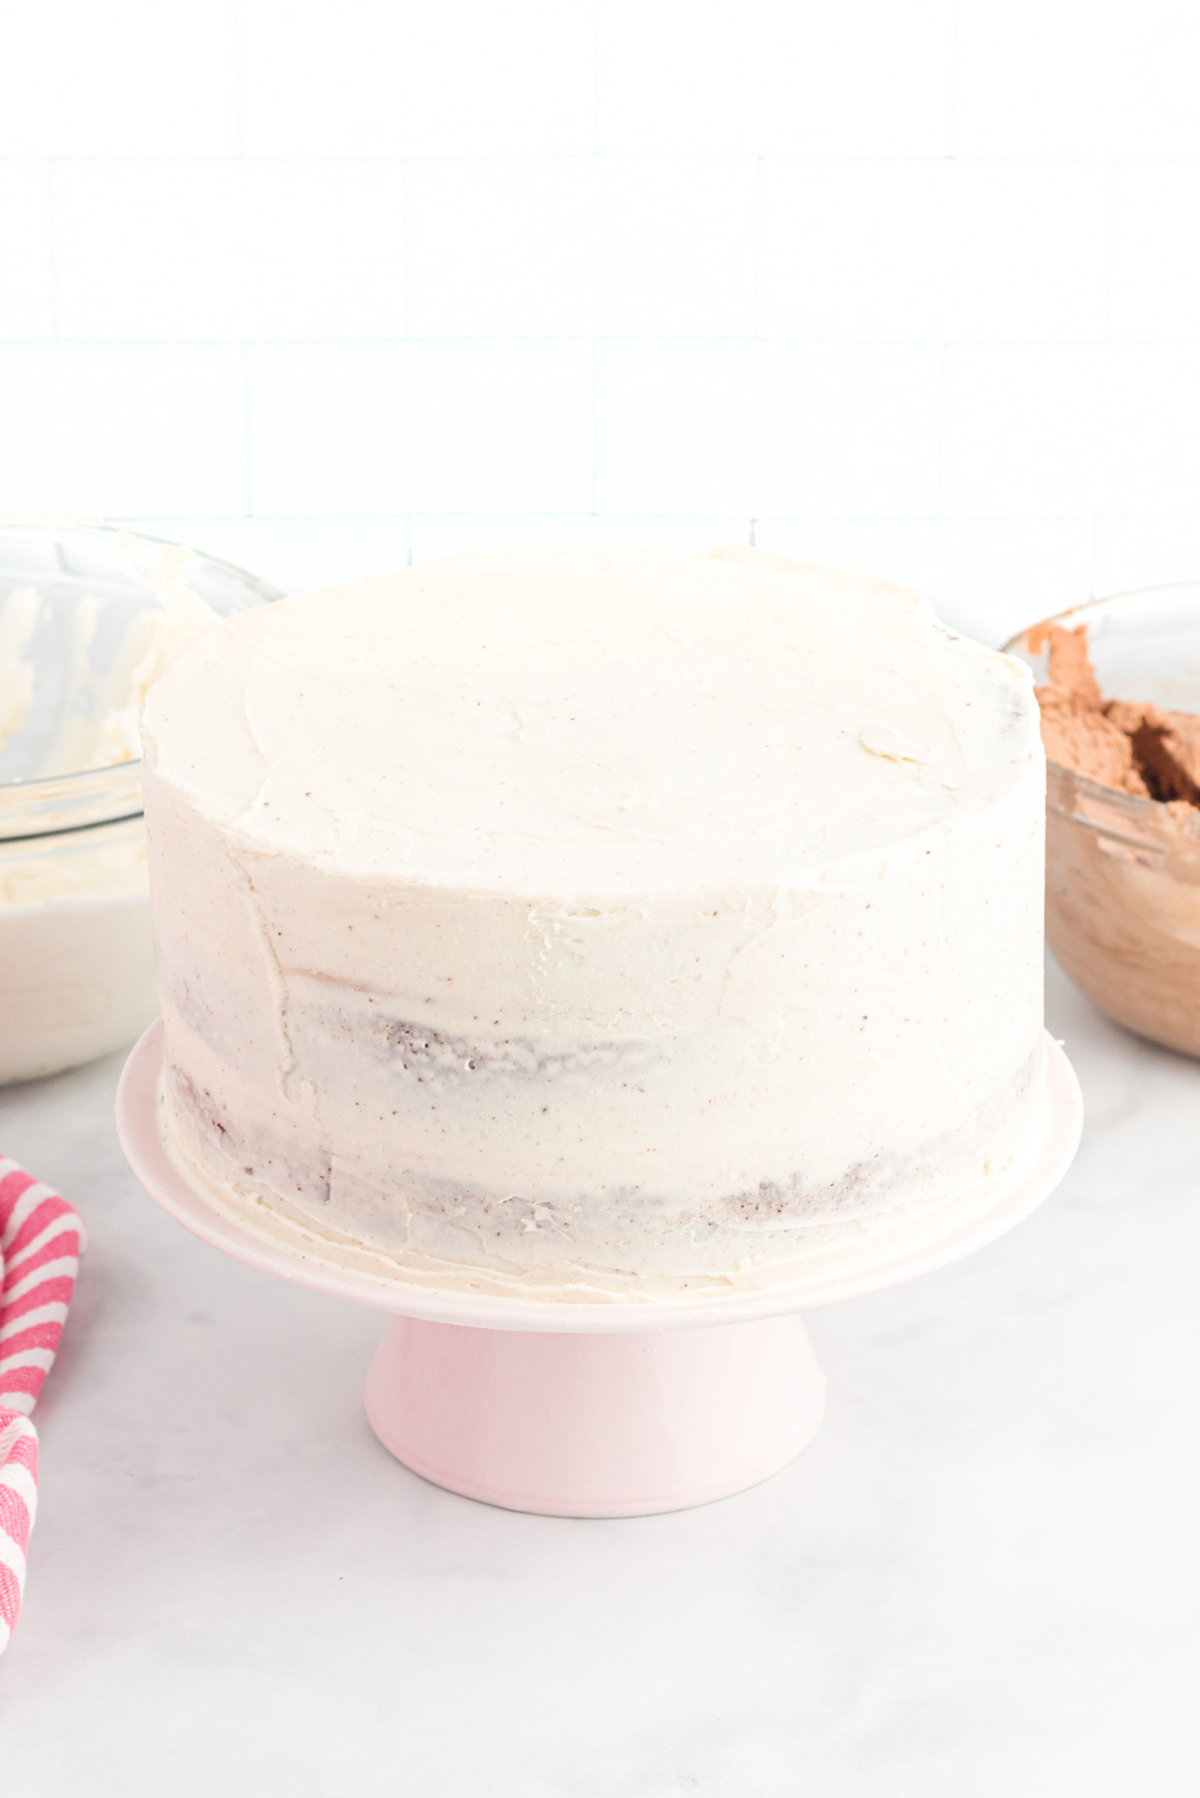
Finish frosting the cake by: Frosting a thin layer of vanilla frosting around the top and sides of the cake. This first coating of frosting (called a crumb coat) is meant to secure all the crumbs to the cake. To get the layers of frosting smooth, use a tool like a cake scraper to smooth the icing out.
Now, it's time to let the frosting harden by placing the lightly frosted cake into the freezer for 10 minutes so the crumb coat hardens up a bit before frosting the next layer.
DECORATE THE CAKE
After the time is up, remove the cake from the freezer and smooth on a second layer of vanilla frosting around the top and sides of the cake. Use the cake scraper to smooth this out.
Place chocolate frosting in a tipless icing bag. Leave about ½ cup of chocolate frosting out of the bag and color this a darker shade of brown using brown food coloring. Place the darker shade of brown frosting into a separate tipless icing bag.
Color about 2 tablespoons of vanilla frosting with black food coloring. Place in a tipless icing bag.
And then, color about ¼ cup of vanilla frosting with red food coloring. Place in a tipless icing bag.
Place about 2 tablespoons of white vanilla frosting into a tipless icing bag.
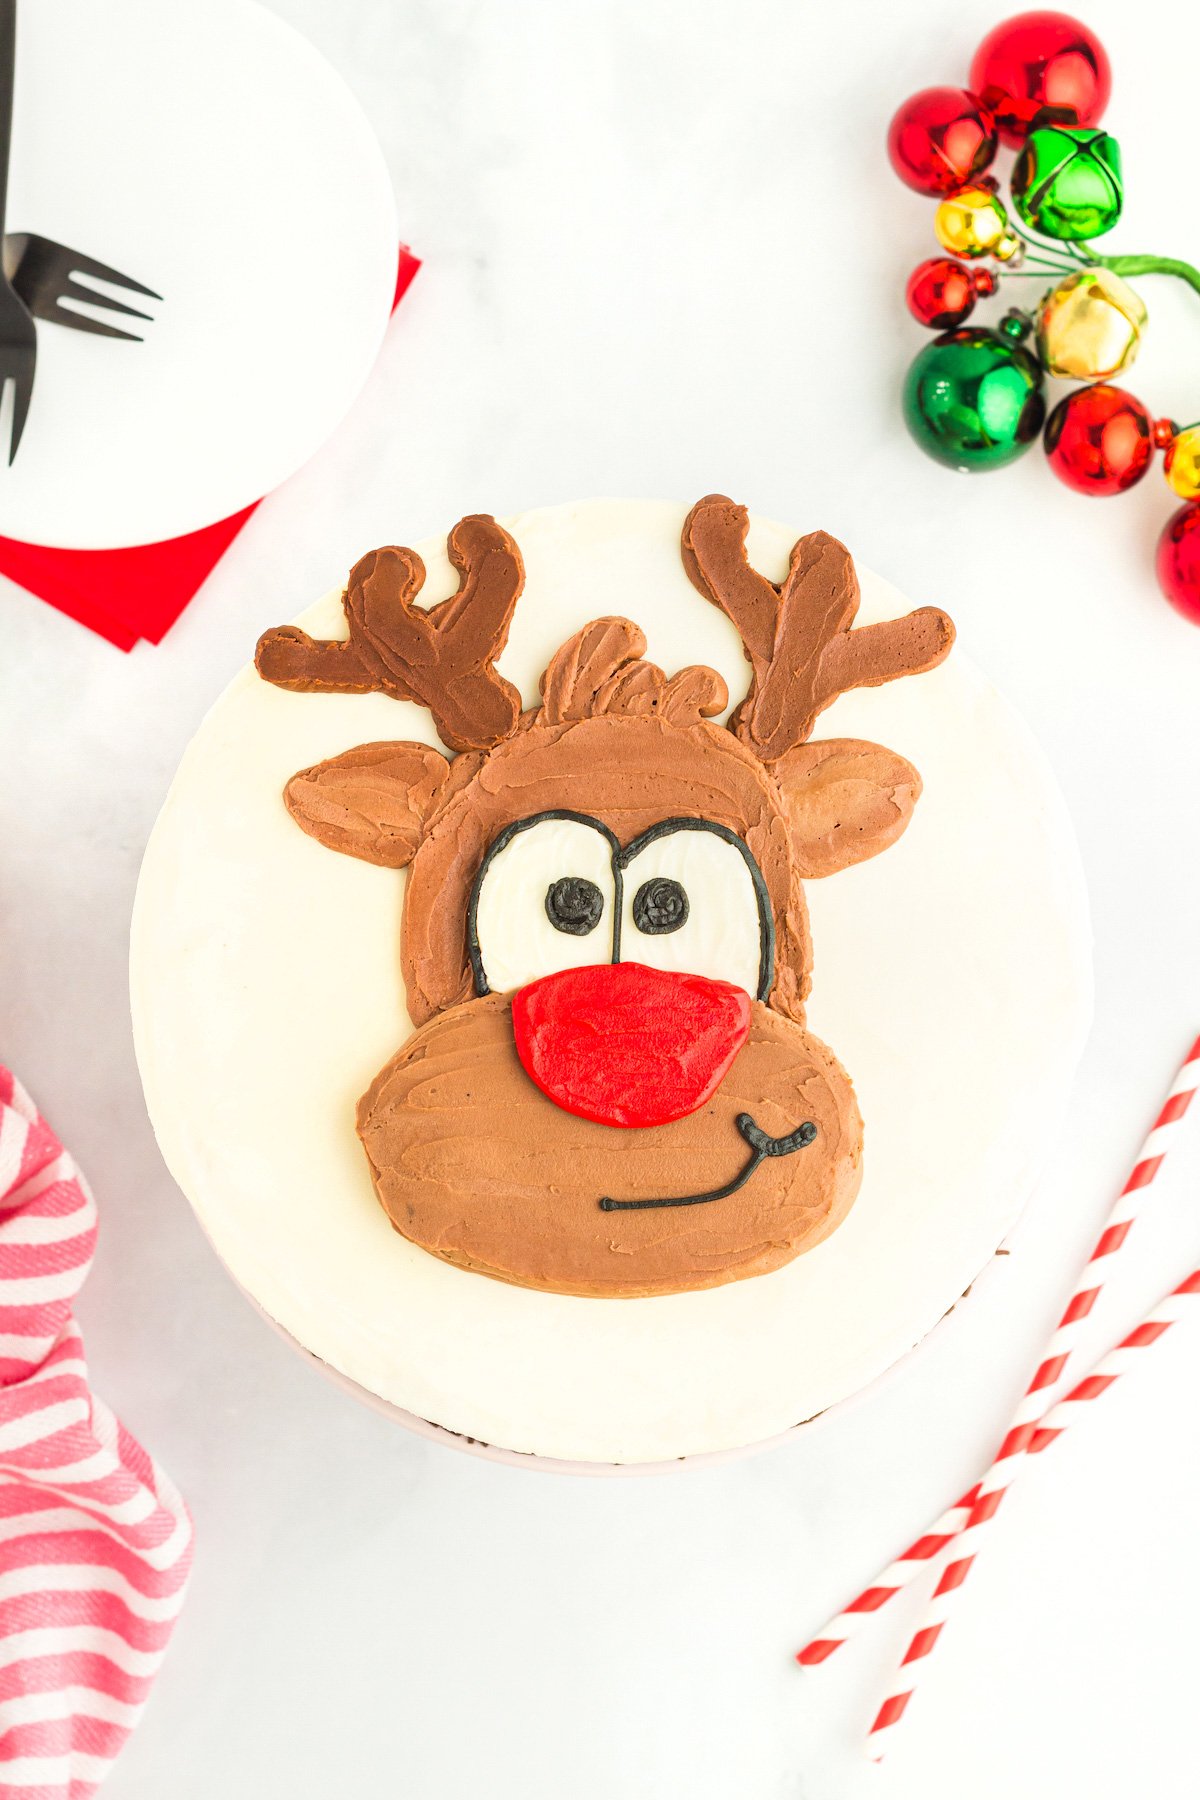
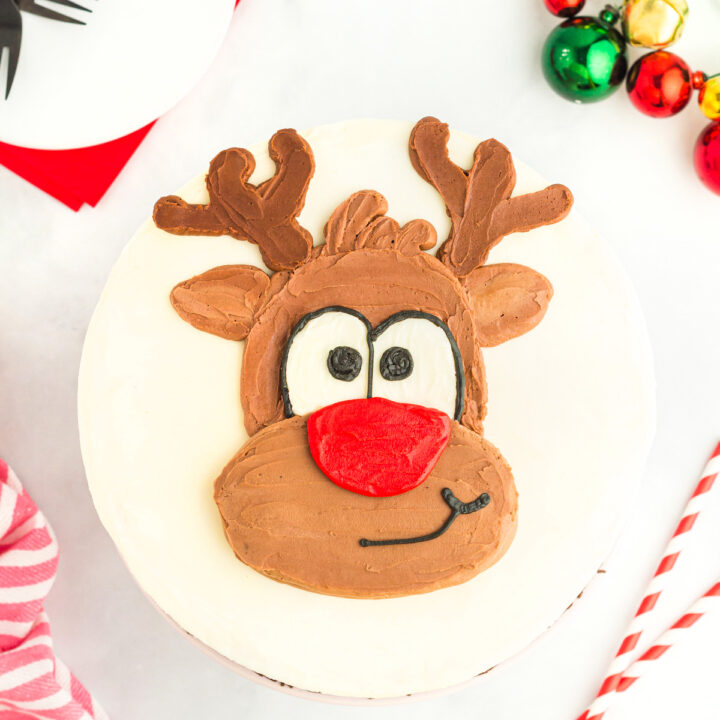
Now, let's start by making a large vertical brown oval on top of the cake using the chocolate frosting. Be sure to leave enough room above that oval to make antlers later.
Then, a large horizontal brown oval overlaps the bottom of the vertical oval. Your reindeer now has a face!
And then, use the white and black frostings to create eyes with pupils.
Next, use the red frosting to draw on a large nose.
Use the black frosting to draw a small smile under the nose.
And, use the darker brown frosting to pipe two antlers above the reindeer’s head.
Finally, use the lighter brown frosting to pipe some hair between the antlers and then ears on the side of his forehead.
REINDEER CAKE RECIPE NOTES
- It's very important that you don't overmix the cake batter or the cake will be tough. Once you add the flour to the wet ingredients be careful to allow the mix until the ingredients are just combined as you don't want to overwork the batter.
- The cake can remain at room temperature in an airtight container or up to 3 days. After 3 days, wrap leftovers well in food-safe plastic wrap and store in the fridge (up to 2 additional days) or freezer (up to a month). Bring the cake back to room temperature before serving.
- When making the frosting, it's important to make sure all ingredients are at room temperature (especially the butter). If they are not, your frosting may end up too runny or lumpy.
- If you don't have a piping bag on hand, you can use freezer or ziplock bags with a corner snipped off instead.
- It's also very important to chill the cake after frosting it, but before decorating it so that you can ensure that the frosting is set and doesn't mix.
WHY IS MY CAKE DRY
If your cake is dry then you most likely used too much flour. It's important to make sure that you measure the cake flour by weighing it. If you don't measure by weighing then, use the spoon method. Spoon the flour into the measuring cup and not scooping with it.
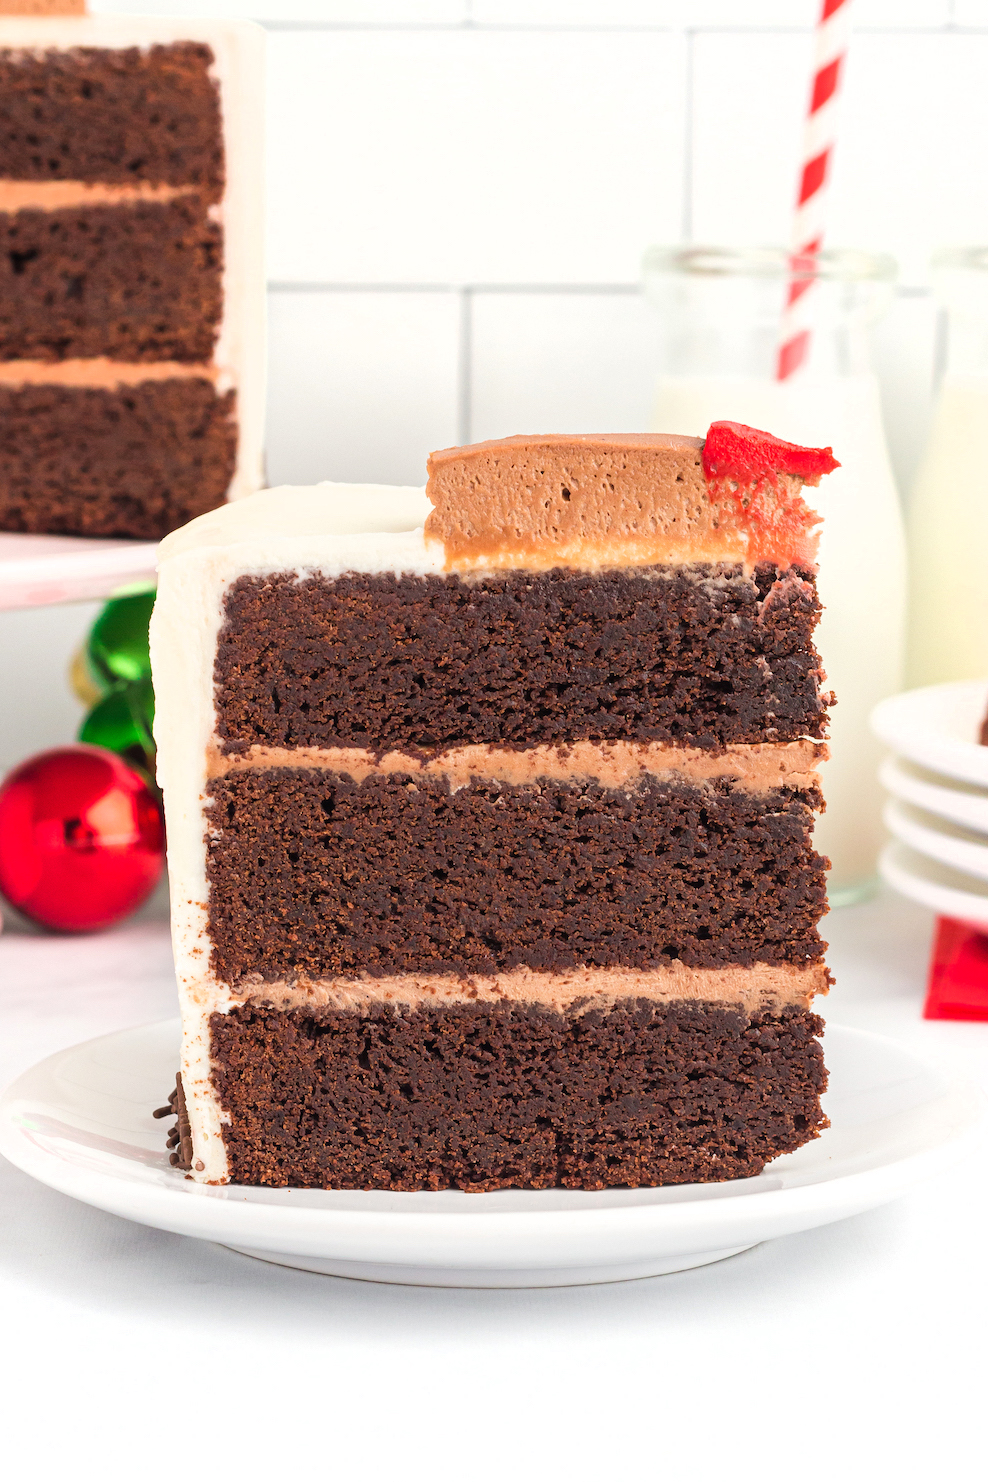
Brownie Reindeer Cake
Cute Brownie Reindeer Cake made with layers of deliciously dense cake with chocolate and vanilla buttercream.
Ingredients
- CAKE INGREDIENTS
- 3 ¼ cups (455 grams) all-purpose flour
- 1 cup (100 grams) unsweetened cocoa powder
- 2 teaspoons baking powder
- 1 teaspoon baking soda
- 1 ½ cups (340 grams) unsalted butter, slightly melted (cold butter from the fridge can go in the microwave for 45 seconds)
- 1 ½ cups (300 grams) light brown sugar, packed
- ¾ cup (150 grams) granulated sugar
- 4 large eggs, room temperature
- 1 tablespoon vanilla extract
- ½ cup buttermilk, room temperature
- 12 ounces semi sweet Baker’s chocolate, melted but cooled
- CHOCOLATE FROSTING INGREDIENTS:
- 3 ½ cups (420 grams) confectioners’ sugar
- 1 cup (227 grams) unsalted butter, slightly melted (if cold from fridge, about 45 seconds in the microwave)
- 4 ounces semi sweet Baker’s chocolate, melted but cooled
- 2 teaspoons vanilla extract
- VANILLA FROSTING INGREDIENTS:
- 3 ½ cups (420 grams) confectioners’ sugar
- 1 cup (227 grams) unsalted butter, slightly melted (if cold from fridge, about 45 seconds in the microwave)
- 2 teaspoons vanilla extract
- gel food coloring: black, red and brown*
Instructions
Preheat oven to 350 degrees F.
Spray three 8” round cake pans with non-stick cooking spray and line the inside bottom of each pan with parchment paper. The parchment paper will help the cakes slide easily out of the pan once baked and cooled. Set pans aside for now.
In a medium bowl, stir together flour, cocoa powder, baking powder and baking soda. Set aside.
In a separate large bowl, beat butter, brown sugar and granulated sugar on high until mixed well (about two minutes).
Beat eggs and vanilla extract into the butter mixture until well combined.
Beat half of the flour mixture into the wet ingredients. Beat this on low speed just until combined. Do not overmix.
Beat in all of the buttermilk just until combined. Again, don’t overmix.
On low speed, beat in the remaining flour mixture just until combined.
Stir in the melted chocolate until well mixed. Do not use the electric beaters for this step.
Pour cake batter evenly between the three prepared cake pans. Try to get the same amount in each pan so that they bake at the same speed.
Bake in oven for 30 minutes or until toothpick inserted in middle of each comes out clean.
Remove cakes from oven and let cakes cool in pans for 15 minutes. After 15 minutes, remove cakes from pans and let cool completely on a wire rack.
Once cakes have completely cooled to room temperature, wrap each cake individually in food-safe plastic wrap and place cakes in fridge for at least 1 hour. Chilling the cakes in the fridge before frosting will help them hold their shape and not crumble during decorating.
Removed chilled cakes from the fridge and use a large serrated knife to cut any dome tops off cakes so they have flat tops. These cakes bake up pretty flat (like brownies) so there won’t be a lot to cut off the tops.
Chocolate Frosting Directions: In a large bowl, beat the confectioners’ sugar, butter, melted chocolate and vanilla extract on high speed until light and fluffy (about 5 minutes).
Vanilla Frosting Directions: In a large bowl, beat the confectioners’ sugar, butter and vanilla extract on high speed until light and fluffy (about 5 minutes).
Place a thin layer of chocolate frosting (about 2 tablespoons) in the middle of a cake board or cake plate then place one cake (cut side facing up) on top of that frosting. This helps secure the cake to the cake board or plate so it doesn’t slide off during decorating.
Add a generous layer of chocolate frosting on top of that first layer of cake and use an angled cake spatula to smooth that frosting into an even layer.
Add the second layer of cake (cut side up) over that frosting then add another generous layer of chocolate frosting on top and smooth it out using the angled cake spatula.
Add the third and final layer of cake with the bottom side facing up. You’ll now have a 3-layer cake.
Frost a thin layer of vanilla frosting around the top and sides of cake. This first coating of frosting (called a crumb coat) is meant to secure all the crumbs to the cake. To get the layers of frosting smooth, use a tool like a cake scraper to smooth the icing out.
Place the lightly frosted cake into the freezer for 10 minutes so the crumb coat hardens up a bit before frosting the next layer.
Remove cake from freezer and smooth on a second layer of vanilla frosting around the top and sides of the cake. Use the cake scraper to smooth this out.
Place chocolate frosting in a tipless icing bag. Leave about ½ cup of chocolate frosting out of the bag and color this a darker shade of brown using brown food coloring. Place the darker shade of brown frosting into a separate tipless icing bag.
Color about 2 tablespoons of vanilla frosting with black food coloring. Place in a tipless icing bag.
Color about ¼ cup of vanilla frosting with red food coloring. Place in a tipless icing bag.
Place about 2 tablespoons of white vanilla frosting into a tipless icing bag.
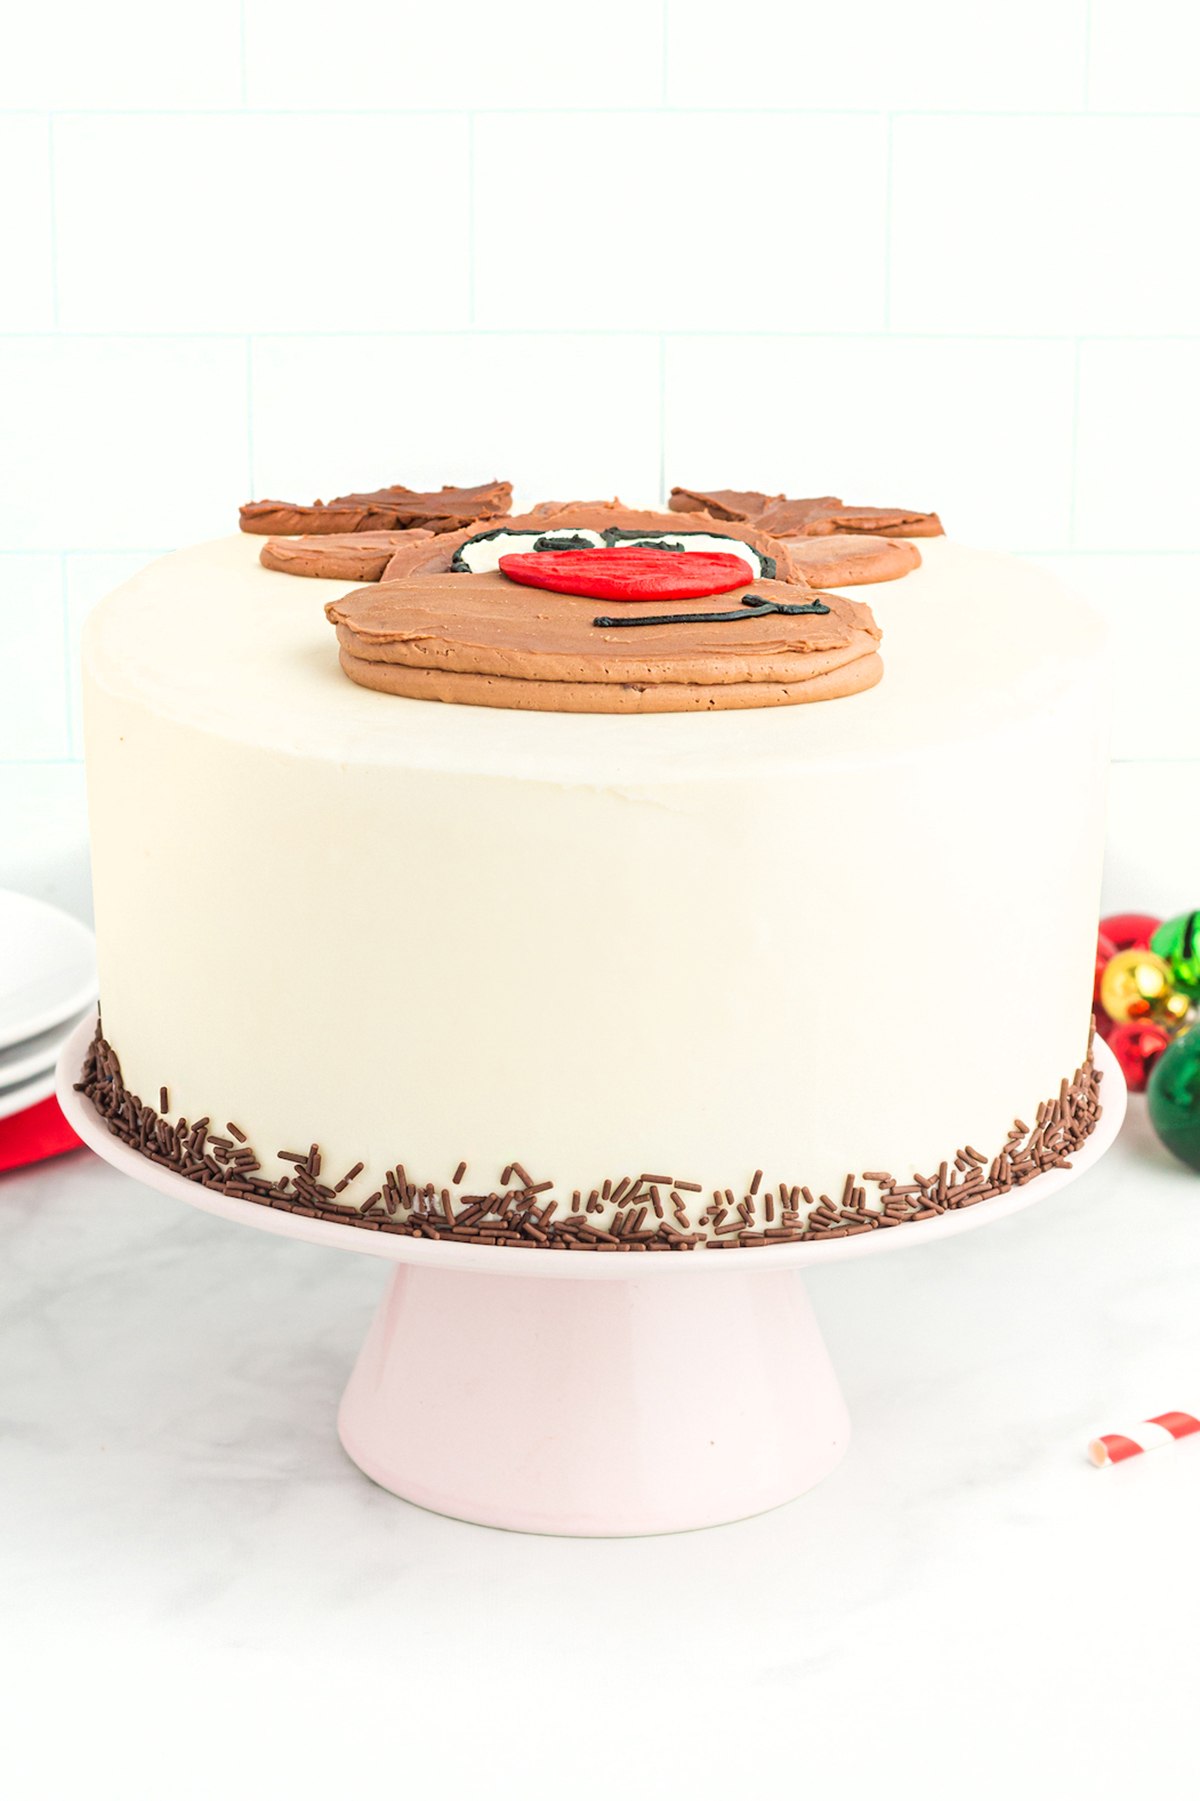
Start by making a large vertical brown oval on top of the cake using the chocolate frosting. Be sure to leave enough room above that oval to make antlers later.
Then make a large horizontal brown oval overlapping the bottom of the vertical oval. Your reindeer now has a face!
Use the white and black frostings to create eyes with pupils.
Use the red frosting to draw on a large nose.
Use the black frosting to draw a small smile under the nose.
Use the darker brown frosting to pipe two antlers above the reindeer’s head.
Use the lighter brown frosting to pipe some hair between the antlers then ears on the side of his forehead.
The cake can remain at room temperature (in a sealed food safe container) for up to 3 days. After 3 days, wrap leftovers well in food-safe plastic wrap and store in the fridge (up to 2 additional days) or freezer (up to a month). Bring cake back to room temperature before serving.
Notes
For these colors I used Chefmaster in Super Red and Super Black. To darken the brown frosting, I used Americolor in Chocolate Brown.
Recommended Products
As an Amazon Associate and member of other affiliate programs, I earn from qualifying purchases.

Nutrition Information
Yield 12 Serving Size 1Amount Per Serving Calories 505Total Fat 19gSaturated Fat 10gTrans Fat 0gUnsaturated Fat 7gCholesterol 84mgSodium 318mgCarbohydrates 74gFiber 2gSugar 43gProtein 9g
This nutritional information is for reference only. We are not responsible for these calculations.
BEST REINDEER TREATS
Want more reindeer inspired eats?
This Reindeer Cheesecake Ball is so much fun to serve.
How about Mini Reindeer Cakes? I'm obsessed.
These little Reindeer Pops are the cutest.
So, there you have it. This reindeer cake is perfect for any holiday celebration. With a few simple steps and a bit of creativity, you can easily create this festive cake that everyone will love!
If you make your own reindeer cake, I'd love to see it! Tag @cutefetti on social media. If you enjoyed this recipe, I would LOVE if you could share it with a friend.