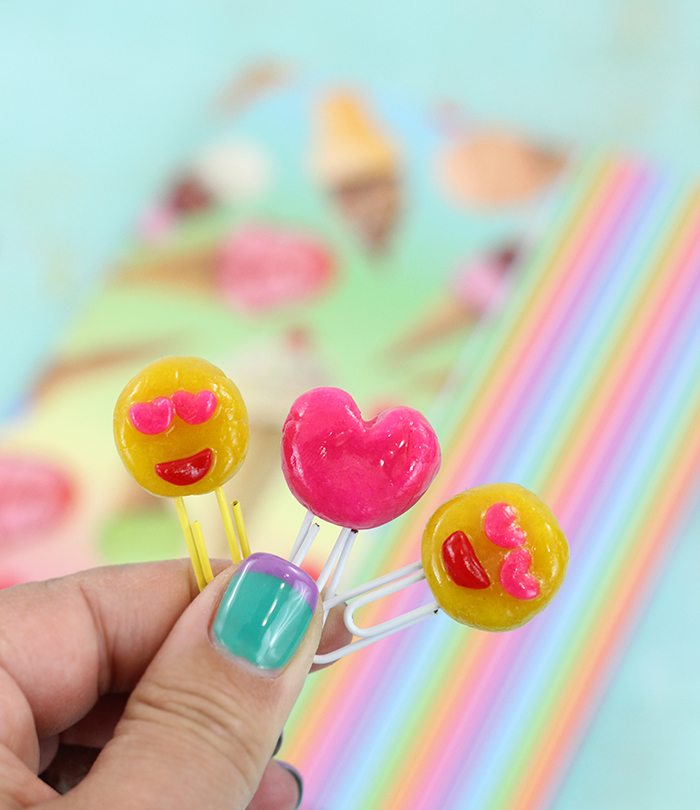
DIY Emoji Paperclips
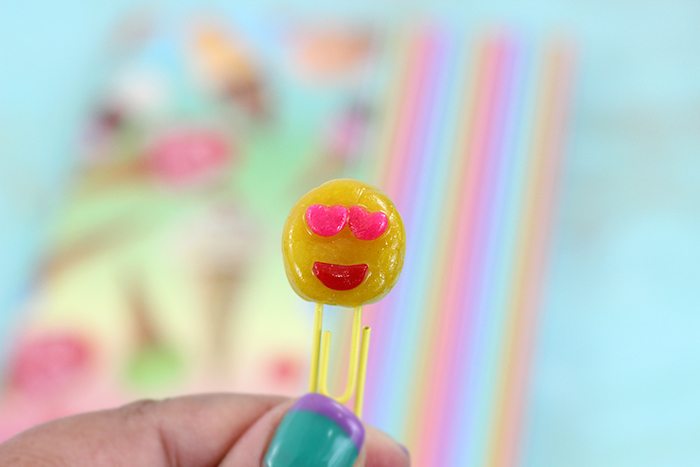
It's back to school time! It's the perfect time to stock up on everything you need for a smooth transition. Today, I'm sharing about a new way to save and a clever way to make DIY Emoji Paperclips to add to the excitement. When I get crafty at home, I often like to run out to make a quick stop to pick up the supplies I need. It's the perfect time to grab other household items we're low on. Let me show you how you can save on your next trip to Family Dollar too! This is a sponsored post.
Before I left to pick up my supplies for my DIY project, I made a list of other things we needed as well. Laundry detergent, paper towels and deodorant for my son. I went onto the Family Dollar Smart Coupons website to see what I could save on. I was able to "clip" coupons for all three household items on my list. Score! I also spotted a lot of cereal and snack coupons that would be perfect for getting stocked up for the start of school.
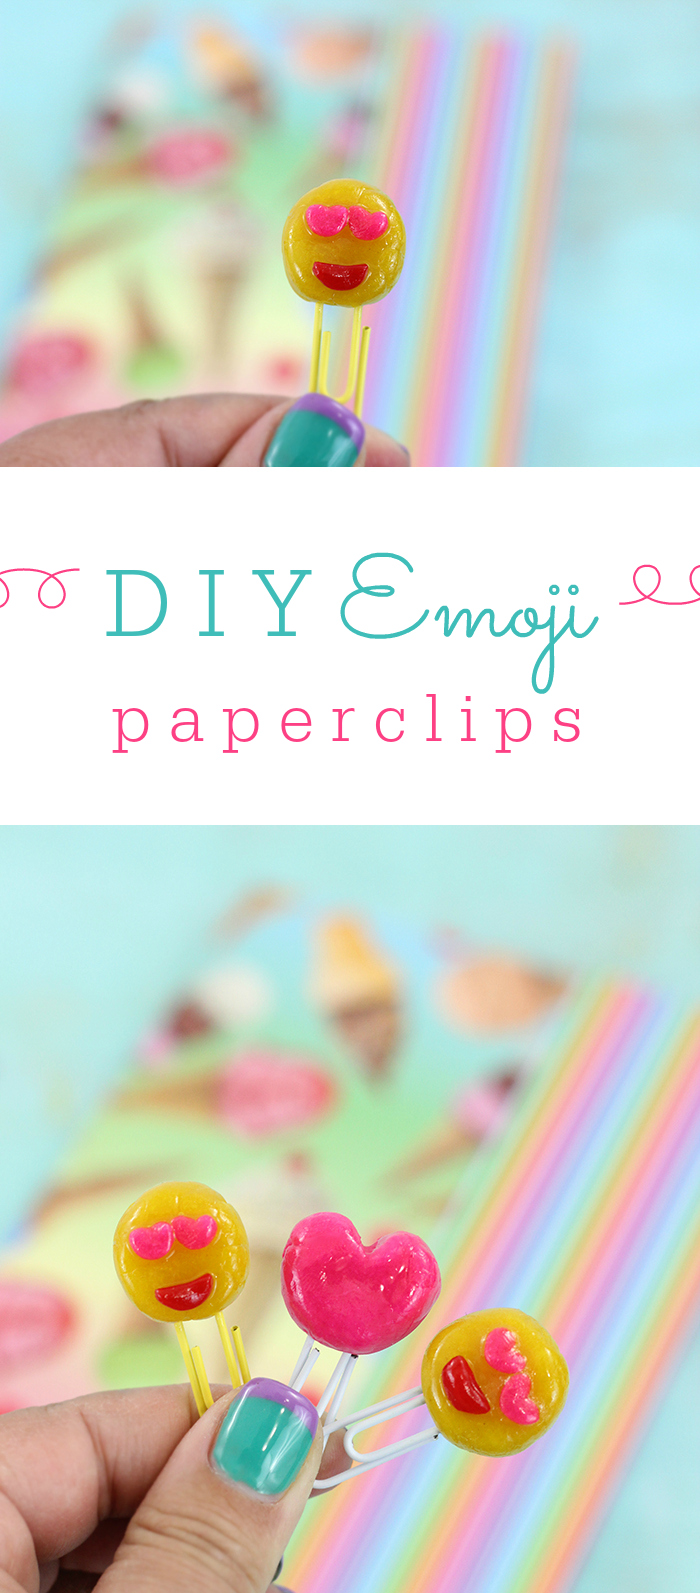
DIY Emoji Paperclips
If you're feeling a little creative this back to school season, you can also grab everything you need for this easy DIY at Family Dollar. Here's what I used:
*Kid's Clay Dough (Yellow, Pink & Orange) I found a perfect multi-set at Family Dollar.
*Paperclips
*Super Glue
*Clear Nail Polish
*Drinking Straw
*Toothpick
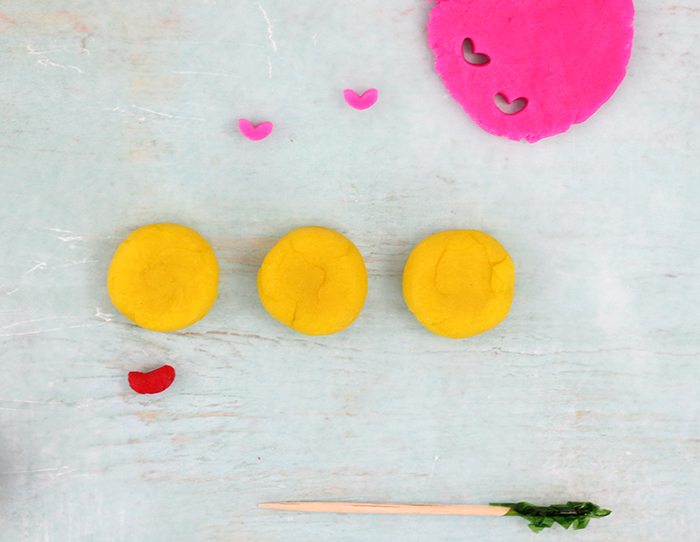
1) Make small circles out of yellow kid's dough for the emoji face.
2) Use a straw to create a heart shaped stencil. You can use a toothpick to make the indent on the top and just press and shape it with your hands. Once you get a heart shape, you can use it to make small "heart eyes" from rolled out pink kid's dough.
3) Make a tiny mouth using red kid's dough. You can use your hands to shape or get a little help shaping from a toothpick.
4) Place your eyes and mouth onto the emoji face and press in carefully so that you don't ruin the shape.
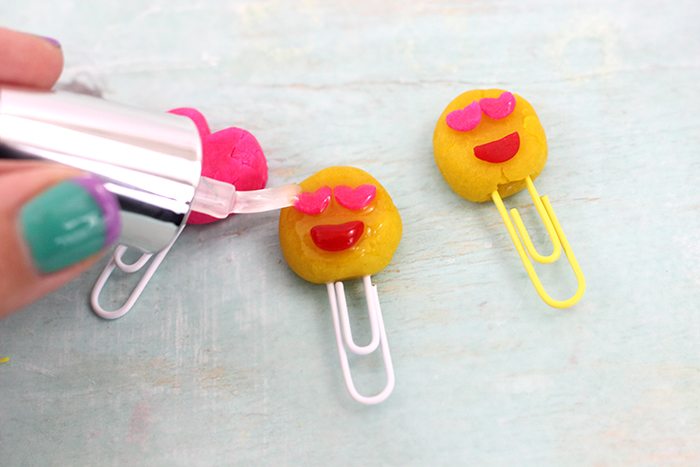
5) Press a paperclip carefully into the bottom center of your emoji face so that you can glue it in after the dough is firmed and set.
6) Bake your kid's dough emojis at 200ºF for about 15 minutes until firm. Let cool completely. If the eyes or mouth are not stuck on completely, use superglue to adhere them at this point.
7) Super glue or use a glue gun to adhere the emoji faces to the paperclips.
8) Coat entire emoji with clear nail polish to set. Do one side at a time and let dry completely before doing the opposite side. Once both sides have been polished and dried, your DIY Emoji paper clips are ready for use!
Voila! Aren't they the cutest?
Grab these supplies and get ready to save in an all new way at Family Dollar.
Now you can save even more when shopping at Family Dollar. What are your favorite shopping list items to pick up there? Which emoji paperclips would you make?



These are such cute paper clips. I love the emoji faces on them and the fact the Family Dollar has such great savings.
The emoji paper clips are soo cute! We love shopping at Family Dollar!
How adorable and creative! I also love to shop at Family Dollar but need to get back into coupon use.
What a great easy craft and would make fun bookmarks for friends.
These are so darn cute! My daughters would love to make these! Thanks for the DIY instructions.
This is such a cute and creative idea. I bet my niece would absolutely be delighted making these.
My nieces would love this DIY! So perfect for back to school as well.
What a great idea! How creative! These would be fun to make with my daughters. I think they would make great gifts for teachers as well.
These are so cute! I love how you made those heart eyes! So creative!
I love these paper clips! Great ideas and we love shopping at Family Dollar! Really cute.
I bet my oldest kids would LOVE to do this! Looks so simple. Maybe it would get them reading more if they could use them as book marks! 😉
What an adorable idea. I tell you what, my kids would love not only making these, but using them. They would be cute in a little gift basket for their new teachers.
Those emoji paper clips are too cute! They don't take many supplies to make either, which is a definite plus.