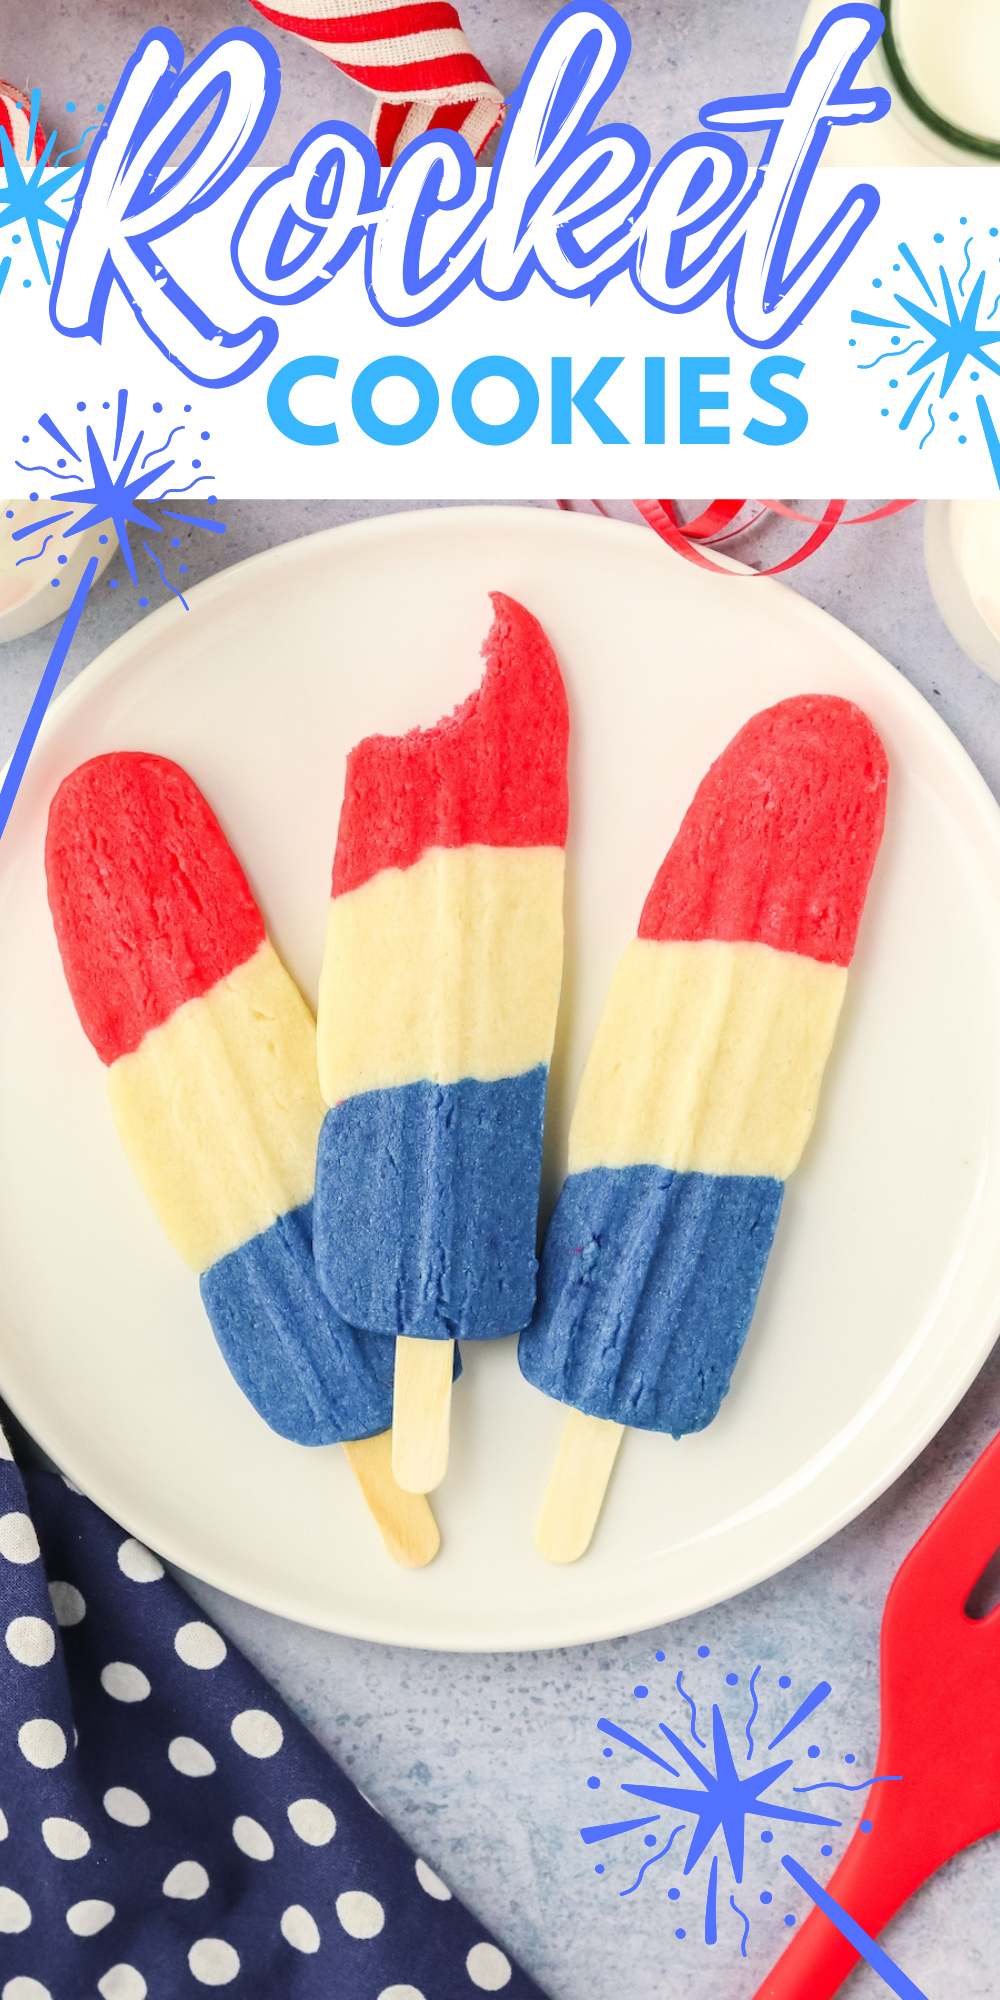
Launch Your Party into Orbit with These Rocket Cookies
Make snack time feel like liftoff with Rocket Cookies! Enjoy a hands-on, creative recipe that turns every baking session into a mini celebration.
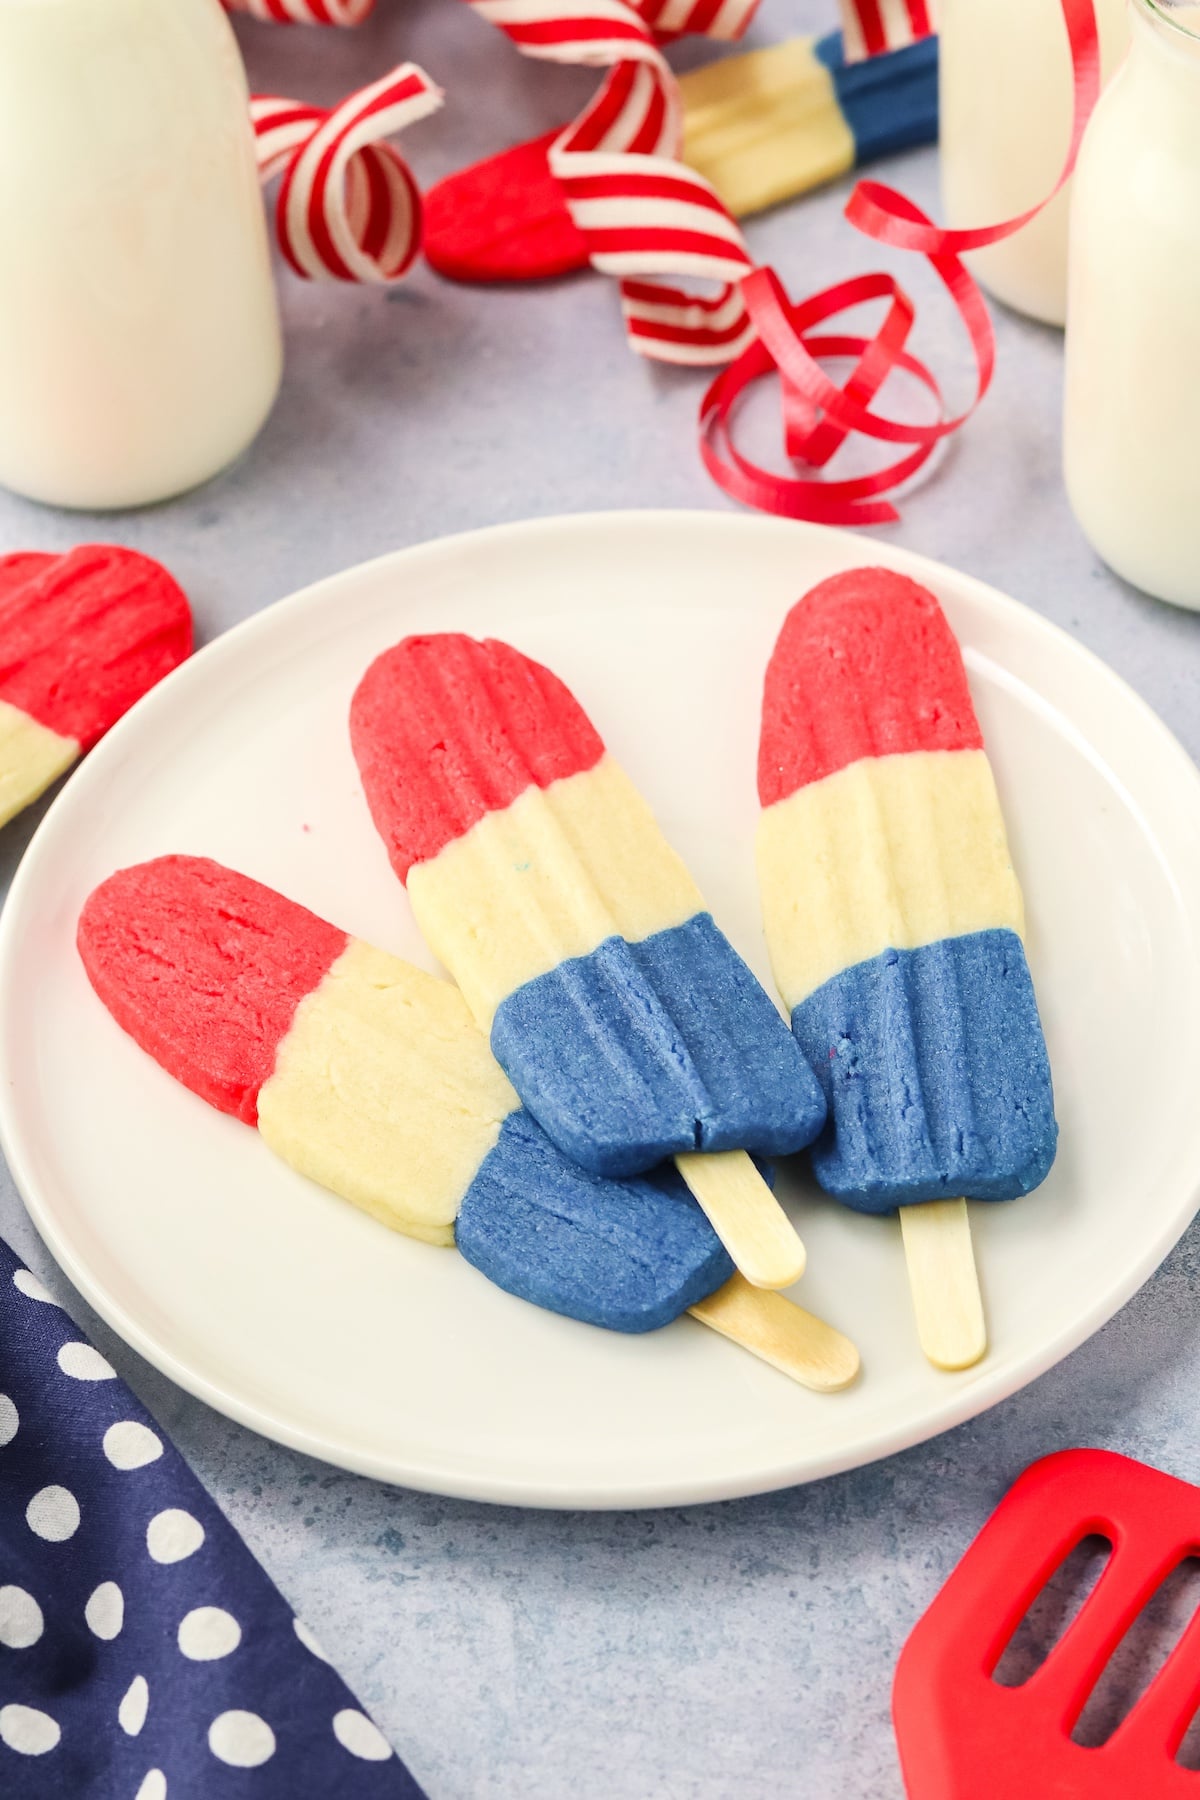
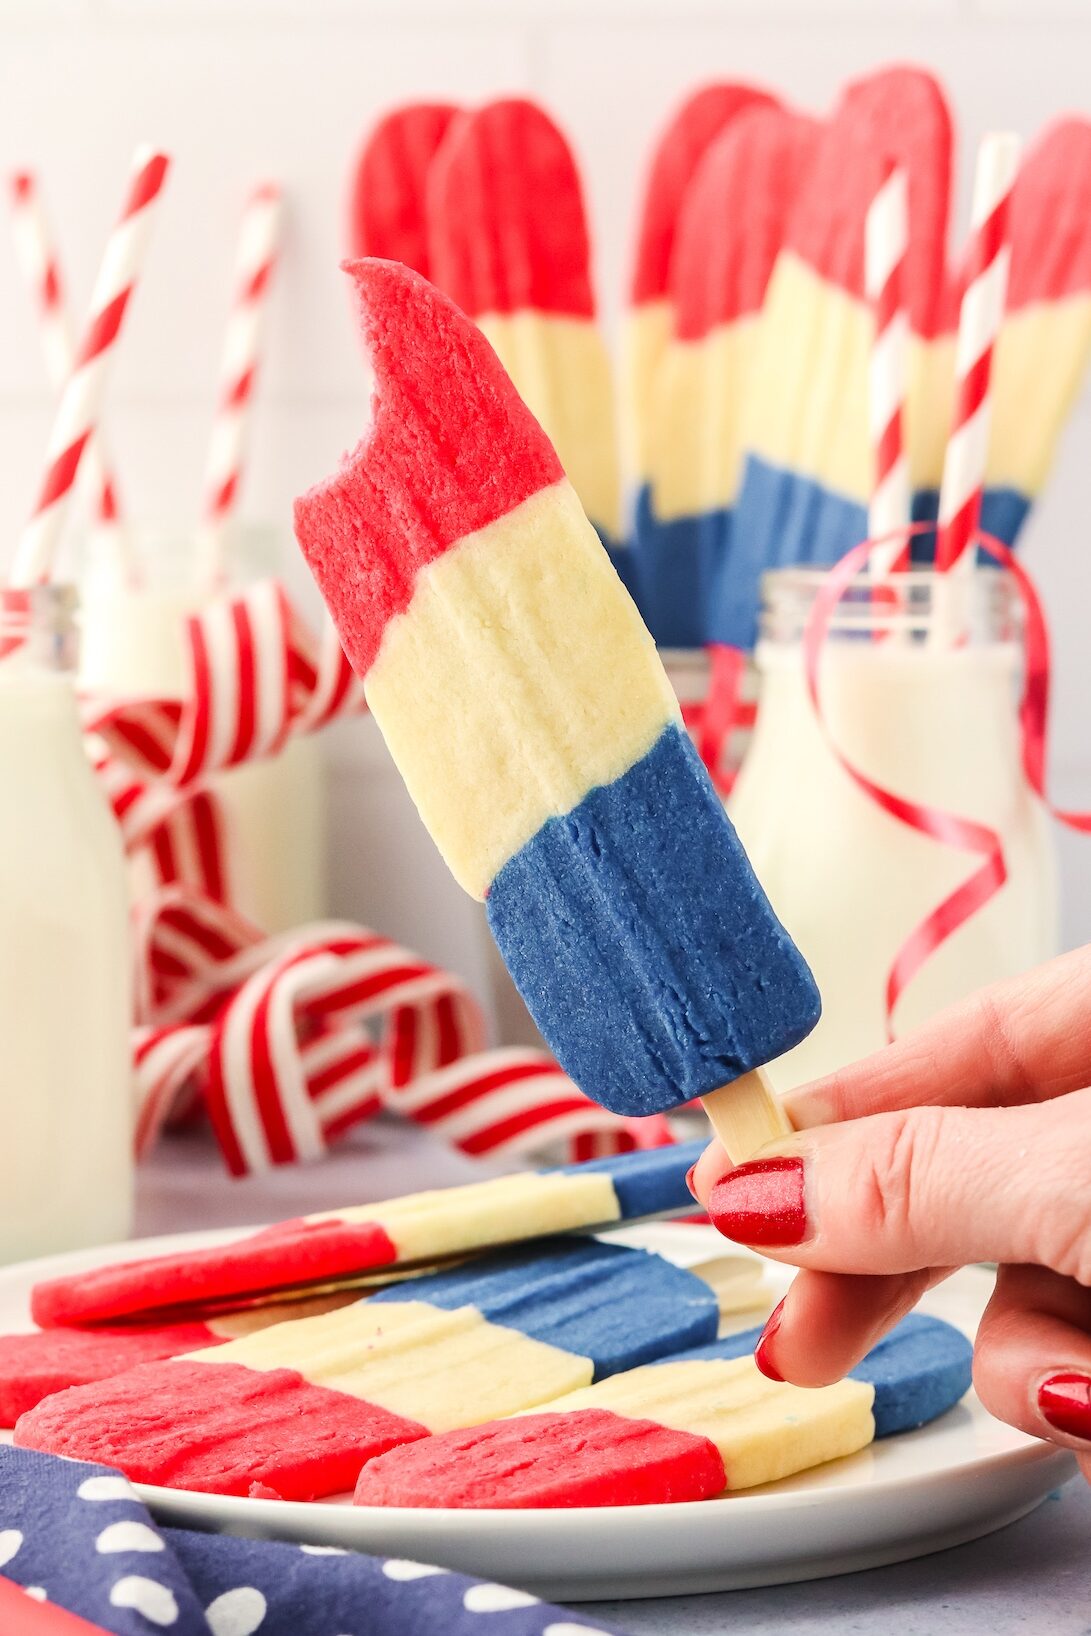
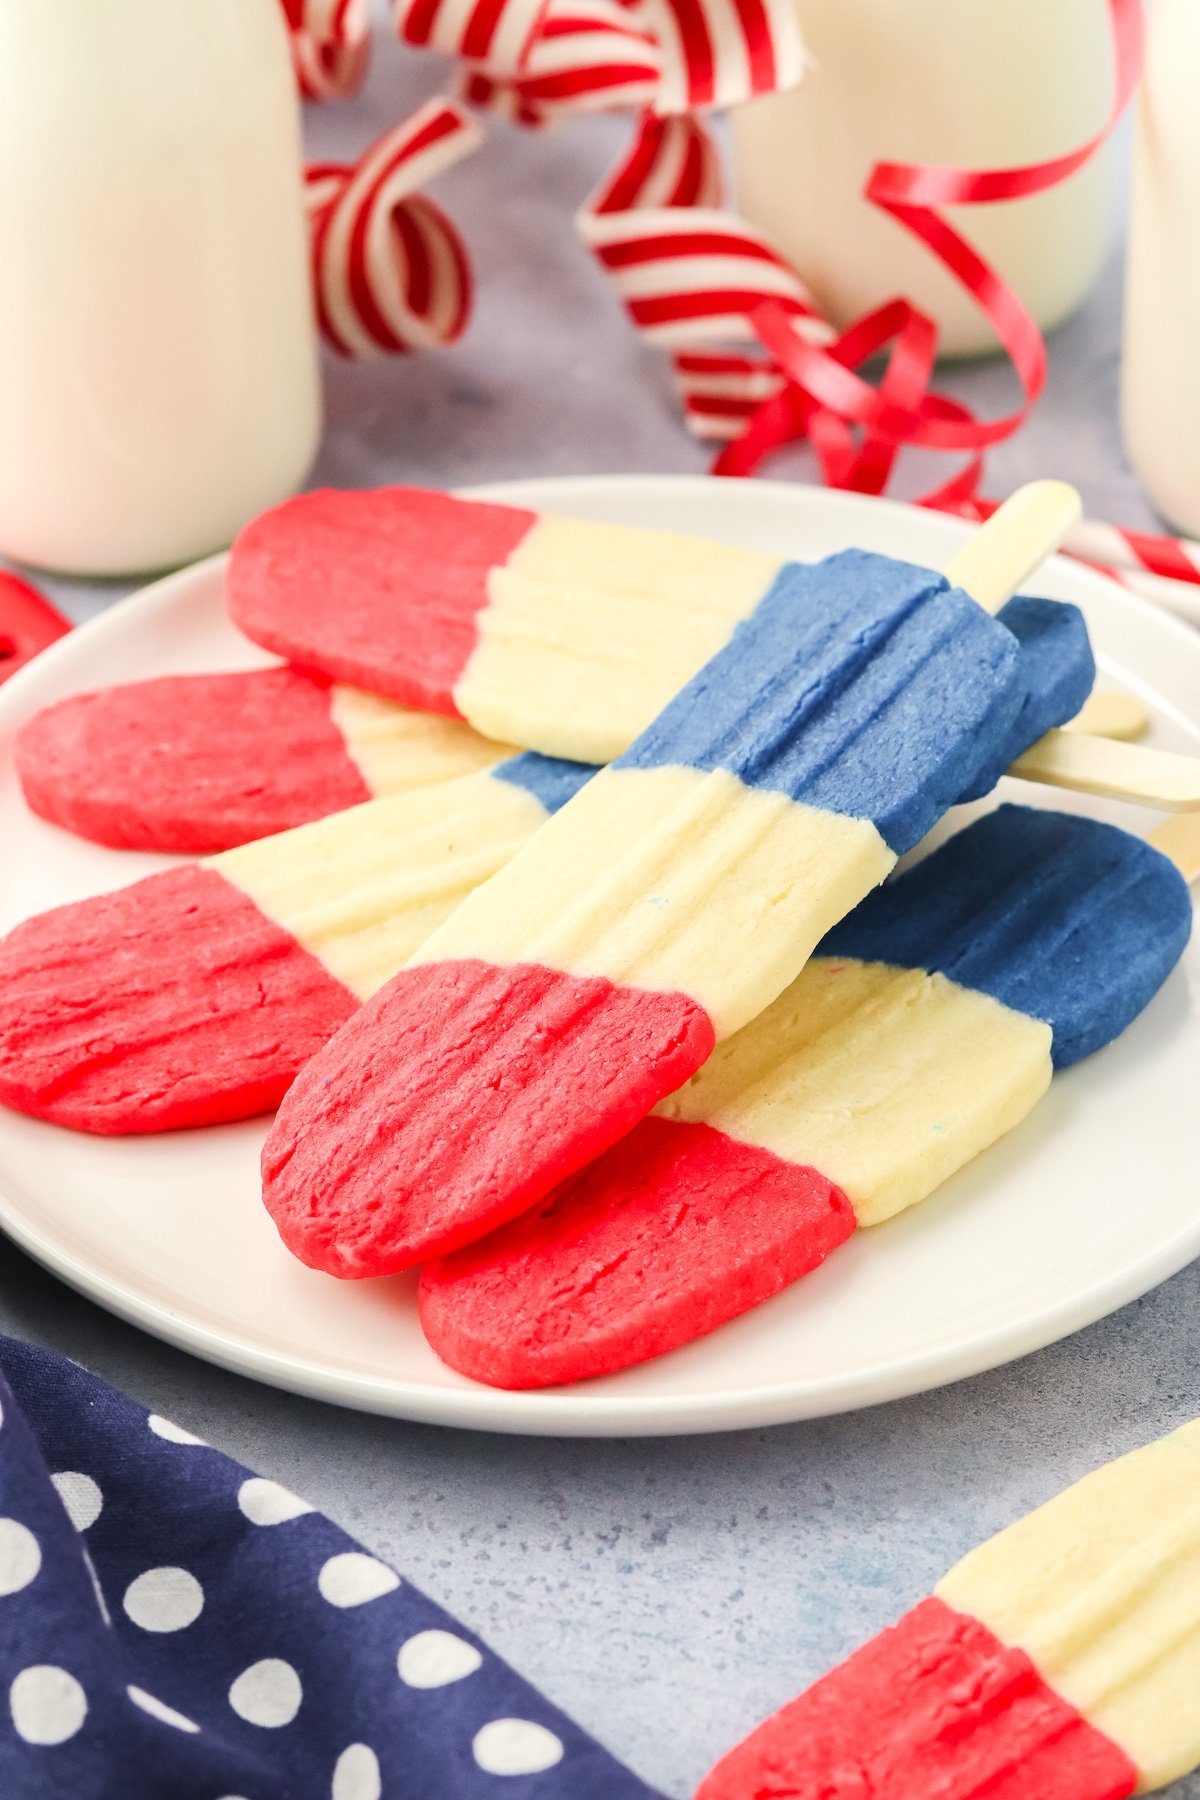
Rocket Cookies bring a burst of color and energy to any dessert table. These bright and cheery treats look like classic rocket popsicles, but they're made from soft sugar cookie dough and loaded with cherry, lemon, and raspberry flavors. Kids and adults love their playful shape, and they're usually the first thing to disappear at parties and holiday celebrations.
They're perfect for Fourth of July, birthdays, or just a fun family baking day. If you're looking for party inspiration, fun desserts like these and other easy treats, such as the playful spirit of Paw Patrol wheel donuts, always hit the spot.
BLAST OFF WITH ROCKET COOKIES
Rocket Cookies do more than just sit pretty on a dessert table, they steal the show. With their bold colors and playful shape, these cookies bring big smiles to every party.
Bursting with Classic Rocket Flavors
You aren’t just biting into a sugar cookie, you’re getting three classic flavors in every bite. Rocket Cookies break down that familiar popsicle taste into layers:
- Cherry delivers a fruity zing.
- Lemon brings a bright, fresh middle.
- Raspberry finishes off with a smooth berry note.
Perfect for Celebrations and Beyond
Rocket Cookies aren’t just for the Fourth of July (though they truly shine on patriotic holidays). They work for birthdays, pool parties, theme nights, or anytime you want something special. The colors and flavors fit right in with other playful desserts like these festive ice cream cone cupcakes, guaranteeing smiles all around.
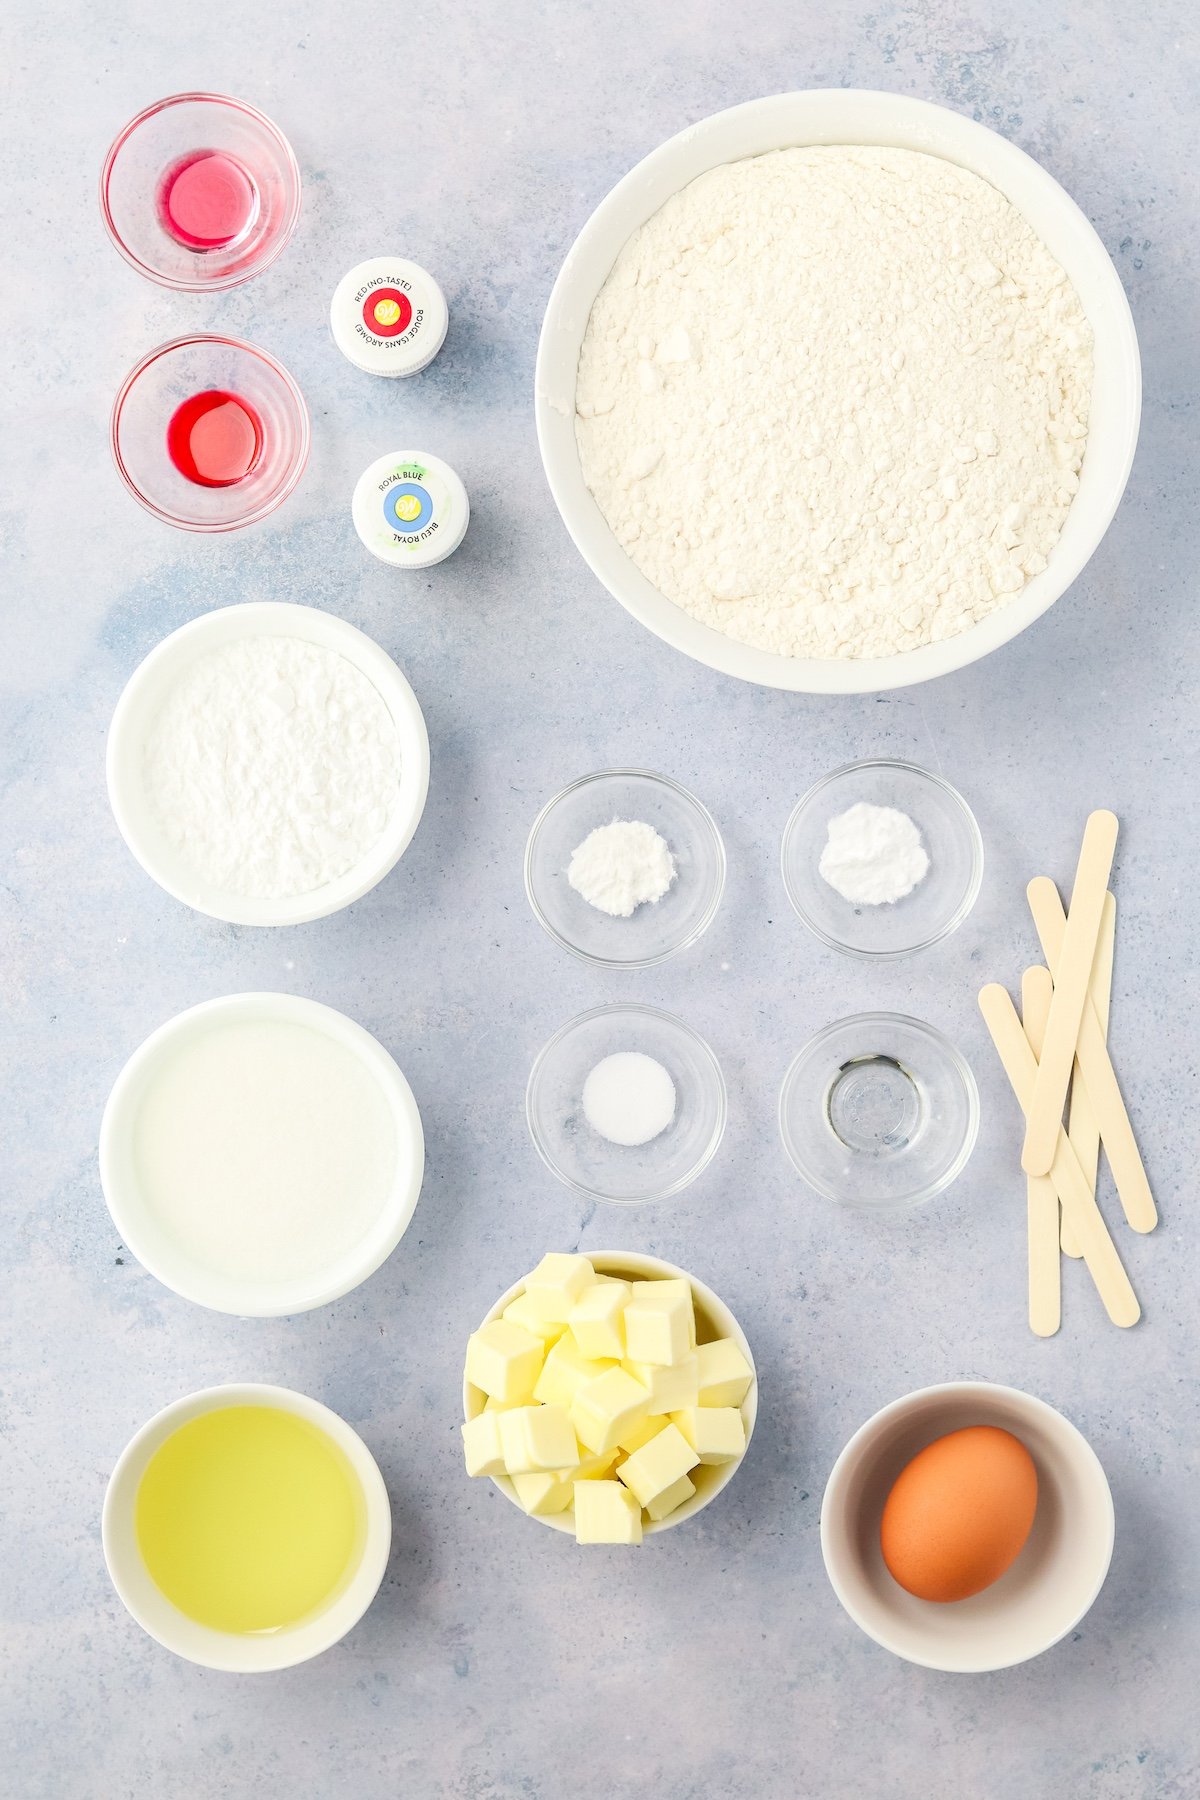
Ingredients
- All purpose flour
- Baking soda
- Cream of tartar
- Salt
- Butter
- Powdered or icing sugar
- Granulated sugar
- Egg
- Vegetable or canola oil
- Cherry extract
- Raspberry extract
- Lemon extract
- Red food coloring
- Blue food coloring
What Else You'll Need
- Cookie Sheet
- Parchment Paper
- Medium Mixing Bowl
- Stand Mixer with Whisk Attachment
- Plastic Wrap
- Sharp Knife
- Wooden Popsicle Sticks or skewers
How to Make Rocket Cookies
In a medium bowl, whisk together the flour, baking soda, cream of tartar, and salt until everything is mixed. Set the bowl aside.
In a stand mixer, beat the softened butter, powdered sugar, and granulated sugar on high speed for 4 to 5 minutes, until the mixture is smooth and fluffy.
Add the egg and oil to the bowl. Beat on high for about 2 minutes, or until well mixed.
Gradually add the flour mixture, about half a cup at a time, mixing until the dough forms and pulls away from the bowl's sides.
Split the dough into three even pieces. Leave one piece in the bowl and set aside the other two.
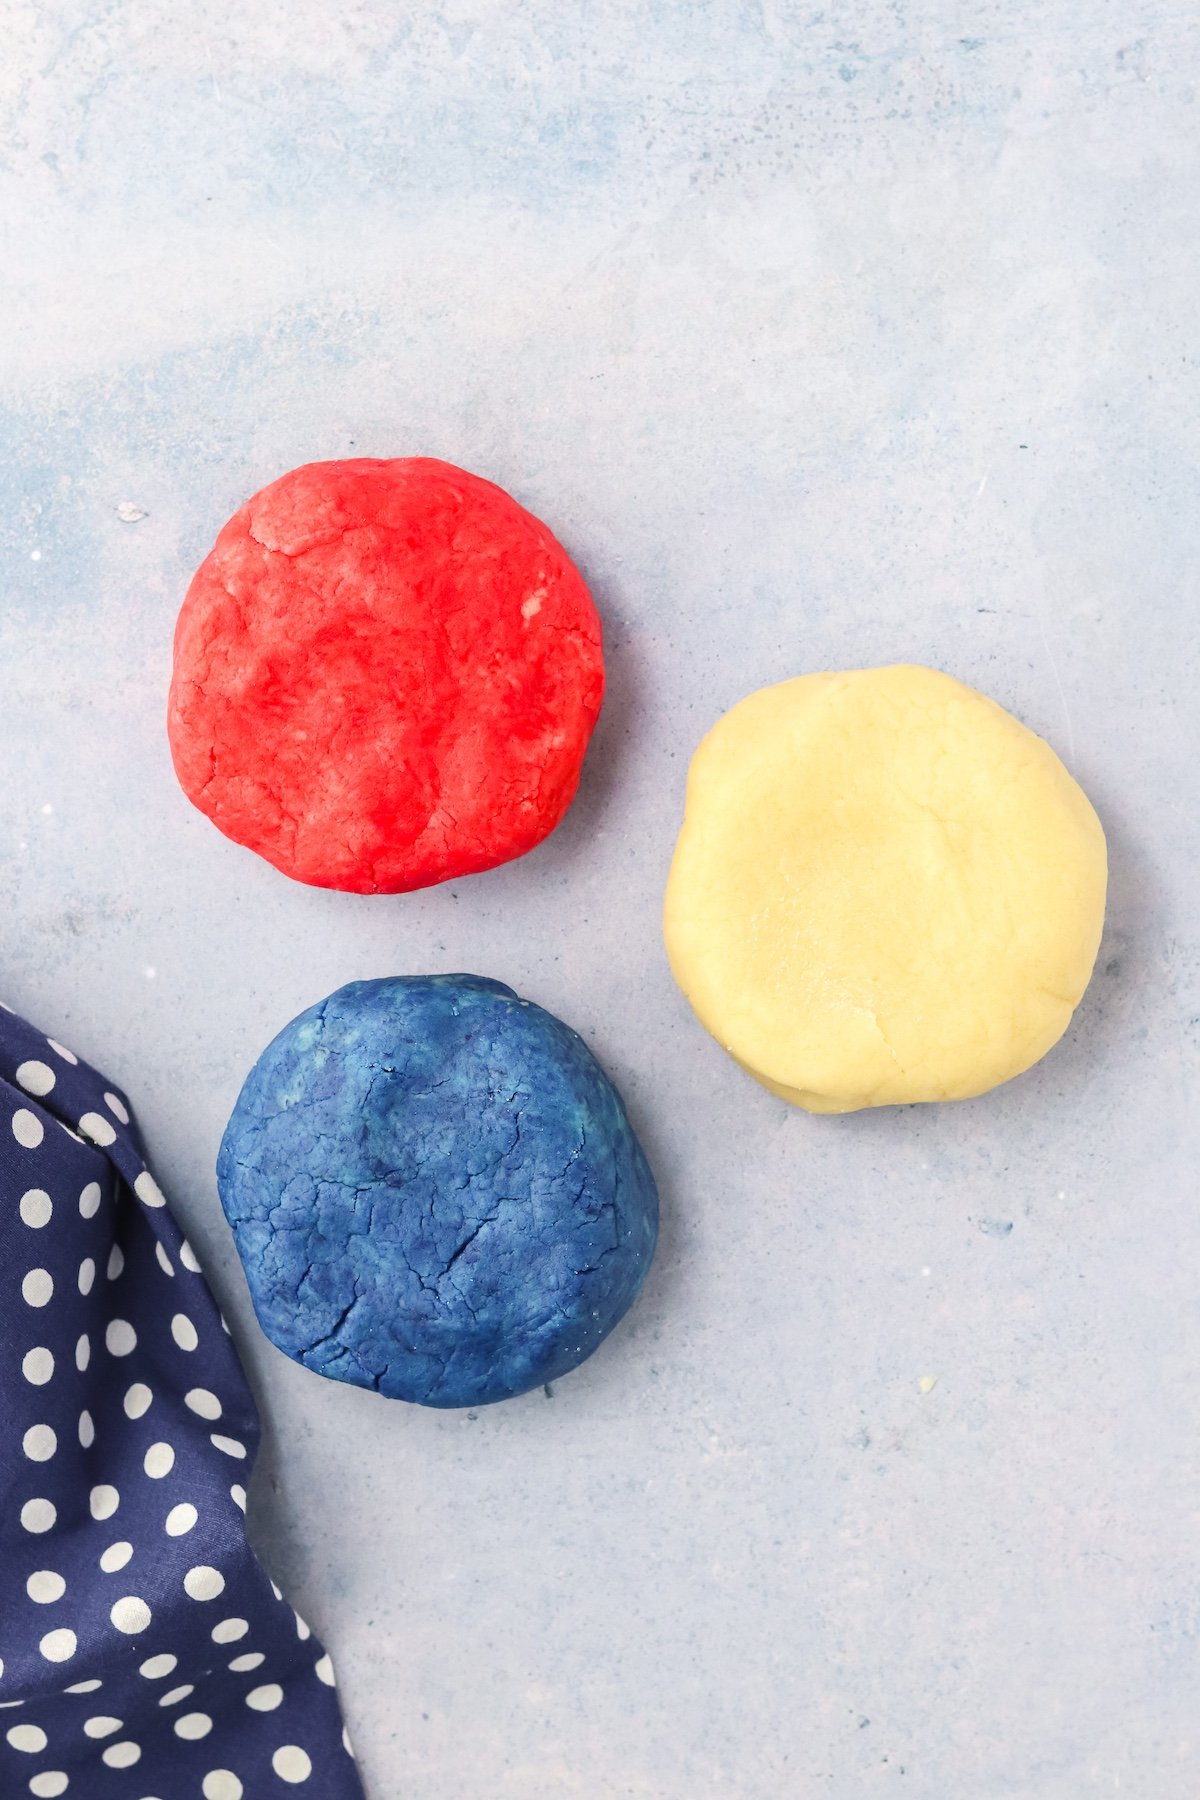
Add lemon extract to the dough in the bowl. Mix on high for 2 minutes, then remove and set aside. Place the second dough piece into the bowl. Add cherry extract and red food coloring, then beat on high until the color is fully blended. Remove and set aside. Add the last dough piece to the bowl. Pour in raspberry extract and blue food coloring. Mix on high until the dough turns blue.
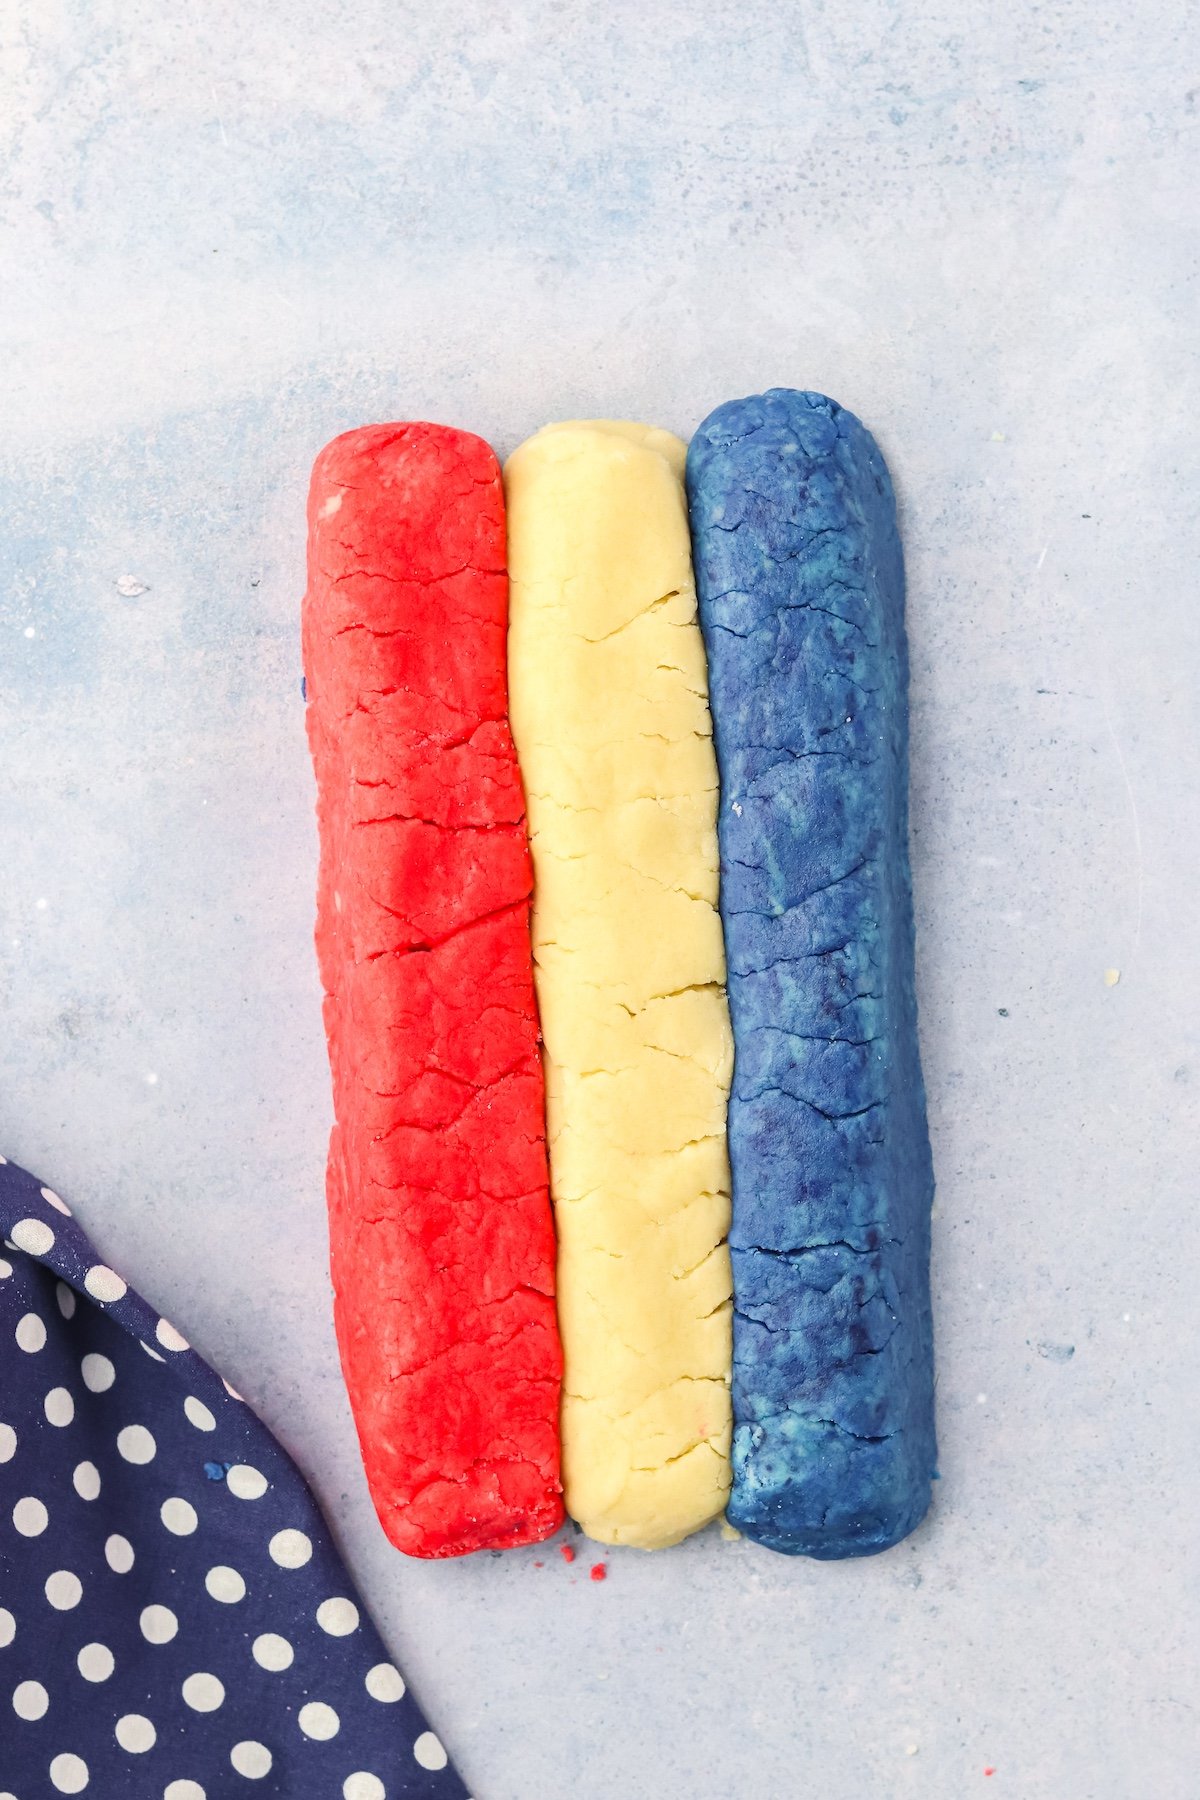
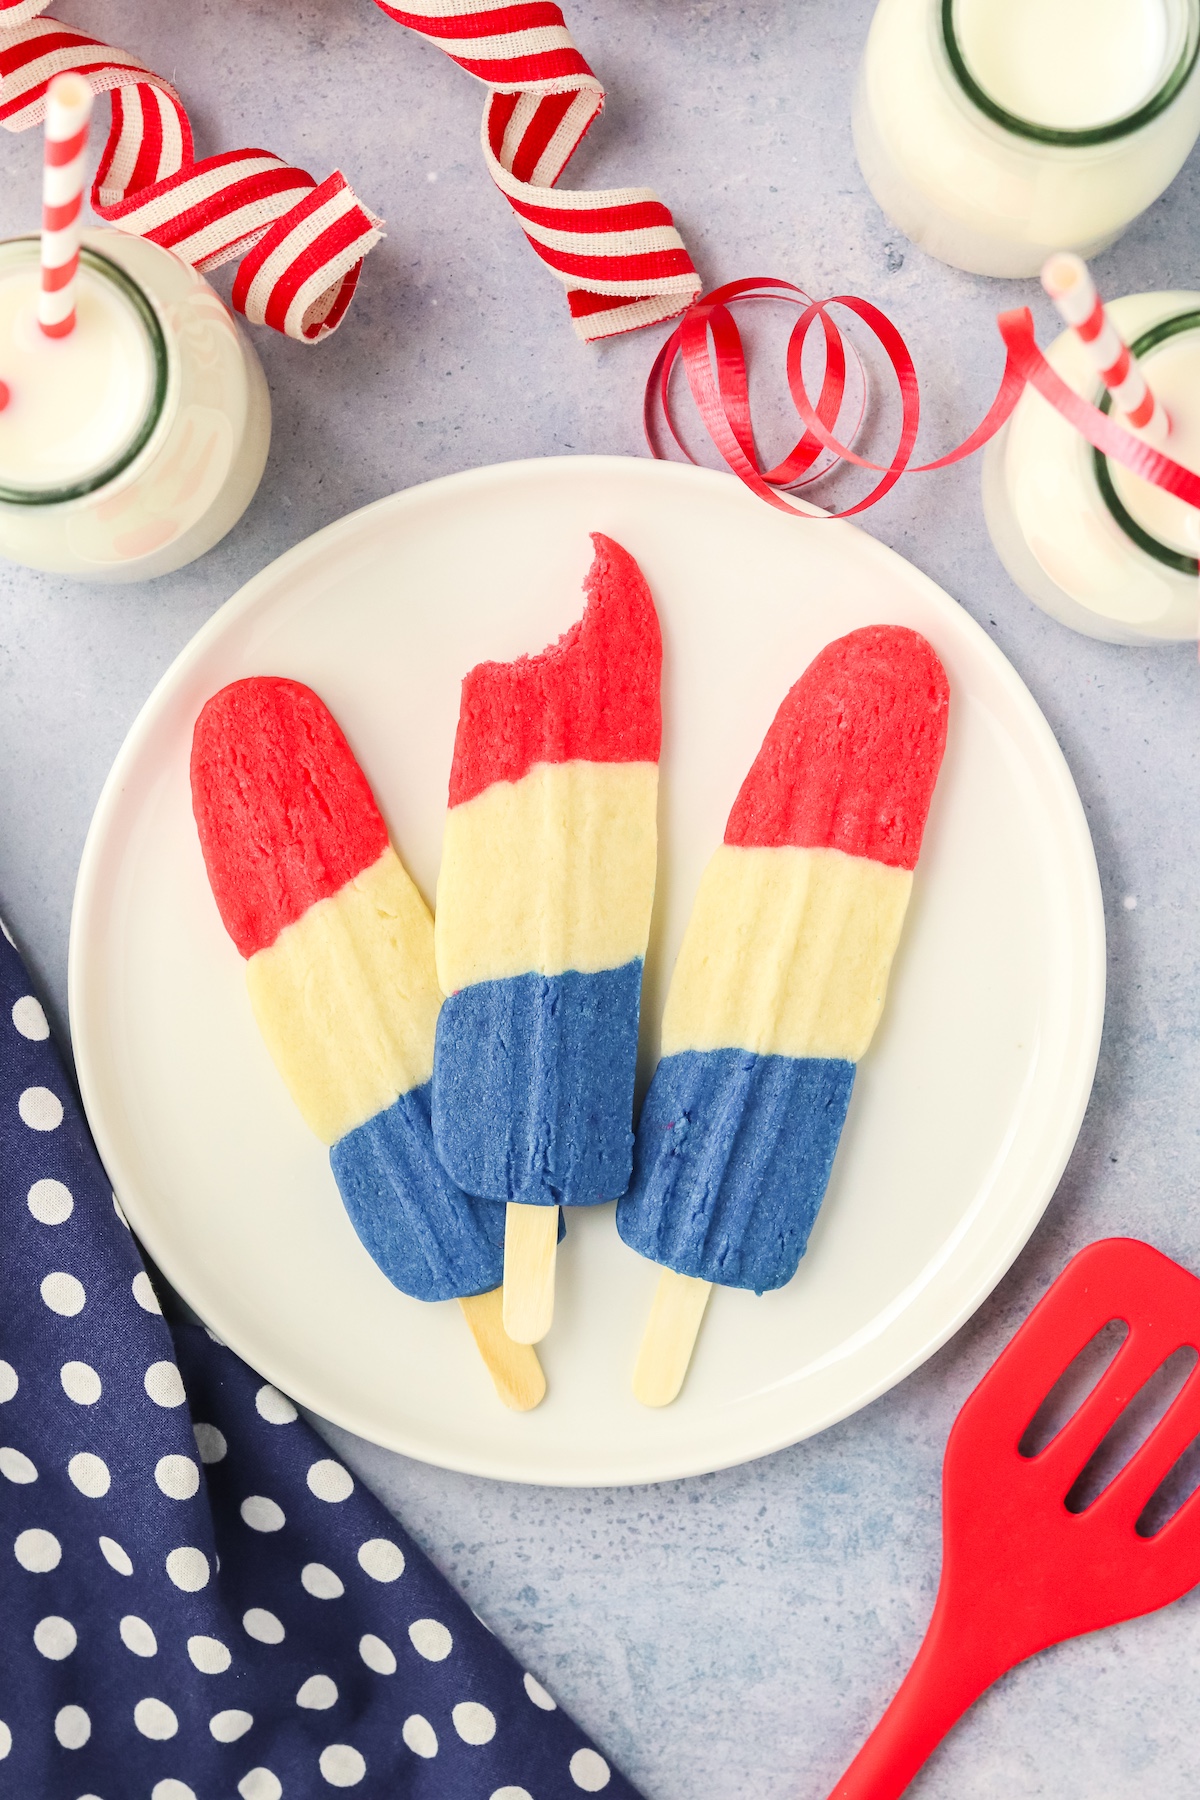
Shape each dough piece into a log about 8 to 10 inches long. Press the logs together with the red on one side, the blue on the other, and the plain dough in the center. Round the edge with the red dough and flatten the blue edge to get a popsicle shape when slicing. Wrap the dough in plastic wrap and chill for 30 minutes.
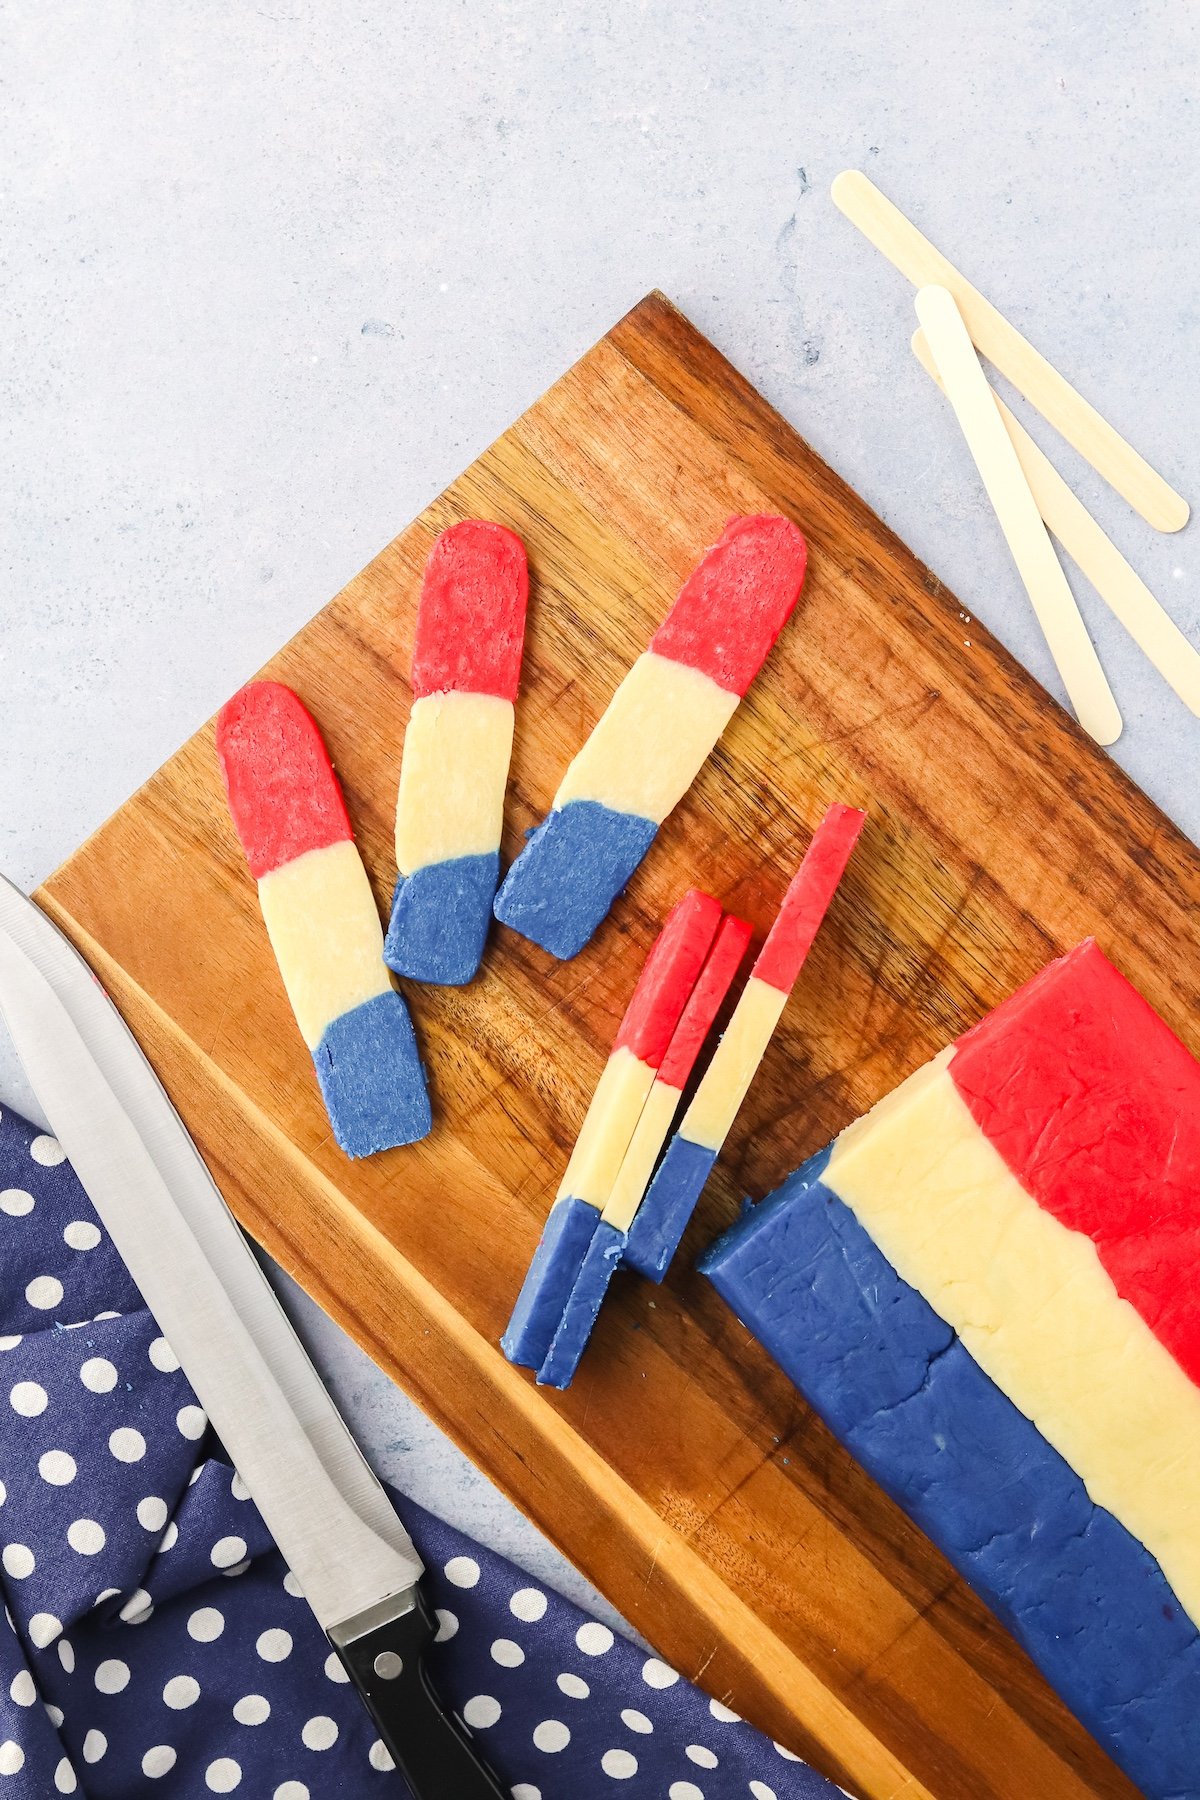
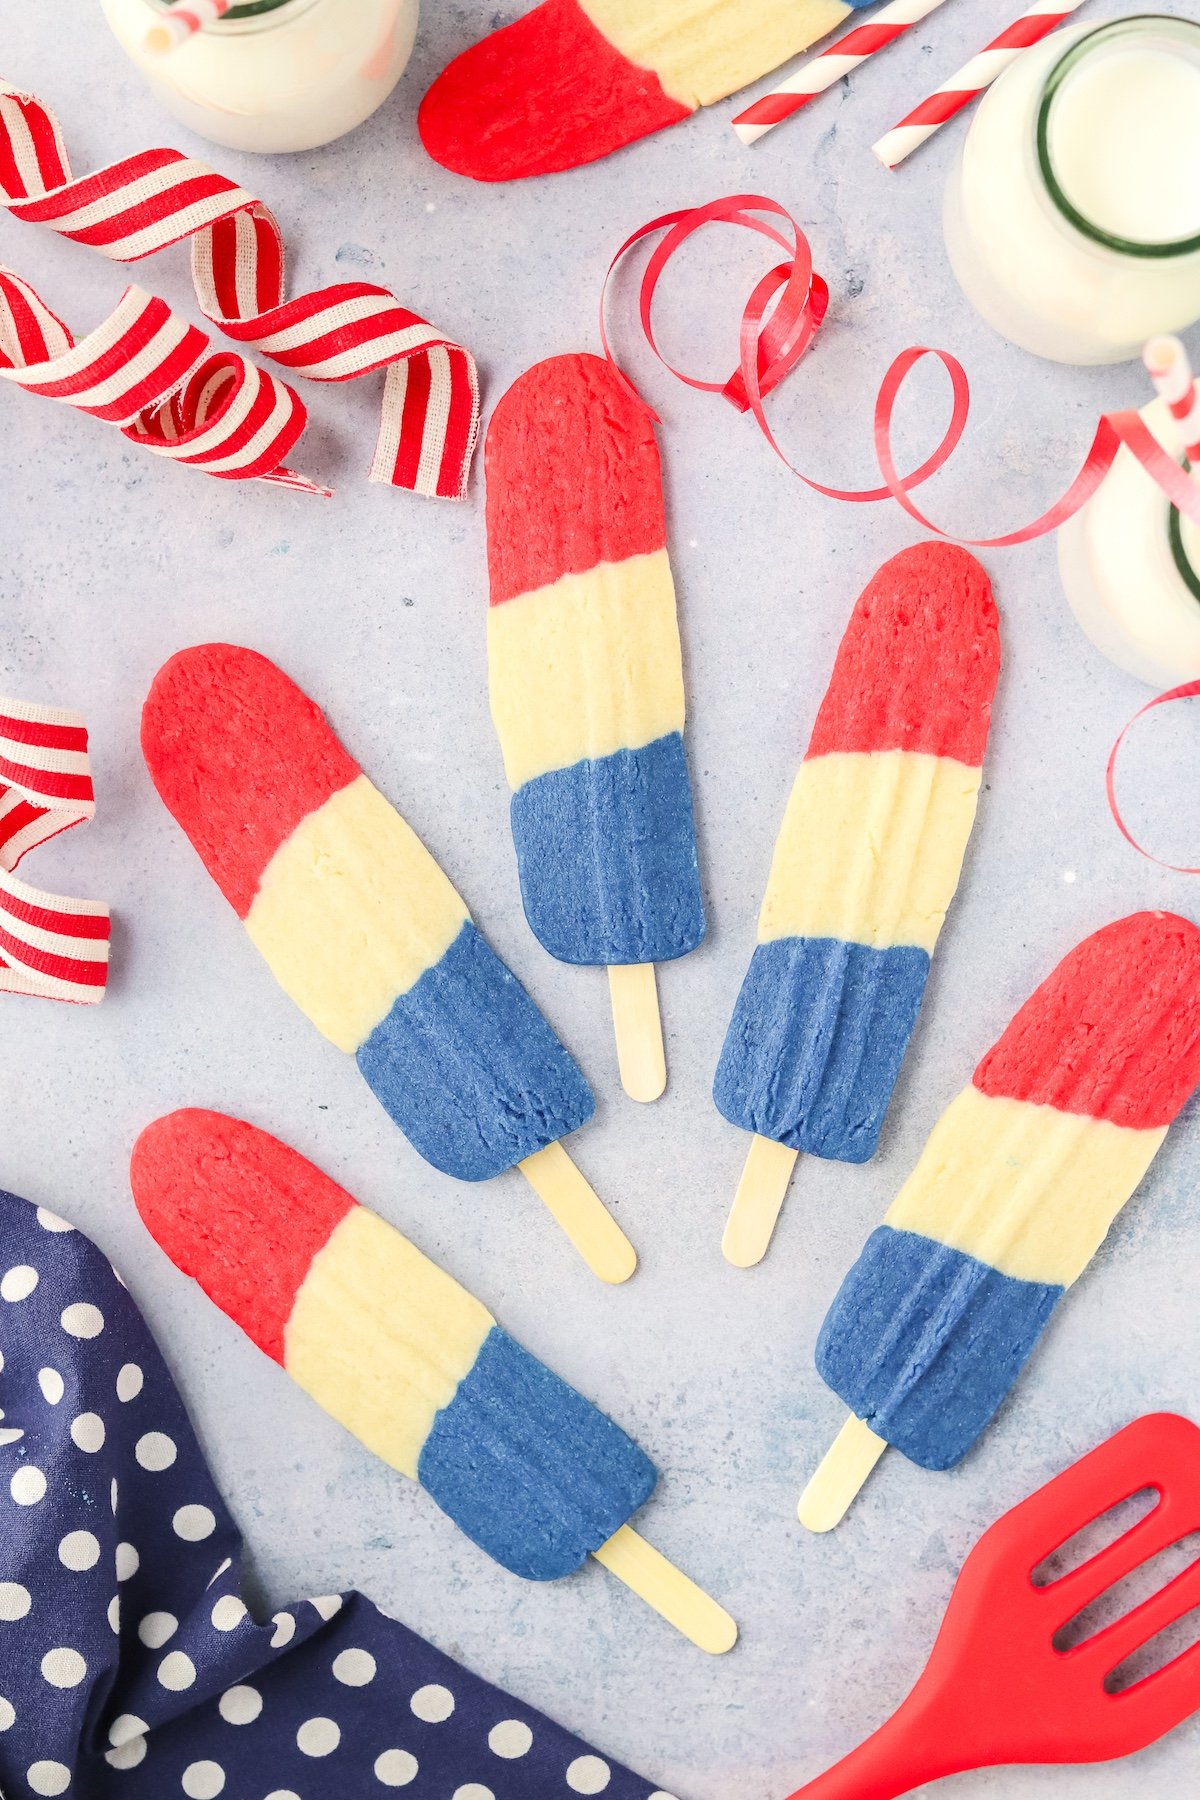
Heat the oven to 350°F. Unwrap the chilled dough and slice it lengthwise into strips about ¼ inch thick.
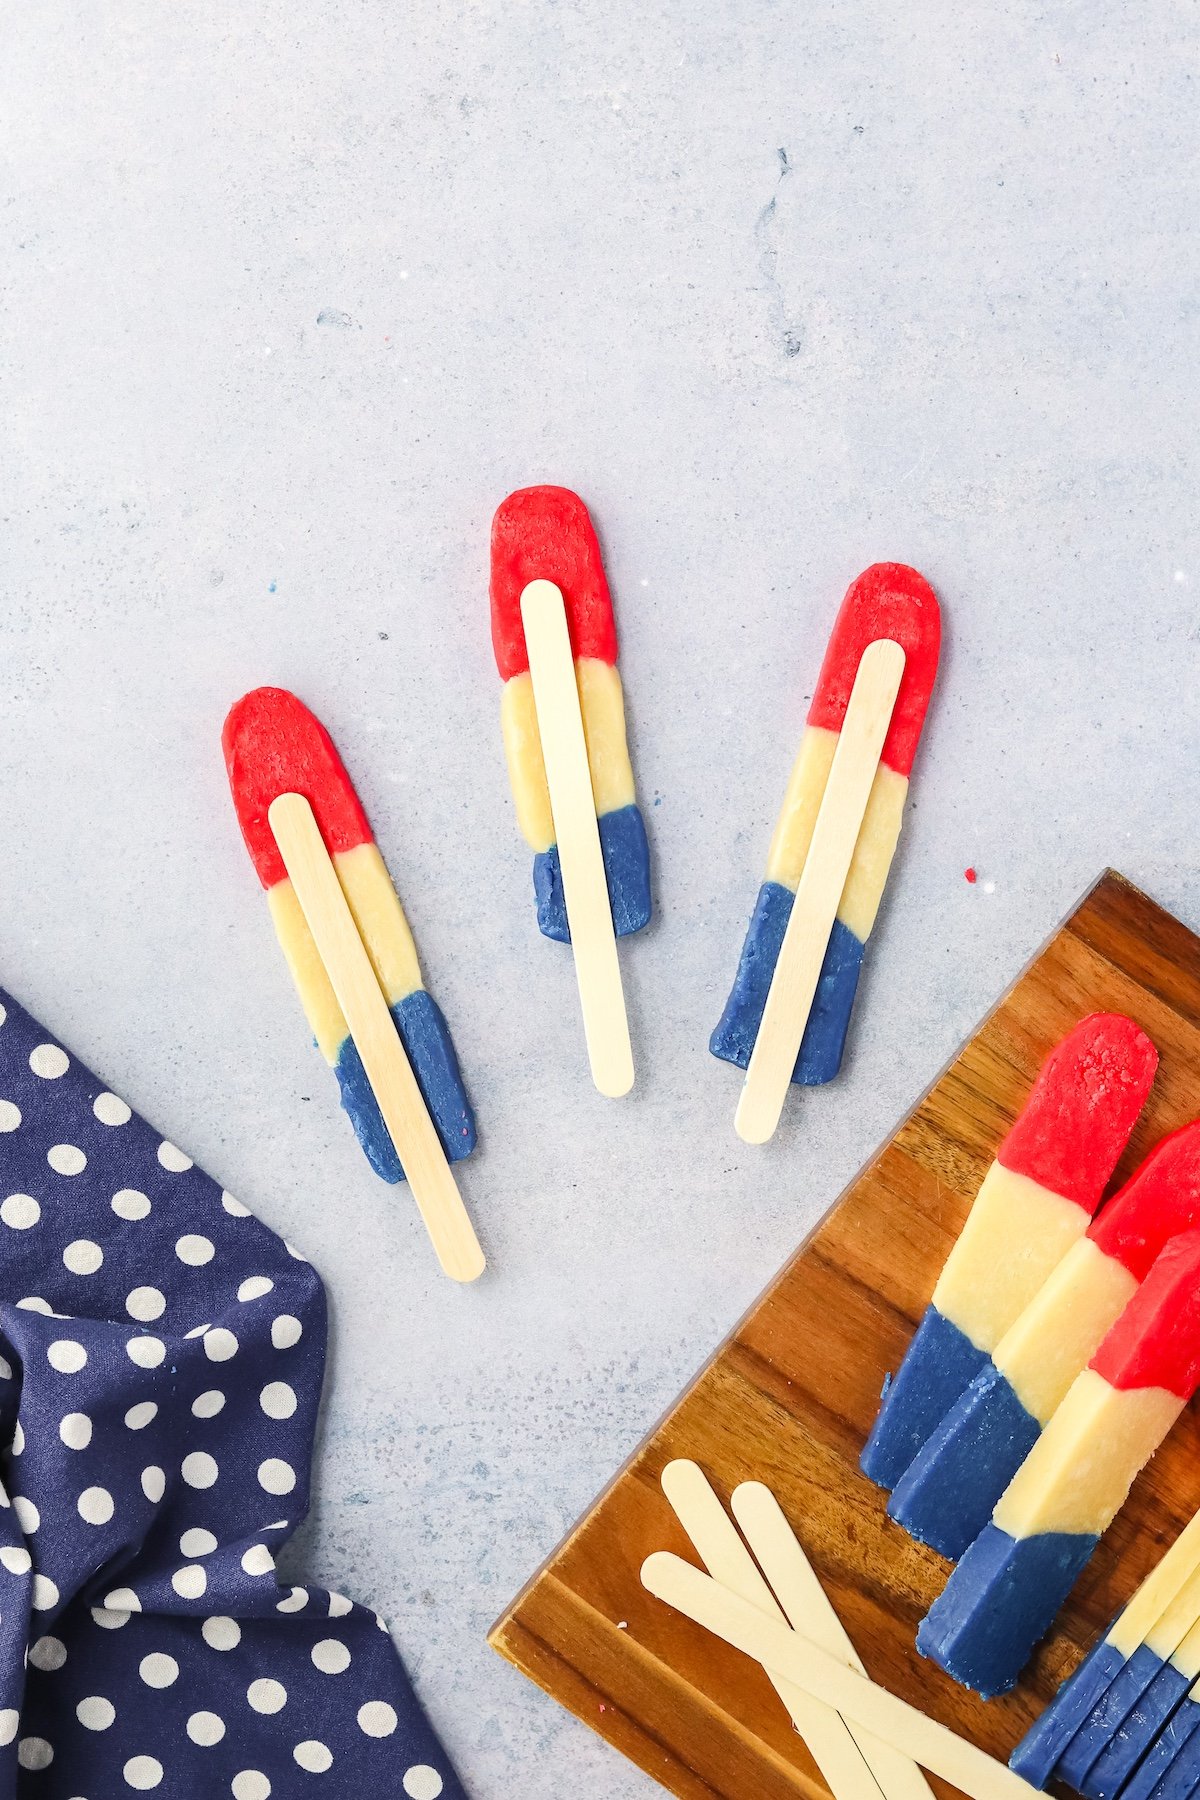
Gently press a popsicle stick into each cookie. Place the cookies on a baking sheet with the stick underneath. Space them at least an inch apart. Use a fork to create decorative ridges on the cookies.

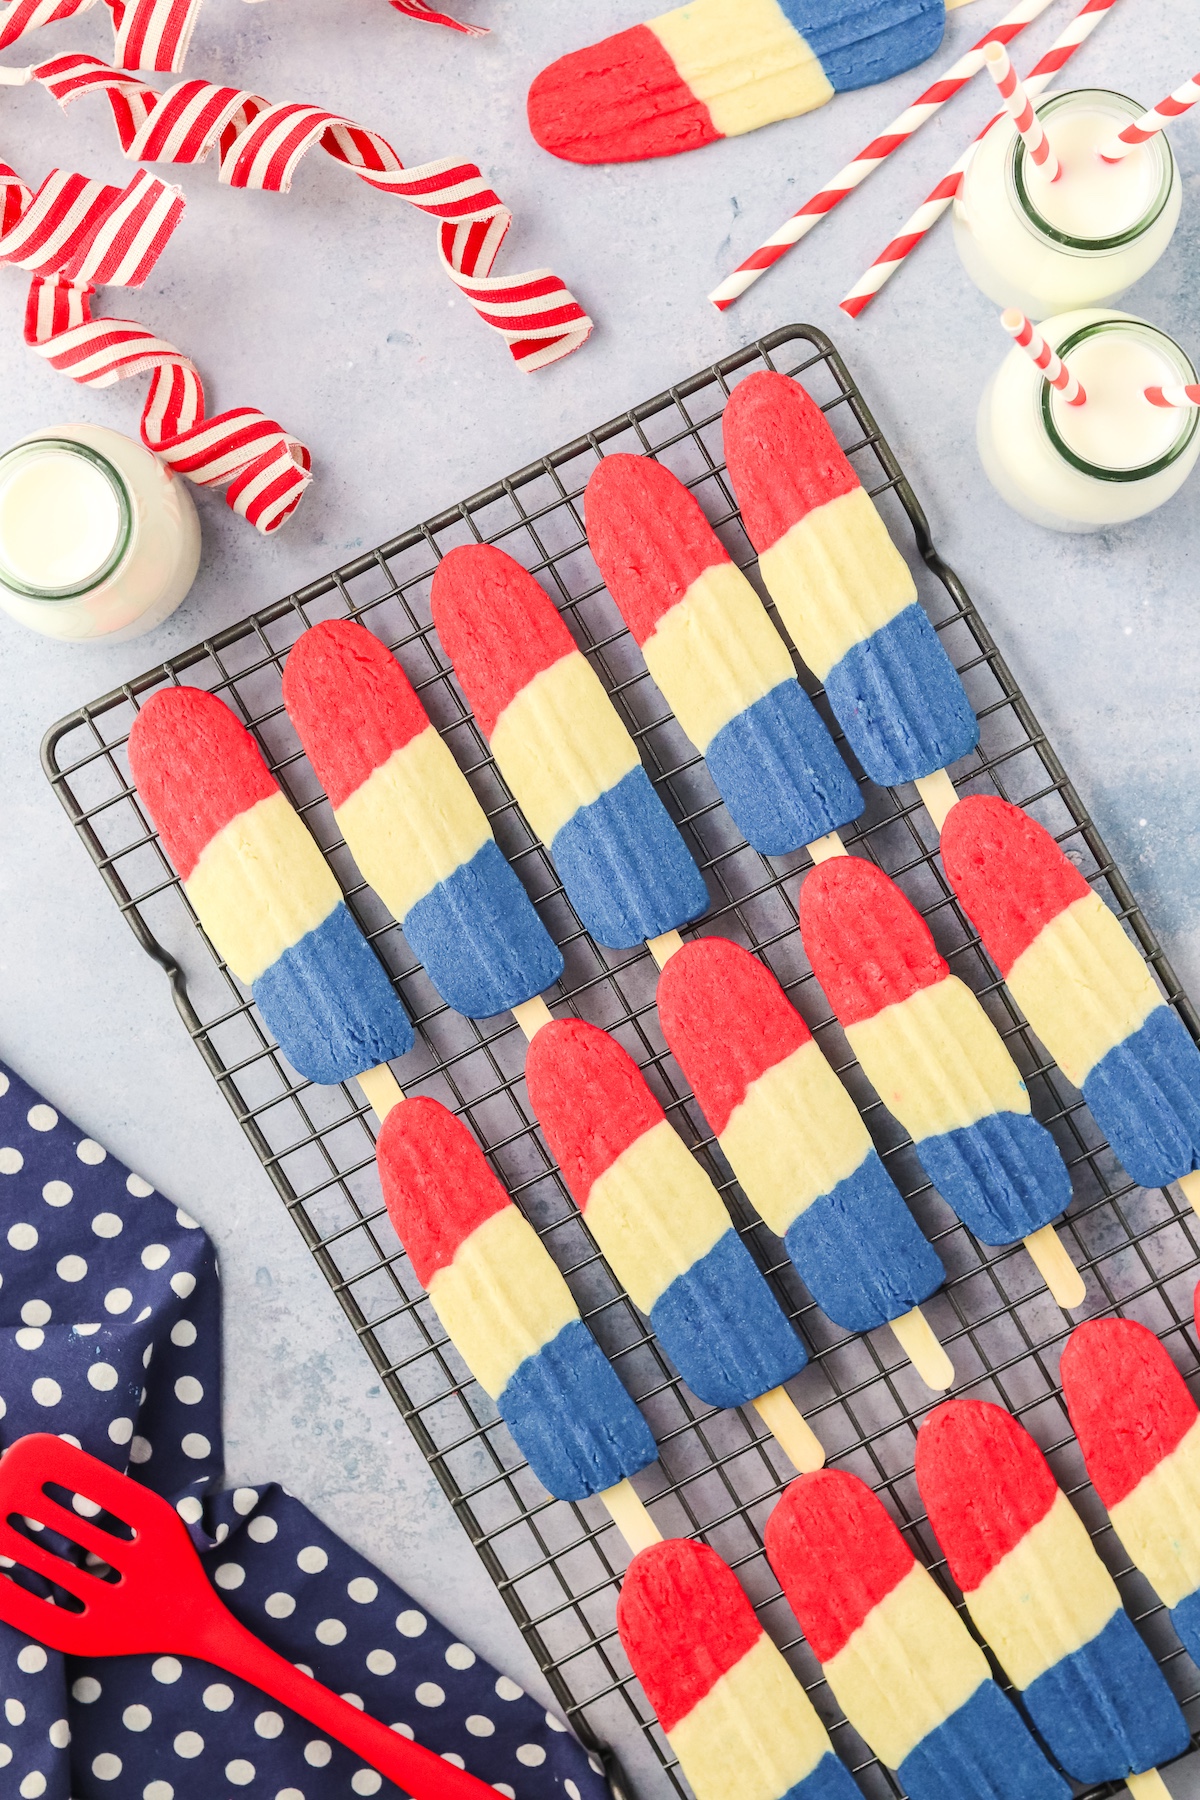
Bake for 10 minutes. The edges should be a bit darker and the tops look dry. Let the cookies cool on the baking sheet for 5 minutes, then move them to a wire rack to cool completely.
Enjoy once cooled.
Presentation Ideas for Parties and Celebrations
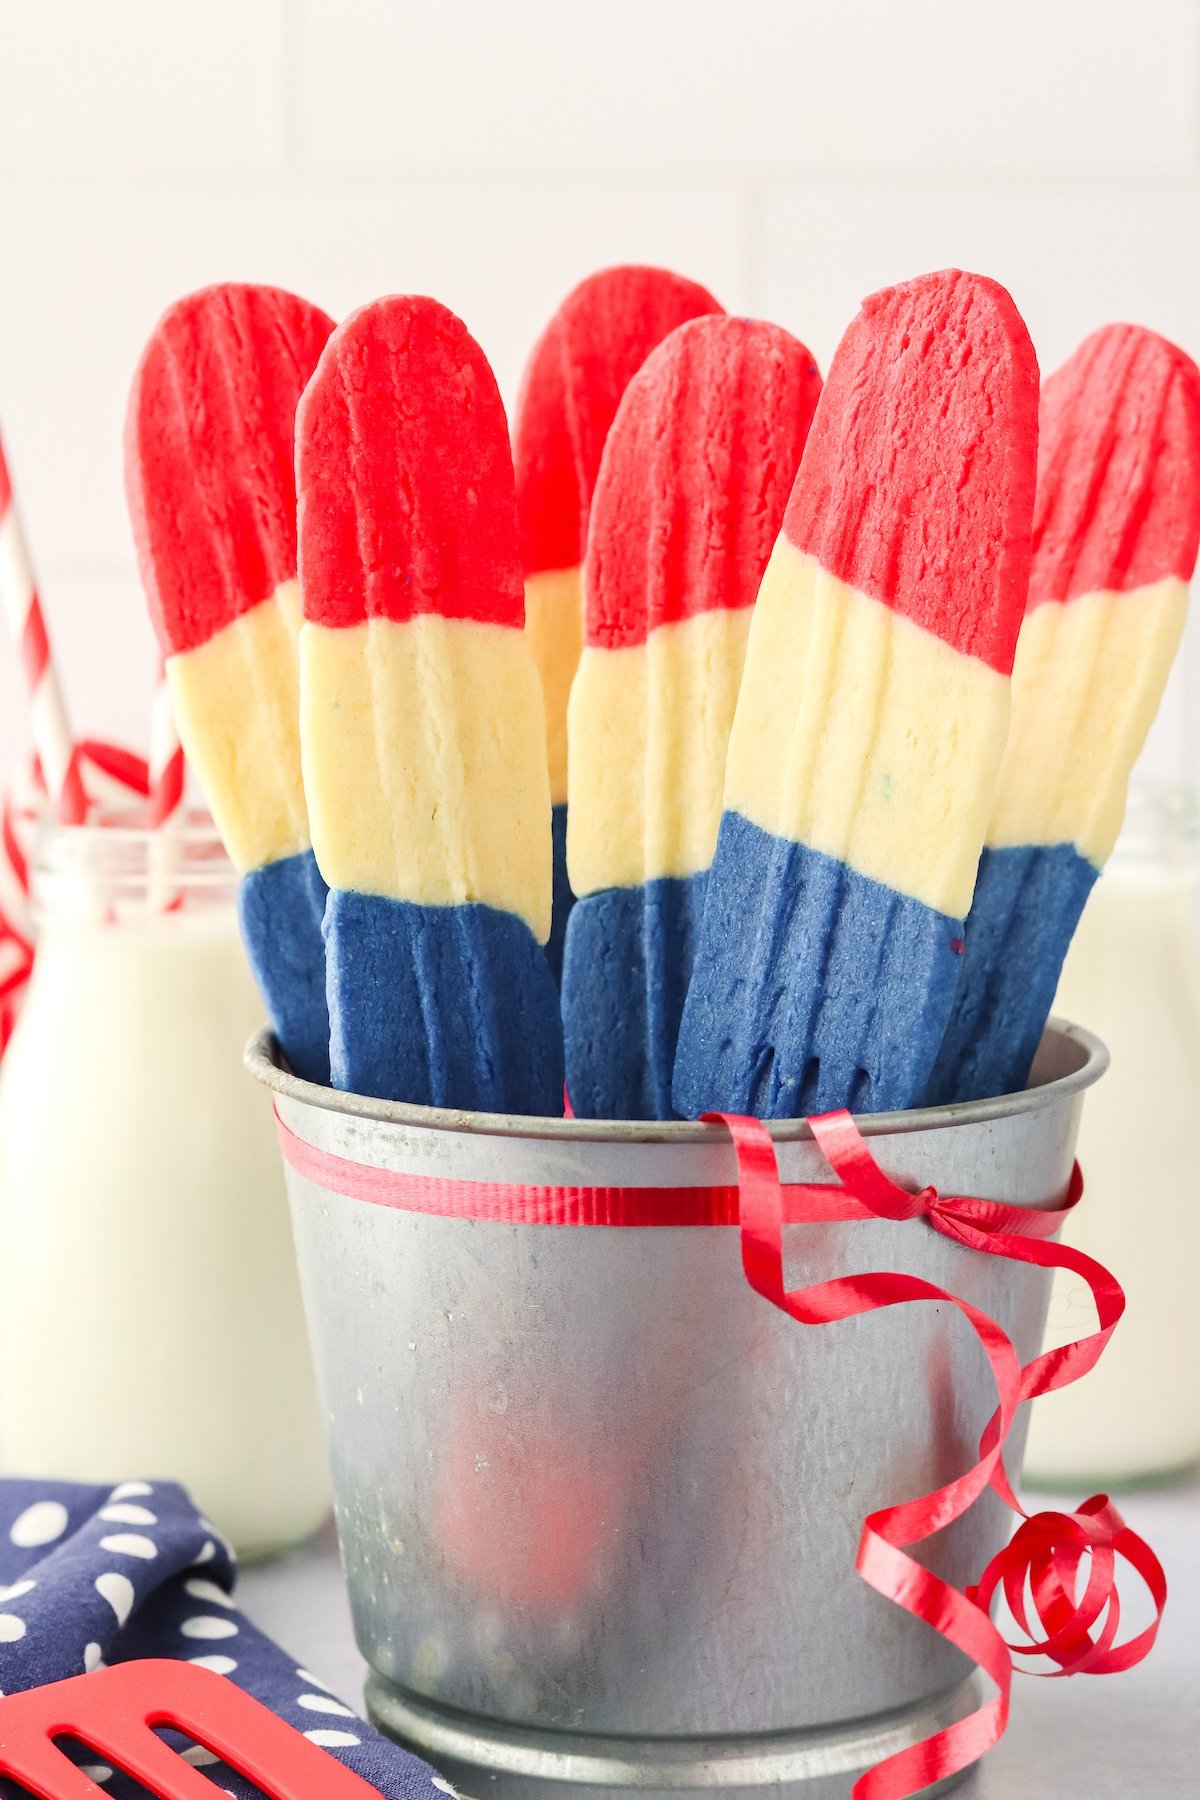
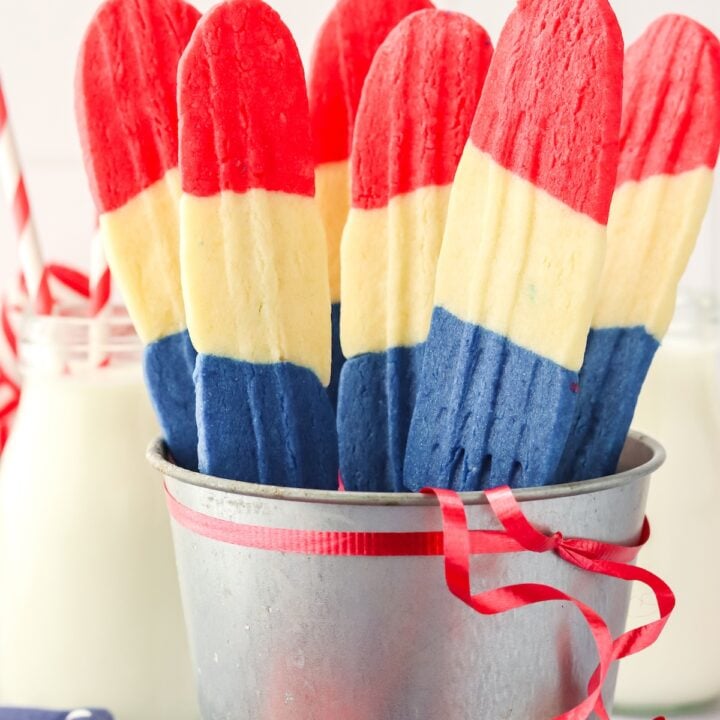
Rocket Cookies shine brightest when they’re displayed with a bit of thought. Line them up on a platter, stick-side up, for a popsicle parade. You can:
- Arrange cookies upright in mason jars filled with blue candy for a red-white-blue pop.
- Stand cookies in a styrofoam block covered with festive wrapping paper, so the cookies look like they’re taking off.
Tips and Tricks for Perfect Rocket Cookies
Making Rocket Cookies is fun, but a few smart moves can make your cookies look sharp and taste even better. Whether you’re baking for kids, holidays, or a bake sale, these tips will keep your batch looking tidy, neat, and party-ready.
Getting the Colors Just Right
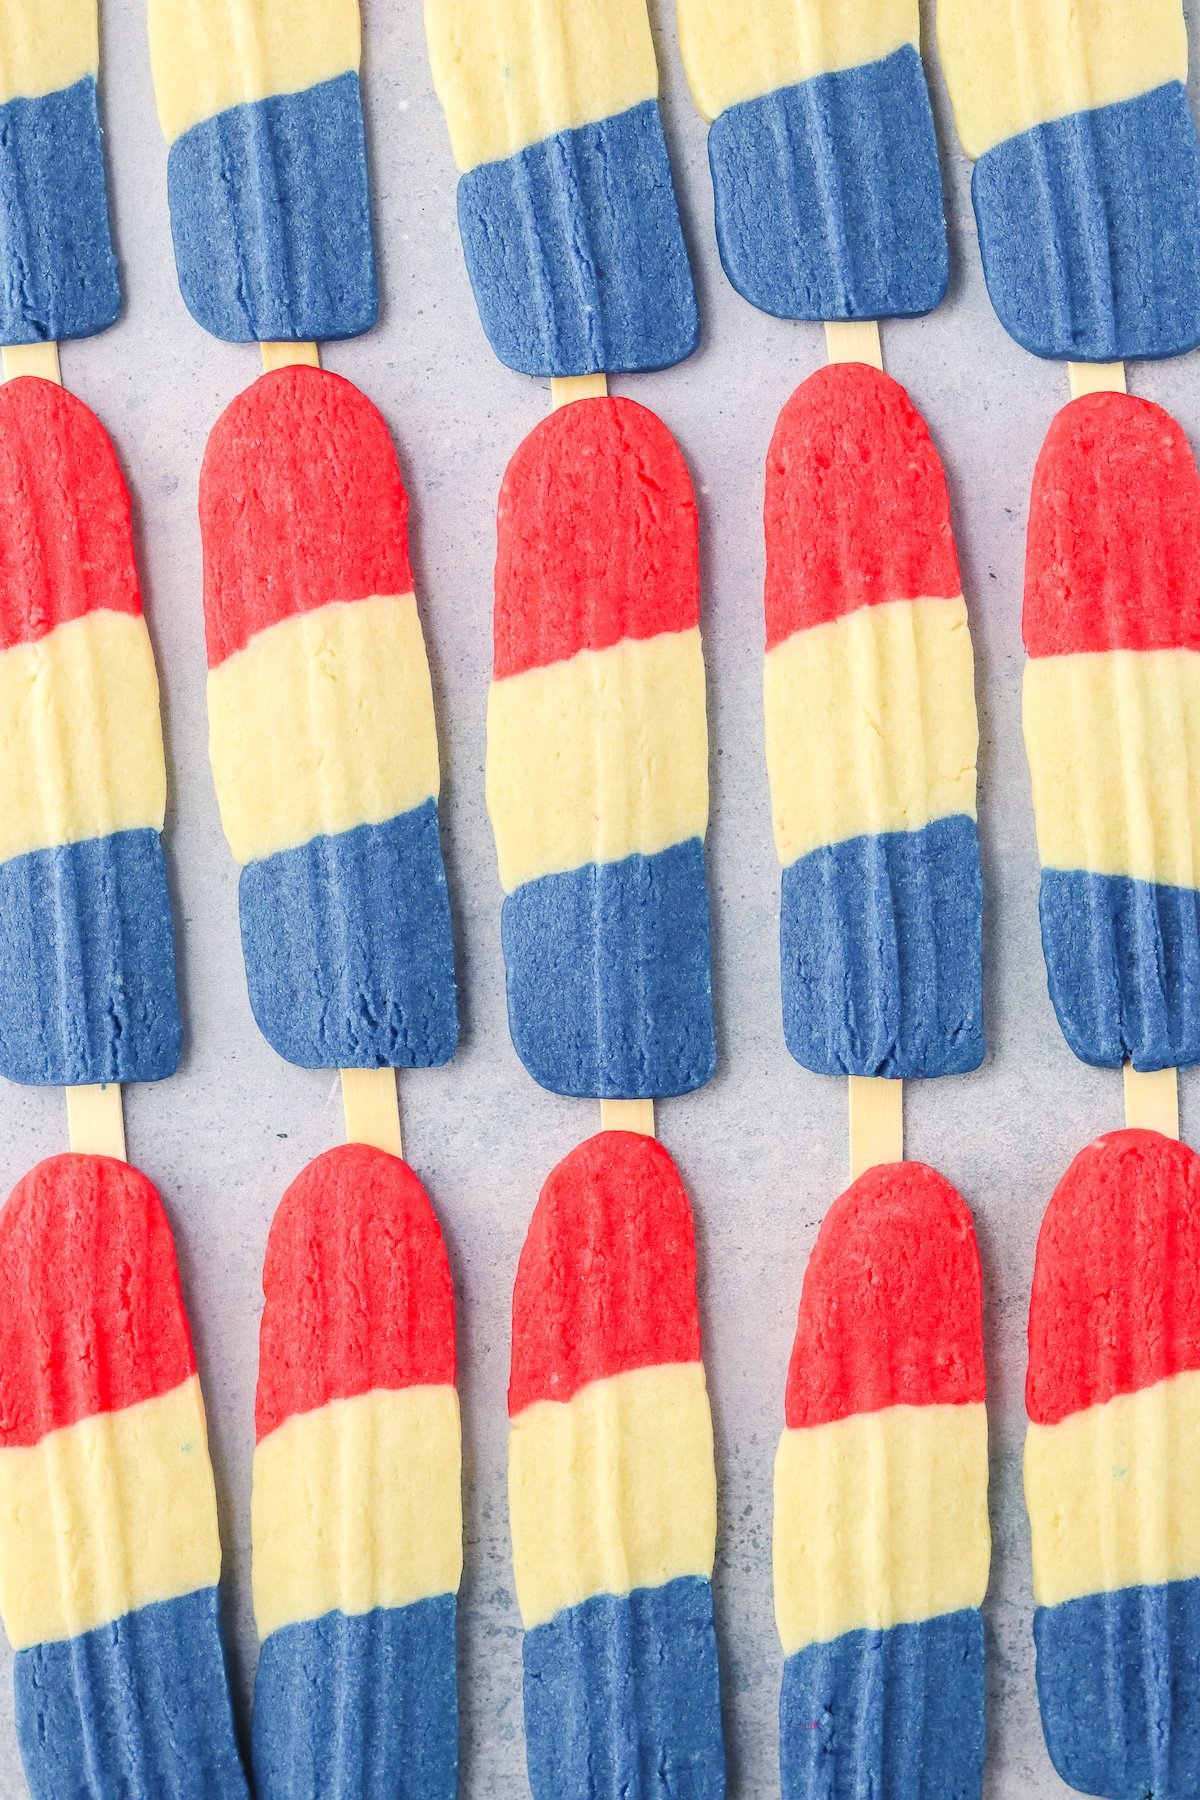
Bright, clean stripes are what set Rocket Cookies apart. The trick is in the colors and how you mix them:
- Use gel food coloring, not liquid. Gels are bold, so you need less for strong color and your dough won’t get sticky.
- Color the dough in the recipe order—white, then red, then blue. This keeps cleanup to a minimum since lighter colors go first.
- Add color one drop at a time. Go slow until you see the shade you want.
- Mix the dough until the color is even. If there are streaks, keep mixing—no one wants a patchy rocket.
Shaping for Sharper Rockets
Getting that popsicle shape is easy, but the finer details matter. Take a minute and:
- Stack the three dough logs snugly together so each stripe is the same thickness.
- Round off the red end gently so you get that “nose cone” look.
- Flatten the blue side a little to mimic a rocket’s base.
- Wrap the dough log tightly in plastic wrap. Press and smooth the sides so everything sticks together and chills evenly.
When slicing, use a sharp knife and a gentle hand. If your slices get a little wobbly, just press them back into shape before baking.
Popsicle Sticks and Cookie Shape
Popsicle sticks turn cookies into a party, but you want them to stay in place:
- Gently wiggle the stick about halfway into the cookie. Don’t push all the way through or the dough can split on the other side.
- Place cookies popsicle-stick side down on the baking sheet so everything bakes flat and sturdy.
- Use wooden sticks only, not colored or plastic.
Chilling is your best friend here. Cold dough won’t spread much, so your rockets keep their popsicle look and are less likely to break.
Even Baking and Crisp Edges
A good bake brings everything together. Follow these easy steps for cookies that stay soft in the middle but hold their shape on the outside:
- Always bake cookies on parchment paper. This keeps the bottoms from over-browning and makes cleanup quick.
- Leave at least 1 inch between each cookie. This stops them from merging together when baking.
- Don’t overbake—edges should look barely golden, and cookies should feel set but slightly soft in the center.
- Let cookies cool on the pan for a few minutes before moving them to a rack. They’ll firm up as they cool.
Quick Fixes for Common Cookie Issues
Little baking hiccups happen. Here’s how to turn things around:
- If dough starts to get sticky or too soft, pop it into the fridge for 10 minutes.
- If your cookies come out uneven, press the edges in gently (using a spatula) while they’re still warm.
- If a stick comes loose, reinsert it once the cookie cools—just do it gently.
Variations and Substitutions
Rocket Cookies are super flexible, you can always mix things up to fit your taste, needs, or the ingredients on hand.
Color Swaps for Every Occasion
You don’t have to stick with red, white, and blue. These cookies look great in any set of bright colors. Planning a birthday party or a themed celebration? Try one of these combos:
- Rainbow Rockets: Use all your favorite bold colors to make rainbow layers.
- Team Spirit: Match your child’s school or favorite sports team colors.
- Seasonal Vibes: Orange, white, and purple are perfect for Halloween. Try pastels for Easter or St. Patrick’s Day greens.
Gel food coloring tends to work best for strong, even hues. If you only have liquid, just start with a small amount so the dough doesn’t get too sticky.
Flavor Substitutions
No cherry or raspberry extract? No problem. You can easily swap the extracts and still have plenty of flavor:
- Vanilla extract: Use it in any layer for a mellow, sweet base.
- Almond or coconut extract: Adds a twist and pairs nicely with fruit flavors.
- Citrus zest: Lemon, orange, or lime zest can give a fresh pop—just a teaspoon per dough portion.
- Mixing extracts works well, too. Combining vanilla with a fruit extract in the same portion can add depth without overpowering.
Ingredient Swaps
If you run out of something, here are easy backup plans:
- No cream of tartar: Skip it, or use a dash of lemon juice for a little extra tang.
- Out of butter: Margarine or plant-based spreads work in equal measure.
- Vegetable or canola oil: Any neutral oil like sunflower or safflower works fine.
More Cookie Recipes
Rocket Cookies
Make snack time feel like liftoff with Rocket Cookies! Enjoy a hands-on, creative recipe that turns every baking session into a mini celebration.
Ingredients
- 3 cups (16oz, 450g) all purpose flour
- ½ teaspoon baking soda
- ½ teaspoon cream of tartar
- ¼ teaspoon salt
- ¾ cup (6oz, 175g) butter, softened
- ½ cup (2.3oz, 65g) powdered or icing sugar
- ½ cup (3.5oz, 100g) granulated sugar
- 1 egg
- ⅓ cup (2.7fl.oz., 80ml) vegetable or canola oil
- ½ teaspoon cherry extract
- ½ teaspoon raspberry extract
- ½ teaspoon lemon extract
- red food coloring
- blue food coloring
Instructions
1.In a medium mixing bowl, whisk the flour, baking soda, cream of tartar and salt all together until combined. Set aside the bowl for a minute.
2.In the bowl to your stand mixer, beat together the softened butter, powdered sugar and granulated sugar on high until smooth and fluffy, about 4-5 minutes.
3.Add the egg and oil and continue beating on high until thoroughly combined, about 2 minutes.
4.Add the flour mixture to the bowl, about a ½ cup at a time until the dough has come together and the sides of the bowl are clean.
5.Divide the dough into 3 equal portions. Set aside 2 of the portions, leaving the third one in the bowl.
6.Add lemon extract to the dough in the bowl and mix on high for 2 minutes. Remove the dough from the bowl and set aside. Add the second dough ball to the bowl. Add the cherry extract and red food coloring to the bowl. Beat on high until the color is mixed through the dough. When done, remove from the bowl and set aside. Lastly, put the third dough portion in the bowl. Add the blue food coloring and raspberry extract to the bowl. Beat on high until the dough is blue.
7.Shape each dough portion into a 8-10 inch log. Press the dough logs together with the red on one side and blue on the other of the uncolored dough. Round the red edge of the dough block and flatten the blue side of the dough. The idea is to have a popsicle shape when we slice the cookies. Wrap the dough in plastic wrap and chill in the fridge for 30 minutes.
8.Preheat the oven to 350 degrees Fahrenheit. Unwrap the chilled dough and use a sharp knife to slice lengthwise about ¼ inch wide.
9.Lightly press a popsicle stick into each cookie. Place on a baking sheet with the popsicle stick on the underside. Keep the cookies at least 1 inch apart. Use a fork to make decorative ridges into the cookie.
10.Bake for 10 minutes in a preheated oven. The edges will be darker and the cookie will appear dry. Cool on the pan for 5 minutes before moving to a cooling rack to cool completely. Enjoy when cooled.
Notes
Tools Needed:
•cookie sheet
•parchment paper
•medium mixing bowl
•stand mixer with whisk attachment
•plastic wrap
•sharp knife
•wooden popsicle sticks or skewers
Nutrition Information
Yield 24 Serving Size 1Amount Per ServingCalories 72Total Fat 1gSaturated Fat 0gTrans Fat 0gUnsaturated Fat 0gCholesterol 8mgSodium 52mgCarbohydrates 15gFiber 0gSugar 3gProtein 2g
This nutritional information is for reference only. We are not responsible for these calculations.