Pinterest Remake: DIY Serving Tray
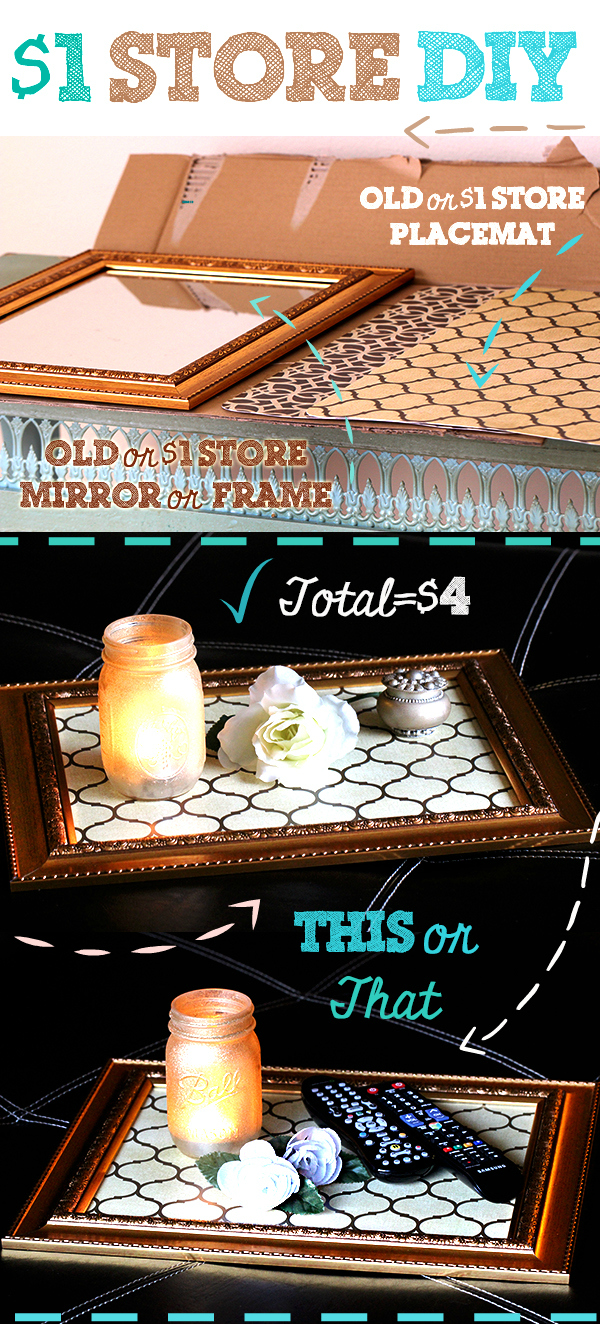
Hey, guess what? It's Pinterest Remake time again! Since I hang out on Pinterest way more than I should, there are TONS of ideas that I've been wanting to try. One of them is a DIY Serving Tray that's typically made using an old picture frame or one purchased on the cheap at a $1 store. Now, do you remember the project I did last month? If not, check those out now! Pretty cool Gold Confetti Drinking Glasses. Those were fun to make! For today's little pin remake adventure, I have to admit is not really based on just one particular pin. There are just SO many of them with all different styles and ways to do it. Today, I'm putting my own twist on it based on the things I scoped out at Family Dollar. My total to make this? $4! Not too shabby since I purchased the items new. If you already have a frame or mirror you can upcycle, that's even better!
Although we moved two or three months ago, I still haven't put the finishing touches on my living room (oh and dining room too). Yeah, a lot of work to do yet. But, after spending a ton of moving costs, we're trying to really stretch our budget right now.
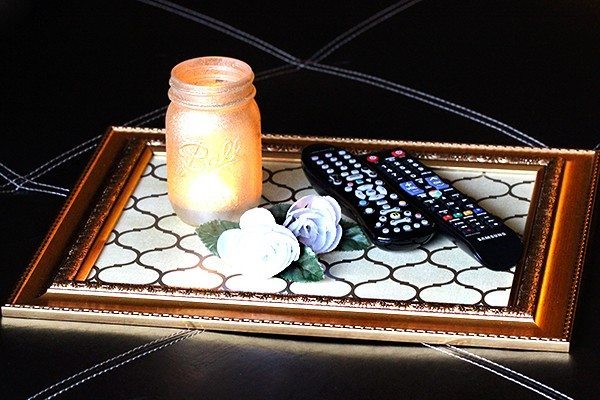
We've been desperately needing some living room decor because we're now using most of our old stuff in the dining room. Currently, we have a giant "brownie" colored and shaped coffee table thingy and it looks funny without anything on top. This quick and easy "serving tray" really did the trick. As an added bonus, all of the trays that I was considering buying run from about $20 - $40.
I just need to decide if we'll keep it functional to store our remote controls on or go the decorative route. Time will tell. You'll have to tell me what you think 😉
Sorry, I'm rambling big time. Can you tell that I haven't had company in a while? The price we're paying for moving so far away. See, there I go again. Anyway, here is one of my favorite Pins showcasing a DIY Picture Frame Tray. If you want to see a whole slew of different ways people have done these, just search "picture frame tray". Most people tend to either glue or screw in handles, but for the sake of simplicity I decided against that for the moment.
DIY Serving Tray
So, here's what I used:
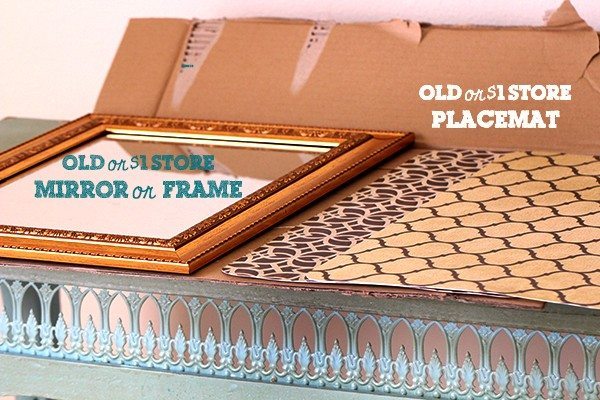
- Framed Mirror (You could use just a regular frame - upcycle or $1 store)
- Placemats (I got some at the $1 store)
Just to clear up some confusion, I purchased the mirror because I fell in love with the frame. I would have preferred a frame as it would have made this project much more simple. I had some trouble trying to remove the mirror panel, so instead of putting the trimmed place mat in the frame, I had to trim and tuck in on top instead. I have to admit that I love it this way after all.
I used measuring tape to get the exact height and width, then I trimmed the place mat just a little longer and wider which allowed me to tuck it into the corners perfectly. The beautiful part? It will be easy to clean and since I didn't glue it, I can also switch out the place mat anytime. Total win!
Want more fun Pinterest Remakes? Make sure to visit a few of my favorite blogs to see what they came up with this month:
- Pumpkin Mini Baked Donuts Recipe with Apple Sauce by Our Family World
- DIY Whipped Body Butter by My So Called Balanced Life
- DIY Skin Detox Body Scrub by Oh So Savvy Mom
- Apple Nachos with Peanut Butter and Chocolate by Mom Always Finds Out
- Pinterest Inspired Bud Vase - A Simple DIY Craft by Three Different Directions
- DIY Spring Clothespin Wreath by Simply Southern Mom
- Oatmeal Energy Balls Recipe by A Magical Mess
- Thumbprint Birthday Cards by Upstate Ramblings
- DIY Nail Art: Easy Geometric Style by LW Vogue
So, what do you think?
Should I use this tray to display and showcase things or should I use it to make my remote controls look a little less pointless?
(Oh and if you're not following me on Pinterest, you are a meathead totally missing out.) 😉


Such a great idea! I love how a tray can elegantly contain small items! Thanks so much for taking the time to link up with us over at the #HomeMattersParty - we hope to see you again this Friday! Feel free to bring a friend 🙂
What a great idea! Dollar store crafts are the best!
Thank you for sharing this at Brag About It Link Party on VMG206.
~ Megin of VMG206
Love the frame and the tray! It turned out really pretty. I've been wanting to make one for my counter to put coffee fixin's on. Just haven't gotten around to it. Haven't thought of using a placemat. Thanks for sharing!
You're welcome! I love to save money, and I love nice things. That's why I shared this. It's nice to have something pretty that you made!
That is such a cute project to make. I'll have to wait a few more years if I don't want it accidentally broken by exuberant boys, though.
True, true! Might want to wait on that!
Really cute idea and it came out great! I wonder fir there's a way to make sides though like a tray...I may need to play with this!
Yes! You absolutely can! A lot of people do it that way. I've seen it done by either gluing or screwing in the handles. It's pretty cool. I may still add some on to mine if I can find some that I like.
I love the way your tray turned out it is really nice. I love shopping at the dollar store because it makes things so much more affordable.
Oh my goodness who would have thought something so chic looking would be both so inexpensive and easy?! I love it.
Thanks! 😉 Not too bad, huh!
OMG you are a total genuis. I love this idea and it is so pretty
Tee hee! Thanks chicky! I am thrilled with out it came out!
I love seeing Dollar store crafts like this. What a great idea!
Thanks Nicole!
I love it!!! It looks so awesome! Super happy to not be a meat head, too! 😉
Thanks! Tee hee! Yes, you are a lucky non-meathead 😉
Well, I am not a meat head. lol. I love that this only cost four dollars. I need to make one for my family room!
Nope, you are very far from being a meathead 😉
I love this idea. What a great way to dress up a room!
Thanks! I'm really excited about it.. I just need to decide what I am going to display on it. I keep rearranging and can't pick the idea that I like best Hmm!